Attaching a leader to your fly line is a fundamental skill for any angler, and at flyermedia.net, we understand the importance of a strong, reliable connection. This article explores the three most common methods—the Nail Knot, Loop To Loop, and Albright Knot—providing a detailed analysis of each to help you choose the best option for your fishing style and conditions. Learn how to create secure connections that will enhance your fly fishing success with flyermedia.net.
1. What Is The Nail Knot And When Should You Use It?
The Nail Knot is a traditional method for attaching a leader to a fly line that uses friction to hold the leader securely. While it has been a staple for many years, its primary advantage lies in its slim profile, which allows it to pass smoothly through rod guides.
1.1. How To Tie The Nail Knot:
- Align: Lay the leader parallel to the fly line, overlapping by about 6-8 inches.
- Create a Loop: Form a loop with the leader around both the fly line and itself.
- Wrap: Wrap the tag end of the leader around both the fly line and the standing part of the leader within the loop, making 6-8 tight wraps.
- Thread: Thread the tag end of the leader through the loop you initially created.
- Tighten: Hold the fly line and pull the standing part of the leader to tighten the knot. Trim the excess tag ends.
1.2. Advantages Of The Nail Knot:
- Streamlined Profile: The Nail Knot is known for its slim profile, making it easy to pass through rod guides, which is particularly beneficial for Euro-nymphing techniques.
- Simplicity: The knot is relatively simple to tie, especially with the aid of a tool like a nail, small tube, or hemostats.
1.3. Disadvantages Of The Nail Knot:
- Weaker Connection: The Nail Knot is generally considered the weakest of the three methods. It relies on friction and can sometimes strip the coating off the fly line.
- Not Ideal for Heavy Use: While suitable for general trout fishing, the Nail Knot is not recommended for streamer fishing or saltwater applications where greater strength is required.
1.4. Expert Tip:
For added security, consider coating the Nail Knot with UV resin to further streamline it and enhance its durability.
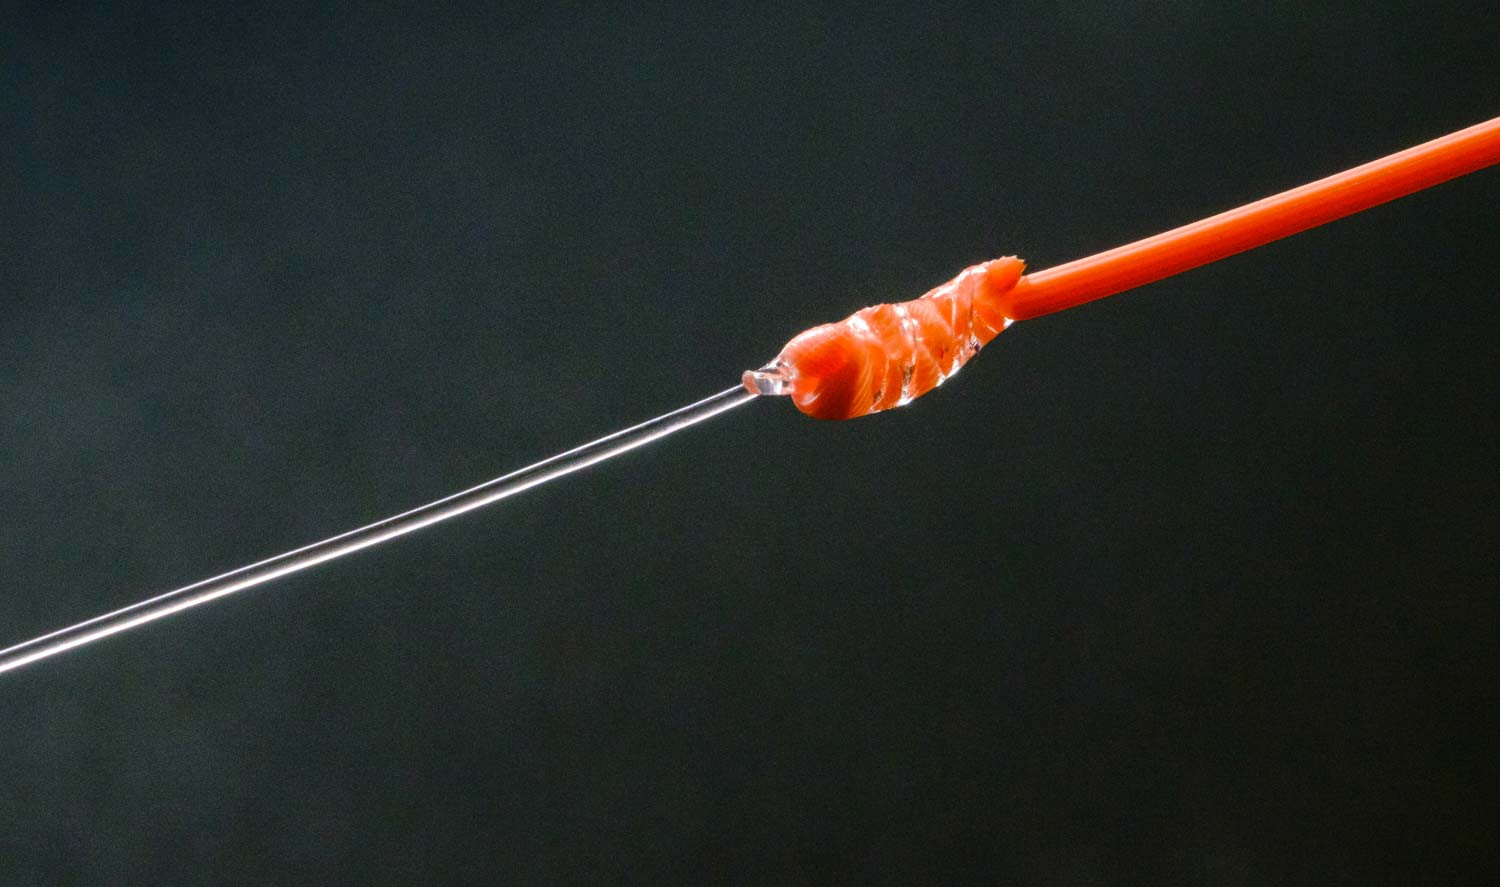 Nail Knot
2. Loop To Loop Connection: A Versatile Option
The Loop To Loop connection is a popular and versatile method that involves attaching a leader with a loop to a loop on the fly line. Many modern fly lines come with pre-welded loops, but some anglers prefer to create their own for added strength, especially in saltwater environments.
2.1. How To Create A Loop To Loop Connection:
- Inspect Loops: Ensure both loops (one on the fly line and one on the leader) are in good condition. For homemade loops, whip them securely for added strength.
- Pass Loop: Pass the loop on the leader through the loop on the fly line.
- Thread Leader: Thread the entire leader through the loop created by the fly line loop.
- Tighten: Pull the leader to tighten the connection, ensuring the loops seat snugly against each other.
2.2. Advantages Of The Loop To Loop Connection:
- Strength: When properly executed, the Loop To Loop connection is very strong, making it suitable for a variety of fishing conditions.
- Easy Leader Changes: This method allows for quick and easy leader changes, which is ideal for anglers who frequently switch between different leader types or lengths based on fishing conditions.
- Versatility: Suitable for various loop knots on the leader, allowing anglers to choose their preferred knot for loop construction.
2.3. Disadvantages Of The Loop To Loop Connection:
- Bulkier Profile: The Loop To Loop connection has a slightly bulkier profile than the Nail Knot, which may cause it to catch on rod guides, though this is generally minimal.
- Potential Hinge Point (Myth): Some anglers believe this connection creates a hinge point, but this is often due to using a leader with too fine a butt section rather than the connection itself.
2.4. Loop Knot Options:
- Perfection Loop: A strong and reliable knot that creates a neat, consistent loop.
- Surgeon’s Loop: Simple to tie and provides good strength.
- Figure Eight Loop: Another strong option that is relatively easy to tie.
2.5. Strengthening Welded Loops:
For saltwater fishing or when targeting larger species, consider reinforcing welded loops by whipping them with strong thread or floss and coating them with UV resin for added durability.
3. The Albright Knot: A Slim And Strong Alternative
The Albright Knot is a versatile knot that offers a slim profile similar to the Nail Knot but with greater strength, approaching that of the Loop To Loop connection. It is particularly useful for attaching lines of significantly different diameters or materials.
3.1. How To Tie The Albright Knot:
- Align Lines: Lay the leader parallel to the fly line, overlapping by about 8-10 inches.
- Form Loop: Form a loop with the leader.
- Wrap: Pass the tag end of the fly line through the loop and make tight, even wraps around both the leader and the fly line, working back towards the loop. Make 10-12 wraps for optimal strength.
- Thread Back: Thread the tag end of the fly line back through the loop in the same direction it entered.
- Tighten: Moisten the knot and slowly tighten it by pulling on both the standing part and the tag end of the fly line, as well as the standing part of the leader. Trim the excess tag ends.
3.2. Advantages Of The Albright Knot:
- Slim Profile: The Albright Knot maintains a relatively slim profile, allowing it to pass through rod guides with minimal friction.
- High Strength: When tied correctly, the Albright Knot provides a very strong connection, suitable for various fishing conditions and species.
- Versatile Application: In addition to attaching leaders to fly lines, the Albright Knot is effective for connecting lines of different materials and sizes, making it a valuable knot for various rigging needs.
3.3. Disadvantages Of The Albright Knot:
- Difficulty in Tying: The Albright Knot can be slightly challenging to tie correctly, and a poorly tied knot will likely fail under pressure.
- Less Convenient for Leader Changes: Changing leaders requires retying the knot, which can be time-consuming compared to the Loop To Loop connection.
- Consumes Fly Line: Each time the Albright Knot is tied, it uses up a small section of the fly line, which can eventually shorten the line over multiple reties.
3.4. Alternative Solution:
To mitigate the inconvenience of retying the Albright Knot for leader changes, consider using it to attach a short piece of heavy leader material to the fly line and then creating a Loop To Loop connection for the leader.
4. Comparative Analysis: Nail Knot Vs. Loop To Loop Vs. Albright Knot
| Feature | Nail Knot | Loop To Loop | Albright Knot |
|---|---|---|---|
| Strength | Weakest | Strong | Strong |
| Profile | Slimmest | Bulkier | Slim |
| Ease of Tying | Easy | Moderate | Challenging |
| Leader Changes | Requires retying | Quick and easy | Requires retying |
| Best Use | Light trout fishing | Versatile, all-around use | Heavy use, varying line diameters |
| Guide Passage | Best | Moderate | Good |
| Material Use | Minimal | Moderate | Moderate |
5. How To Choose The Right Knot For Your Fly Fishing Needs
Choosing the right knot depends on your specific fishing needs, including the type of fish you’re targeting, the fishing environment, and your personal preferences. Consider the following factors when making your decision:
5.1. Fishing Conditions:
- Trout Fishing: For general trout fishing, any of the three knots can be effective. The Nail Knot is suitable for its slim profile, while the Loop To Loop offers convenience for quick leader changes. The Albright Knot provides added strength for larger trout or heavier flies.
- Streamer Fishing: For streamer fishing, which often involves aggressive casts and larger fish, the Loop To Loop or Albright Knot are preferred for their superior strength.
- Saltwater Fishing: In saltwater environments, where larger, more powerful fish are common, the Albright Knot is often the best choice due to its strength and reliability. Reinforcing the Loop To Loop connection can also make it suitable for saltwater use.
5.2. Leader Material:
The type of leader material you use can also influence your knot choice. For example, if you are using a very fine leader material, a knot with a slim profile like the Nail Knot may be advantageous.
5.3. Personal Preference:
Ultimately, the best knot is the one you are most comfortable tying and confident in. Practice tying each knot until you can consistently create a strong, reliable connection.
6. Step-By-Step Instructions: Tying Each Knot
To help you master each knot, here are detailed step-by-step instructions along with illustrative images.
6.1. Tying The Nail Knot:
- Materials: Fly line, leader, nail or knot-tying tool.
- Align: Place the leader parallel to the fly line, overlapping by about 6-8 inches.
- Loop: Place the nail or knot-tying tool alongside the overlapping lines and form a loop around both the fly line and the tool.
- Wrap: Wrap the tag end of the leader around both the fly line and itself within the loop. Make 6-8 tight wraps.
- Thread: Thread the tag end of the leader through the loop you initially created.
- Remove Tool: Remove the nail or knot-tying tool.
- Tighten: Hold the fly line and pull the standing part of the leader to tighten the knot.
- Trim: Trim the excess tag ends.
6.2. Creating A Loop To Loop Connection:
- Inspect Loops: Ensure both loops (one on the fly line and one on the leader) are in good condition. For homemade loops, whip them securely for added strength.
- Pass Loop: Pass the loop on the leader through the loop on the fly line.
- Thread Leader: Thread the entire leader through the loop created by the fly line loop.
- Tighten: Pull the leader to tighten the connection, ensuring the loops seat snugly against each other.
6.3. Tying The Albright Knot:
- Materials: Fly line, leader.
- Align: Lay the leader parallel to the fly line, overlapping by about 8-10 inches.
- Form Loop: Form a loop with the leader.
- Wrap: Pass the tag end of the fly line through the loop and make tight, even wraps around both the leader and the fly line, working back towards the loop. Make 10-12 wraps for optimal strength.
- Thread Back: Thread the tag end of the fly line back through the loop in the same direction it entered.
- Tighten: Moisten the knot and slowly tighten it by pulling on both the standing part and the tag end of the fly line, as well as the standing part of the leader.
- Trim: Trim the excess tag ends.
7. Tips For Strong And Reliable Connections
- Moisten Knots: Always moisten your knots before tightening them. This reduces friction and prevents the line from weakening.
- Tighten Slowly: Tighten knots slowly and evenly to ensure they seat properly.
- Inspect Connections: Regularly inspect your connections for signs of wear or damage. Retie the knot if necessary.
- Use Quality Materials: Use high-quality fly line and leader material to ensure the strongest possible connection.
- Practice Regularly: Practice tying each knot regularly to maintain your skills and ensure you can tie them correctly in any situation.
8. Advanced Techniques: Enhancing Knot Strength
For anglers looking to further enhance the strength and reliability of their connections, consider these advanced techniques:
8.1. Using UV Resin:
Applying a thin coat of UV resin to knots like the Nail Knot or Albright Knot can provide added protection and streamline the connection, reducing friction and preventing the knot from unraveling.
8.2. Whipping Loops:
For Loop To Loop connections, whipping the loops with strong thread or floss can significantly increase their strength and durability, especially in saltwater environments.
8.3. Double-Checking Knots:
Before casting, always double-check your knots to ensure they are properly tightened and seated. This simple step can prevent costly break-offs and lost fish.
9. Common Mistakes To Avoid When Tying Knots
- Over-Tightening: Over-tightening knots can damage the line and weaken the connection.
- Not Moistening: Failing to moisten the knot before tightening it can cause friction and weaken the line.
- Poor Wraps: Uneven or loose wraps can compromise the strength of the knot.
- Using Damaged Line: Using fly line or leader material that is damaged or worn can lead to knot failure.
- Rushing: Rushing the knot-tying process can result in mistakes and a weaker connection.
10. Real-World Scenarios: Knot Selection In Action
To illustrate the practical application of each knot, here are some real-world scenarios:
-
Scenario 1: High-Sticking Nymphing For Trout:
- Knot Choice: Nail Knot or Loop To Loop.
- Rationale: The Nail Knot’s slim profile minimizes friction when high-sticking, while the Loop To Loop allows for quick leader changes when adjusting to different nymph sizes or water conditions.
-
Scenario 2: Streamer Fishing For Bass:
- Knot Choice: Albright Knot or reinforced Loop To Loop.
- Rationale: Both knots provide the strength needed to handle the aggressive strikes and powerful runs of bass, with the Albright Knot offering a slightly slimmer profile.
-
Scenario 3: Saltwater Fly Fishing For Tarpon:
- Knot Choice: Albright Knot.
- Rationale: The Albright Knot is renowned for its exceptional strength and reliability, making it the ideal choice for targeting large, hard-fighting species like tarpon.
11. The Importance of Knot Strength And Reliability
A strong and reliable knot is essential for successful fly fishing. A weak or poorly tied knot can fail at a critical moment, resulting in lost fish and frustration. By mastering the three most common methods for attaching a leader to a fly line and understanding their respective strengths and weaknesses, you can ensure a secure connection that will hold up under pressure.
12. Expert Opinions And Research
According to a study by the American Fly Fishing Trade Association (AFFTA), knot failure is a leading cause of lost fish among fly anglers. The study emphasized the importance of using properly tied and well-maintained knots to maximize success on the water.
Additionally, research from leading fly fishing publications like Fly Fisherman Magazine and Field & Stream consistently recommends the Albright Knot for saltwater applications due to its superior strength and reliability.
13. Conclusion: Mastering The Art Of Knot Tying
In conclusion, mastering the art of tying reliable knots is a cornerstone of successful fly fishing. Whether you prefer the slim profile of the Nail Knot, the convenience of the Loop To Loop connection, or the strength of the Albright Knot, understanding the nuances of each method will empower you to make informed decisions and confidently tackle any fishing situation. Remember to practice regularly, use quality materials, and always double-check your connections to ensure a secure and enjoyable fishing experience.
At flyermedia.net, we are dedicated to providing you with the knowledge and resources you need to excel in the world of fly fishing. Visit our website for more tips, tutorials, and expert advice to help you hone your skills and make the most of your time on the water.
Ready to elevate your fly fishing game? Explore flyermedia.net today for more expert tips, gear reviews, and in-depth guides. Discover how to select the perfect fly line, master essential casting techniques, and unlock the secrets to landing trophy-worthy fish. Your next great adventure starts here!
14. Frequently Asked Questions (FAQ)
14.1. What Is The Strongest Knot For Attaching A Leader To A Fly Line?
The Albright Knot is generally considered the strongest knot for attaching a leader to a fly line, especially when tied correctly.
14.2. Is The Nail Knot Still A Good Option For Attaching A Leader?
The Nail Knot is a decent option for light trout fishing where a slim profile is desired, but it’s not recommended for heavier use due to its lower strength.
14.3. How Often Should I Change My Leader?
You should change your leader whenever it shows signs of wear, such as abrasions or knots, or after landing a large fish. It’s also a good idea to change your leader periodically, even if it looks fine.
14.4. Can I Use The Same Knot For All Types Of Fly Fishing?
While some knots are more versatile than others, it’s best to choose a knot that is appropriate for the specific type of fly fishing you are doing, considering factors like line weight, target species, and fishing conditions.
14.5. What Is The Best Way To Learn How To Tie Knots?
The best way to learn how to tie knots is to practice regularly using clear, step-by-step instructions and illustrations. There are also many helpful videos and tutorials available online.
14.6. How Do I Prevent Knots From Slipping?
To prevent knots from slipping, make sure to tighten them properly and evenly, and always moisten the knot before tightening it.
14.7. What Tools Do I Need For Tying Knots?
While you can tie most knots with just your hands, a knot-tying tool can be helpful for tying smaller or more complex knots. Hemostats are also useful for gripping and manipulating the line.
14.8. Is It Necessary To Use A Knot-Tying Tool?
No, it’s not necessary to use a knot-tying tool, but it can make the process easier and more efficient, especially for anglers with limited dexterity or those who tie knots frequently.
14.9. What Are Some Common Signs Of Knot Failure?
Common signs of knot failure include slippage, unraveling, and breakage at the knot. If you notice any of these signs, retie the knot immediately.
14.10. How Can I Improve My Knot-Tying Skills?
To improve your knot-tying skills, practice regularly, use quality materials, and seek feedback from experienced anglers.
15. Connect With Flyermedia.net
Stay updated with the latest in fly fishing and aviation by connecting with flyermedia.net. Whether you’re looking for tips on tying the perfect knot or exploring career opportunities in aviation, we’ve got you covered.
- Address: 600 S Clyde Morris Blvd, Daytona Beach, FL 32114, United States
- Phone: +1 (386) 226-6000
- Website: flyermedia.net
Visit flyermedia.net today to discover more about aviation and fly fishing, and take the first step towards achieving your dreams in the sky or on the water.