Want to learn how to make a paper airplane that soars through the air? With a few simple folds and the right technique, you can craft a paper airplane that flies far and impresses your friends. This guide provides step-by-step instructions and helpful tips to achieve maximum flight distance. Let’s get started!
 how to make a paper airplane that flies far
Gather Your Supplies
Before you begin, you’ll need just two things:
- Paper: A standard 8.5×11 inch sheet of paper (70-90 GSM) works best. Thicker paper provides more stability but might be harder to fold.
- Ruler (optional): A ruler or any straight edge helps create crisp folds for better aerodynamics.
Step-by-Step Folding Instructions
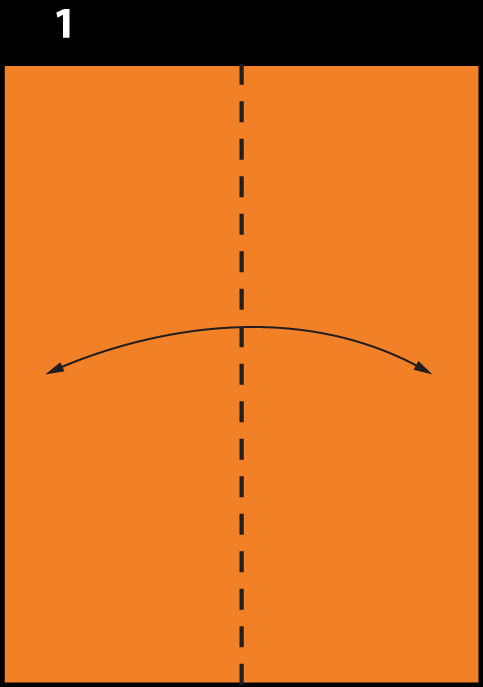
Step 1: The Initial Fold
- Lay your paper flat in portrait orientation.
- Fold the paper in half lengthwise, bringing the left edge to the right edge.
- Crease firmly and unfold. This creates a center line that you’ll use as a guide.
 how to make a paper airplane that flies far
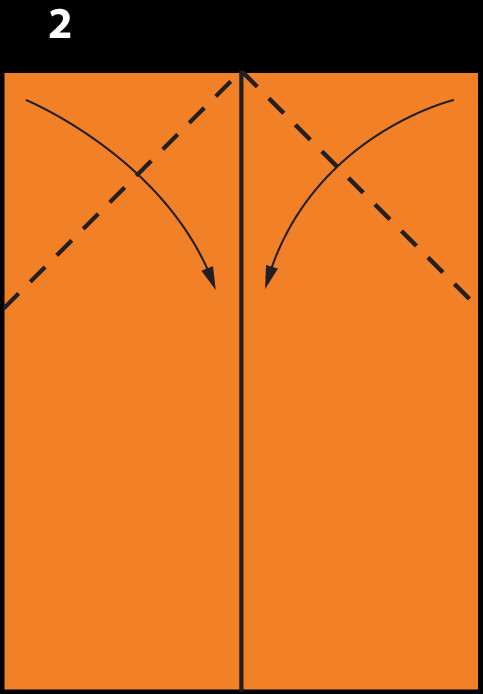
Step 2: Forming the Nose
- Fold the top left corner of the paper down to the center crease, ensuring the edge aligns with the center line.
- Repeat this fold with the top right corner, mirroring the left side.
 how to make a paper airplane that flies far and straight
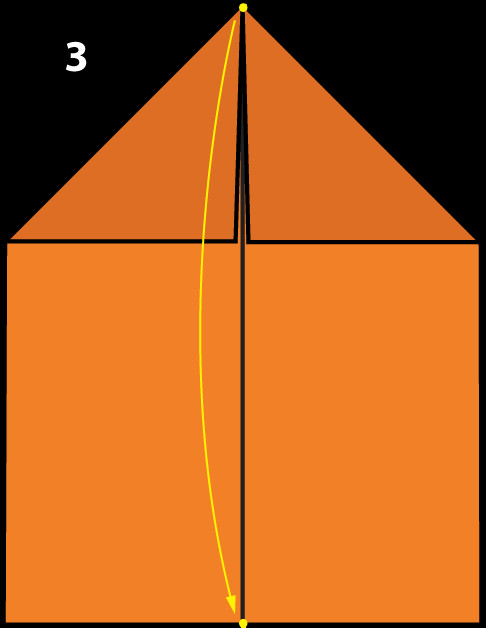
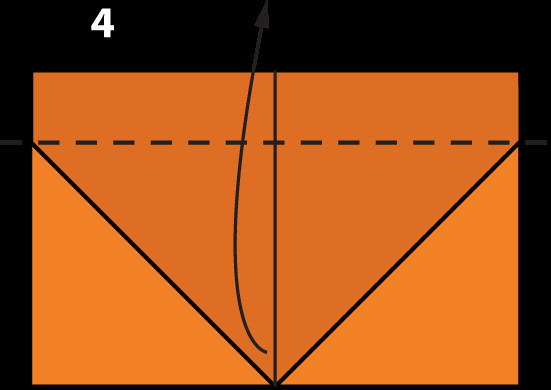
Step 3: Refining the Nose Fold
- Fold the top point of the newly formed triangle down to the bottom edge of the paper, aligning it with the center crease.
 how to make paper planes that fly far and fast
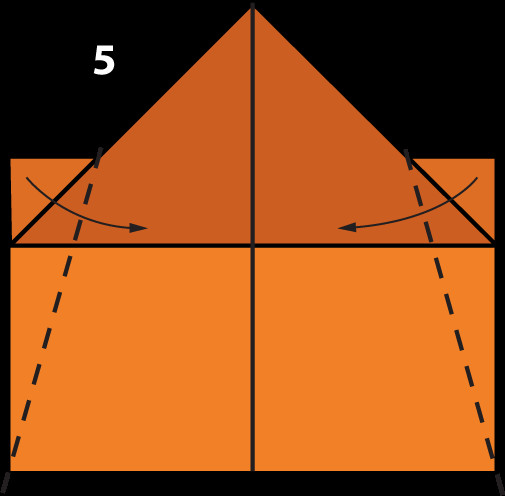
Step 4: Creating the Fuselage
- Fold the top edge of the paper (the base of the triangle) up to meet the top point of the triangle. Crease firmly.
 how to make a paper airplane that goes far
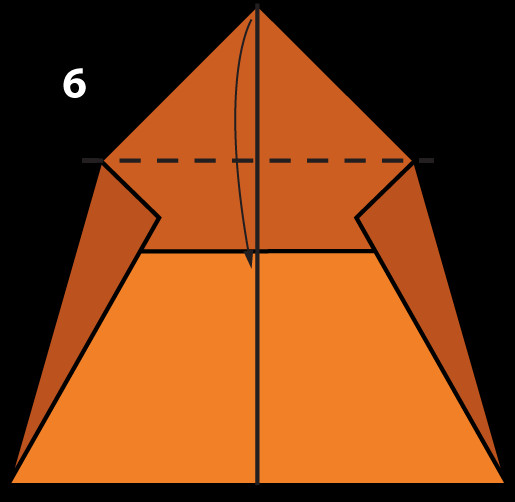
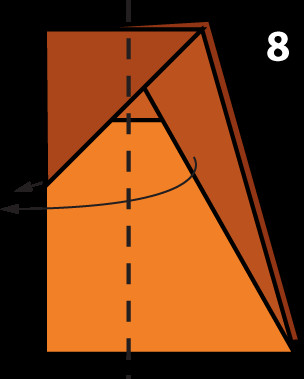
Step 5: Forming the Wings
- Fold the right side of the paper down along a line that runs from the top corner of the fuselage to a point about one inch from the bottom corner of the paper on the same side.
- Repeat this fold on the left side, mirroring the right wing.
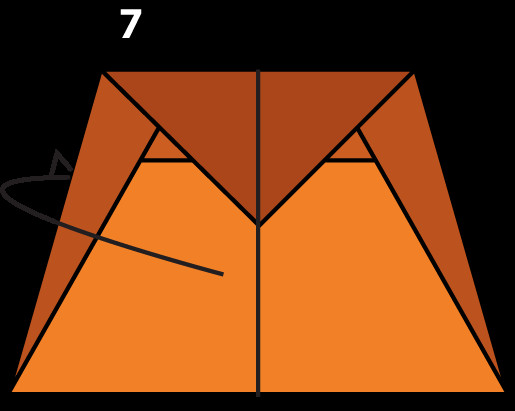
Step 6: Securing the Wings
- Fold the nose of the plane down, following the angled edge created in the previous step. This fold locks the wings in place.
Step 7: Folding the Plane in Half
- Fold the entire plane in half along the original center crease, with the wings on the outside.
Step 8: Creating Wing Flaps
- On each wing, fold down a flap about one inch wide along the edge that is furthest from the body of the plane. These flaps will help with stability and lift.
Launching Your Paper Airplane for Maximum Distance
- Grip: Hold the plane just behind the center crease, where the wings meet the fuselage.
- Angle: Aim for a launch angle of approximately 30-45 degrees.
- Throw: Use a smooth, firm overhand motion to launch the plane. Avoid throwing too hard or too softly. Experiment with different throwing techniques to find what works best for you.
Fine-Tuning Your Flight
If your plane doesn’t fly straight or doesn’t glide as far as you’d like, try these adjustments:
- Tail Adjustments: Slightly bend the tail flaps up or down to adjust the plane’s pitch. Bending them up will cause the plane to climb, while bending them down will cause it to dive.
- Wing Adjustments: Make small adjustments to the angle of the wings to fine-tune the flight path.
By following these instructions and experimenting with different adjustments, you’ll be well on your way to creating a paper airplane that can fly far and stay aloft for an impressive amount of time. Have fun!