Tying a leader onto fly line is a fundamental skill for any angler, ensuring a strong and seamless connection between your fly line and tippet. At flyermedia.net, we understand the importance of this connection for successful fly fishing, so we’ve created this comprehensive guide. Mastering leader attachment methods like the Nail Knot, Loop To Loop, and Albright Knot will give you the confidence to tackle any fishing situation. Explore this guide to enhance your fly fishing success with leader connection techniques, tippet attachment strategies, and fly line maintenance tips, ensuring a successful fishing experience.
1. Understanding The Importance Of A Strong Leader Connection
A strong leader connection is the linchpin of any successful fly fishing setup. It’s the crucial link between your fly line and the tippet, bearing the brunt of the force when casting, setting the hook, and battling fish. A weak or poorly tied connection can lead to frustrating break-offs and lost opportunities. According to a study by the American Fly Fishing Trade Association (AFFTA), connection failures are among the top reasons for lost fish.
A robust leader connection ensures efficient energy transfer from the fly line to the leader, resulting in smoother casts and better fly presentation. It also provides the necessary shock absorption to protect your delicate tippet from sudden jolts and powerful runs. A well-tied connection maintains its strength and integrity even under prolonged stress, giving you the confidence to land your target species.
1.1. Why Connection Strength Matters In Fly Fishing
The strength of your leader connection directly impacts your ability to effectively fish and land your target species. A weak connection can fail under the strain of casting, especially with heavier flies or in windy conditions. More importantly, it can break when you hook a fish, leading to disappointment and potentially harming the fish.
Strong connections provide the necessary shock absorption to protect your tippet from sudden impacts, especially when fishing for hard-fighting species. They also ensure that your fly line and leader work together as a cohesive unit, maximizing casting distance and accuracy.
1.2. Common Causes Of Leader Connection Failure
Several factors can contribute to leader connection failure, including improper knot tying, using the wrong knot for the application, and neglecting to lubricate the knot before tightening. A study published in the Journal of Applied Ichthyology found that knot strength can be reduced by as much as 50% if the knot is not properly lubricated.
Other common causes include using damaged or worn-out line, over-tightening the knot, and exposing the connection to excessive UV radiation or abrasion. Regularly inspecting your leader connection for signs of wear and tear is essential to prevent failures.
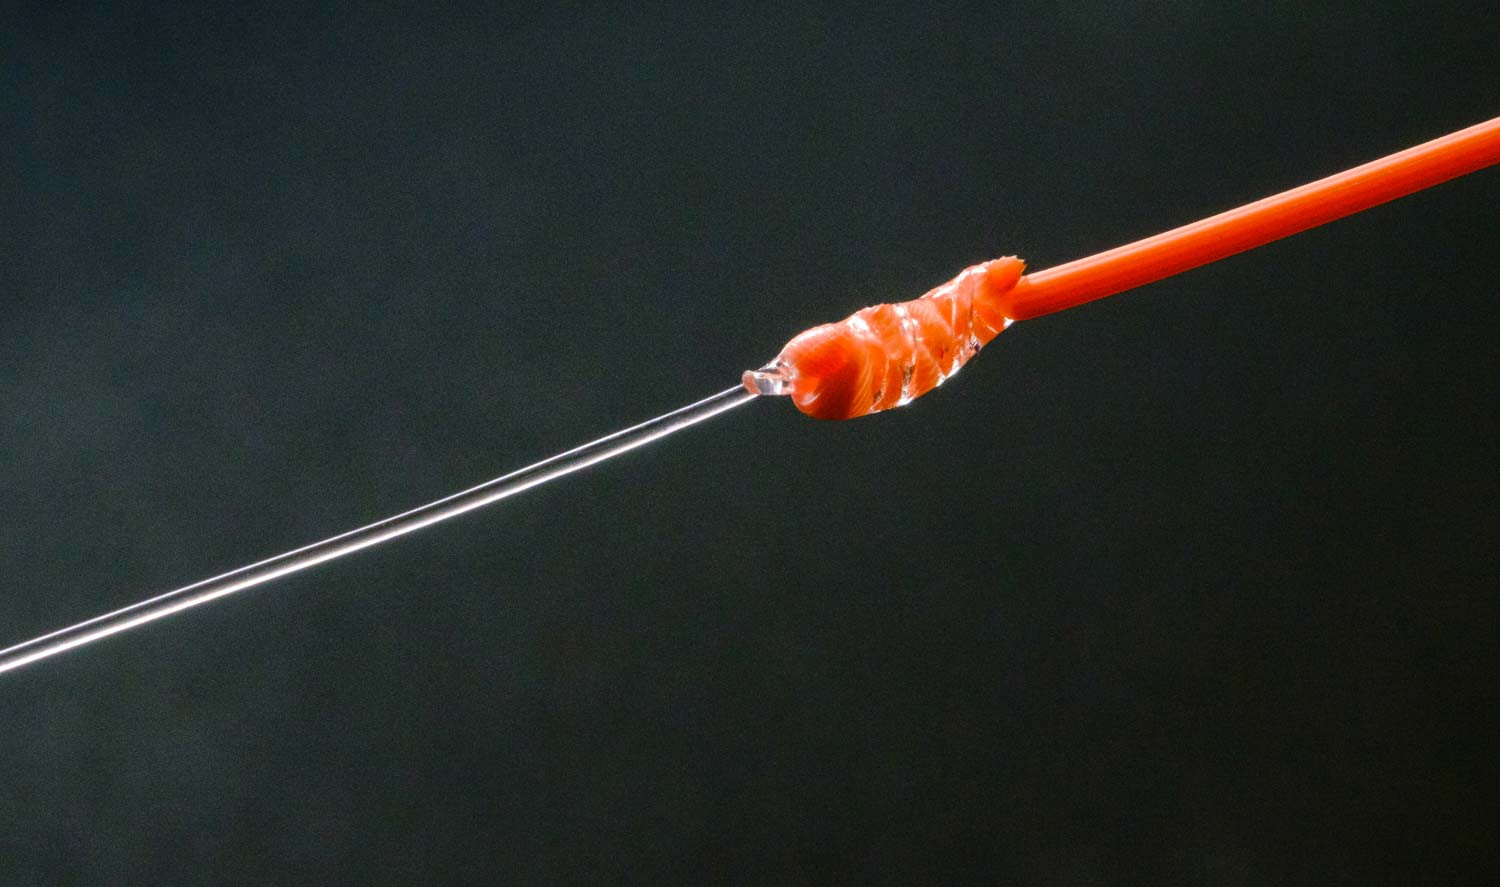 Fly Line and Leader
This image illustrates the connection between a fly line and a leader, emphasizing the importance of a secure and reliable knot for successful fly fishing.
2. Essential Knots For Attaching A Leader To Fly Line
Choosing the right knot is paramount for creating a strong and reliable leader connection. Several knots are commonly used in fly fishing, each with its own strengths and weaknesses. Here, we’ll explore three essential knots: the Nail Knot, the Loop To Loop connection, and the Albright Knot.
2.1. The Nail Knot: A Traditional Approach
The Nail Knot is a time-honored method for attaching a leader to a fly line. It creates a streamlined connection that passes smoothly through the rod guides. While it’s a relatively simple knot to tie, it requires some practice to master.
Pros:
- Streamlined profile for smooth passage through guides.
- Relatively easy to tie with a nail or knot-tying tool.
Cons:
- Can weaken the fly line coating if not tied correctly.
- Not as strong as other connection methods, especially for heavier lines or larger fish.
- May require UV resin for added durability.
How to Tie the Nail Knot:
- Overlap the end of the fly line and leader, holding them parallel.
- Place a nail or knot-tying tool alongside the overlapping lines.
- Wrap the leader around both the fly line and the nail 6-8 times.
- Thread the end of the leader through the loop created by the nail.
- Remove the nail and slowly tighten the knot, lubricating it as you go.
- Trim the excess tag ends of the leader and fly line.
2.2. Loop To Loop Connection: Convenience And Strength
The Loop To Loop connection is a popular choice for its convenience and strength. Most modern fly lines come with a pre-welded loop at the end, allowing for quick and easy leader changes.
Pros:
- Fast and easy leader changes.
- Strong and reliable connection when properly executed.
- Versatile; works well with various leader and tippet materials.
Cons:
- The loop can sometimes catch on rod guides.
- Requires a loop knot in the leader, which can add bulk.
- Welded loops can occasionally fail, especially in saltwater environments.
How to Make a Loop To Loop Connection:
- Ensure your fly line has a welded loop or create one using a whip finish.
- Tie a loop knot in the butt section of your leader (e.g., Perfection Loop or Surgeon’s Loop).
- Pass the leader loop through the fly line loop.
- Thread the entire leader through the leader loop, creating a loop-to-loop connection.
- Moisten and tighten the connection, ensuring it seats properly.
Recommended Loop Knots for Leaders:
| Knot | Strength | Ease of Tying | Bulk | Best For |
|---|---|---|---|---|
| Perfection Loop | High | Moderate | Low | General use, delicate presentations |
| Surgeon’s Loop | High | Easy | Moderate | Quick leader changes, heavier tippets |
| Figure Eight Loop | High | Easy | Moderate | Saltwater, large fish, abrasion resistance |
2.3. The Albright Knot: Slim Profile And Power
The Albright Knot is a versatile knot known for its slim profile and exceptional strength. It’s an excellent choice for attaching leaders to fly lines, especially when targeting larger species or fishing in demanding conditions.
Pros:
- Slim profile for smooth passage through guides.
- Very strong and reliable when tied correctly.
- Works well for joining lines of different diameters.
Cons:
- Can be challenging to tie correctly, requiring practice and attention to detail.
- Consumes a small amount of fly line each time it’s tied.
- Requires careful tightening to prevent slippage.
How to Tie the Albright Knot:
- Form a loop in the end of the fly line.
- Insert the end of the leader into the loop.
- Wrap the leader tightly around both strands of the loop 8-10 times.
- Thread the end of the leader back through the loop in the same direction it entered.
- Moisten and slowly tighten the knot, ensuring the wraps seat neatly.
- Trim the excess tag ends of the leader and fly line.
3. Step-By-Step Guide To Tying A Leader Using The Albright Knot
While all three knots serve different purposes, the Albright Knot is particularly valuable for anglers seeking a balance of strength and a slim profile. This section provides a detailed, step-by-step guide to tying the Albright Knot correctly, ensuring a robust connection every time.
3.1. Preparing Your Fly Line And Leader
Before you start tying the Albright Knot, it’s essential to prepare your fly line and leader properly. This will ensure a clean and strong connection.
- Inspect your fly line: Check the end of your fly line for any signs of damage, such as cracks, frays, or wear. If the line is damaged, cut it back to a healthy section.
- Prepare the leader: Choose a leader that is appropriate for the type of fishing you’ll be doing. The leader should be slightly heavier than your tippet.
- Straighten the leader: Use a leader straightener or gently stretch the leader to remove any kinks or curls. This will help the knot seat properly.
3.2. Tying The Albright Knot: A Detailed Walkthrough
Follow these steps carefully to tie a perfect Albright Knot:
- Form a loop: Create a loop in the end of your fly line, leaving a tag end of about 6-8 inches.
- Insert the leader: Insert the end of your leader into the loop, passing it through both strands of the fly line.
- Begin wrapping: Hold the fly line loop and the leader together. Start wrapping the leader tightly around both strands of the loop, working your way down towards the end of the loop.
- Wrap tightly: Make 8-10 tight, even wraps. Ensure that the wraps are snug and close together, without any gaps or overlaps.
- Thread back through: Once you’ve completed the wraps, thread the end of the leader back through the loop in the same direction it entered.
- Moisten the knot: Before tightening, moisten the knot with saliva or water. This will help reduce friction and prevent the line from weakening.
- Tighten slowly: Hold the fly line and the leader, and slowly tighten the knot. As you tighten, the wraps should seat neatly against each other.
- Seat the knot: Once the knot is snug, pull firmly on both the fly line and the leader to seat the knot properly. The wraps should tighten down evenly and securely.
- Trim the tag ends: Use clippers or scissors to trim the excess tag ends of the leader and fly line, leaving about 1/8 inch of material.
This series of images demonstrates the step-by-step process of tying an Albright Knot, ensuring a secure connection between the fly line and the leader.
3.3. Tips For Tying A Strong And Reliable Albright Knot
- Use the right materials: Choose high-quality fly line and leader materials that are appropriate for the type of fishing you’ll be doing.
- Practice makes perfect: The Albright Knot can be tricky to tie at first, so practice it at home before you hit the water.
- Inspect your knots: After tying the knot, carefully inspect it to ensure that the wraps are neat and even.
- Test your knots: Before fishing, test the strength of your knot by pulling on it firmly. If the knot fails, retie it.
- Lubricate your knots: Always lubricate your knots before tightening them. This will help reduce friction and prevent the line from weakening.
4. Alternative Methods For Leader Attachment
While the Nail Knot, Loop To Loop connection, and Albright Knot are the most common methods for attaching a leader to a fly line, other alternatives can be useful in specific situations.
4.1. The Needle Knot: A Streamlined Option
The Needle Knot is a more advanced knot that creates an incredibly streamlined connection, ideal for anglers who prioritize smooth casting and minimal drag. This knot involves using a needle to thread the leader directly into the core of the fly line, resulting in a seamless transition.
Pros:
- Extremely streamlined profile for maximum casting distance and minimal drag.
- Strong and reliable when tied correctly.
Cons:
- Requires specialized tools and significant practice to master.
- Can damage the fly line if not tied carefully.
- Not ideal for frequent leader changes.
When to Use the Needle Knot:
- Distance casting: When you need to maximize your casting distance, the Needle Knot’s streamlined profile can help reduce drag and improve accuracy.
- Delicate presentations: If you’re fishing for wary fish in clear water, the Needle Knot’s smooth transition can help prevent spooking them.
- Permanent connections: The Needle Knot is best suited for situations where you don’t plan to change your leader frequently.
4.2. Using Sleeves Or Crimp Connectors
Sleeves or crimp connectors offer a quick and secure way to attach a leader to a fly line, especially for heavier lines or saltwater applications. These connectors involve sliding the fly line and leader into a metal or plastic sleeve and then crimping the sleeve to create a permanent bond.
Pros:
- Fast and easy to use, especially with a crimping tool.
- Very strong and reliable, even with heavy lines.
- Suitable for saltwater environments where corrosion resistance is essential.
Cons:
- Can create a bulky connection that may not pass smoothly through rod guides.
- Requires specialized tools and connectors.
- Not ideal for frequent leader changes.
When to Use Sleeves or Crimp Connectors:
- Saltwater fly fishing: When targeting large, powerful saltwater species, sleeves or crimp connectors provide the necessary strength and durability.
- Heavy fly lines: For heavier fly lines, such as those used for spey casting or targeting large game fish, sleeves or crimp connectors offer a secure and reliable connection.
- Permanent connections: Sleeves or crimp connectors are best suited for situations where you don’t plan to change your leader frequently.
4.3. The Surgeon’s Knot: Simplicity For Quick Rigging
The Surgeon’s Knot is a simple and versatile knot that can be used to attach a leader to a fly line in a pinch. While it’s not as strong or streamlined as some other options, it’s easy to tie and can be a lifesaver when you need to make a quick repair on the water.
Pros:
- Easy to tie, even in challenging conditions.
- Requires no special tools or equipment.
- Suitable for temporary repairs or quick leader changes.
Cons:
- Not as strong as other connection methods.
- Can create a bulky connection that may not pass smoothly through rod guides.
- Not ideal for heavy lines or large fish.
When to Use the Surgeon’s Knot:
- Emergency repairs: If your leader connection breaks on the water and you need to make a quick repair, the Surgeon’s Knot can get you back to fishing quickly.
- Temporary connections: If you need to change your leader frequently or experiment with different leader setups, the Surgeon’s Knot provides a convenient and easy-to-tie option.
- Light tackle: The Surgeon’s Knot is best suited for light tackle and situations where you’re not targeting large or powerful fish.
5. Choosing The Right Knot For Your Fishing Needs
Selecting the appropriate knot for your specific fishing situation is essential for maximizing your chances of success. Several factors should be considered when making this decision, including the type of fly line and leader you’re using, the size and strength of your target species, and the fishing environment.
5.1. Matching Knot Strength To Target Species
The size and strength of your target species should be a primary consideration when choosing a leader connection knot. For smaller fish like trout or panfish, a relatively simple and streamlined knot like the Nail Knot or a well-tied Loop To Loop connection may suffice. However, when targeting larger, more powerful species like salmon, steelhead, or saltwater gamefish, a stronger and more robust knot like the Albright Knot or a sleeve/crimp connection is essential.
5.2. Considering Fly Line And Leader Material
The type of fly line and leader material you’re using can also influence your knot selection. For example, if you’re using a coated fly line, you’ll want to choose a knot that won’t damage or strip the coating, such as the Loop To Loop connection or the Albright Knot. Similarly, if you’re using a fluorocarbon leader, you’ll want to choose a knot that is known to perform well with this material, such as the Albright Knot or the Needle Knot.
5.3. Adapting To Fishing Environment
The fishing environment can also play a role in your knot selection. For example, if you’re fishing in clear water and need to make delicate presentations, a streamlined knot like the Needle Knot or a carefully tied Albright Knot may be the best choice. On the other hand, if you’re fishing in murky water or heavy cover, a stronger and more abrasion-resistant knot like a sleeve/crimp connection may be more appropriate.
Knot Selection Guide Based on Fishing Scenario:
| Fishing Scenario | Target Species | Fly Line Material | Leader Material | Recommended Knot(s) |
|---|---|---|---|---|
| Trout Fishing (Clear Water) | Trout | Coated | Fluorocarbon | Perfection Loop, Albright Knot |
| Salmon Fishing (Heavy Cover) | Salmon | Braided | Mono | Albright Knot, Sleeve/Crimp Connection |
| Saltwater (Large Gamefish) | Tarpon | Coated | Fluorocarbon | Albright Knot, Sleeve/Crimp Connection |
6. Essential Tools And Accessories For Tying Leader Connections
Having the right tools and accessories can make tying leader connections easier, faster, and more reliable. Here are some essential items to keep in your fly fishing kit:
6.1. Knot-Tying Tools: Enhancing Precision
Knot-tying tools can help you tie consistent and reliable knots, especially when working with small tippets or in challenging conditions. These tools typically feature a variety of functions, such as holding the line, tightening the knot, and trimming the tag ends.
Benefits of Using Knot-Tying Tools:
- Improved knot strength and consistency.
- Easier to tie knots with cold or wet hands.
- Reduces the risk of damaging the line while tightening the knot.
- Convenient for trimming tag ends.
6.2. Line Clippers: Clean Cuts For Secure Knots
Sharp line clippers are essential for making clean and precise cuts when trimming tag ends. Dull or damaged clippers can fray the line, which can weaken the knot and increase the risk of failure.
Features to Look for in Line Clippers:
- Sharp, durable blades made of stainless steel or carbide.
- Ergonomic design for comfortable use.
- Built-in eye-cleaning needle for clearing hook eyes.
- Lanyard attachment for easy access.
6.3. Leader Straighteners: Improving Presentation
A leader straightener can help remove kinks and curls from your leader, improving its presentation and reducing the risk of tangles. These tools typically consist of two rubber or felt pads that you run the leader through to straighten it.
Benefits of Using a Leader Straightener:
- Improved casting accuracy and distance.
- Reduced risk of tangles and wind knots.
- More natural fly presentation.
- Prolongs the life of your leader.
6.4. UV Resin: Reinforcing Connections
UV resin is a liquid plastic that hardens when exposed to ultraviolet (UV) light. It can be used to reinforce leader connections, creating a smooth and durable coating that protects the knot from abrasion and impact.
Benefits of Using UV Resin:
- Increased knot strength and durability.
- Smoother passage through rod guides.
- Protection from abrasion and impact.
- Creates a clean and professional-looking finish.
7. Maintaining Your Leader Connection For Longevity
Proper maintenance of your leader connection is crucial for ensuring its longevity and reliability. Regular inspection, cleaning, and replacement of worn or damaged components can prevent failures and keep you fishing with confidence.
7.1. Inspecting For Wear And Damage
Regularly inspect your leader connection for signs of wear and damage, such as frays, cuts, or abrasions. Pay close attention to the knot itself, as this is the most vulnerable part of the connection. If you notice any damage, replace the leader immediately.
Tips for Inspecting Your Leader Connection:
- Use a magnifying glass to examine the knot closely.
- Run your fingers along the leader to feel for any rough spots or abrasions.
- Check the color of the leader for signs of fading or discoloration, which can indicate UV damage.
- Test the strength of the connection by pulling on it firmly.
7.2. Cleaning And Lubricating Connections
Keep your leader connection clean and lubricated to prevent the buildup of dirt, debris, and salt, which can weaken the line and reduce knot strength. Rinse the connection with fresh water after each use, and apply a small amount of line lubricant to keep it supple and prevent it from drying out.
Recommended Line Lubricants:
- силиконовый-based line dressing
- Fluorocarbon line conditioner
- Glycerin-based lubricant
7.3. Replacing Leaders Regularly
Even with proper maintenance, leaders will eventually wear out and need to be replaced. The frequency with which you need to replace your leader will depend on the type of fishing you’re doing, the conditions you’re fishing in, and the quality of the leader material. As a general rule, it’s a good idea to replace your leader after every few fishing trips, or whenever you notice signs of wear or damage.
Signs That It’s Time to Replace Your Leader:
- Visible frays, cuts, or abrasions.
- Loss of suppleness or increased stiffness.
- Fading or discoloration.
- Reduced knot strength.
8. Troubleshooting Common Leader Connection Issues
Even with careful attention to detail, leader connection issues can sometimes arise. Here are some common problems and how to troubleshoot them:
8.1. Knot Slippage
Knot slippage occurs when the knot loosens or unravels under tension, leading to a loss of connection strength. This can be caused by using the wrong knot for the application, tying the knot incorrectly, or failing to lubricate the knot before tightening it.
Troubleshooting Knot Slippage:
- Ensure that you’re using the appropriate knot for the type of fishing you’re doing and the materials you’re using.
- Double-check that you’re tying the knot correctly, following each step carefully.
- Always lubricate the knot with saliva or water before tightening it.
- Use a knot-tying tool to help you tighten the knot properly.
8.2. Line Breakage At The Knot
Line breakage at the knot indicates that the line is weakened at the point of connection. This can be caused by over-tightening the knot, using damaged or worn-out line, or exposing the connection to excessive UV radiation or abrasion.
Troubleshooting Line Breakage at the Knot:
- Avoid over-tightening the knot. Tighten it just enough to seat the wraps securely.
- Use high-quality line that is in good condition.
- Store your line in a cool, dry place away from direct sunlight.
- Replace your leader regularly, especially if you notice signs of wear or damage.
8.3. Bulky Connections
Bulky connections can catch on rod guides, reducing casting distance and accuracy. This can be caused by using too much material when tying the knot or failing to trim the tag ends properly.
Troubleshooting Bulky Connections:
- Use the minimum amount of material necessary to tie the knot securely.
- Trim the tag ends as close to the knot as possible, without cutting into the knot itself.
- Consider using a knot with a slimmer profile, such as the Needle Knot or the Albright Knot.
- Apply UV resin to create a smooth and streamlined finish.
9. Advanced Techniques For Specialized Fishing Scenarios
For specialized fishing scenarios, such as targeting specific species or fishing in challenging conditions, advanced leader connection techniques can provide a significant advantage.
9.1. Tapered Leaders For Delicate Presentations
Tapered leaders are designed to gradually decrease in diameter from the butt section to the tippet, allowing for smoother energy transfer and more delicate fly presentations. These leaders are particularly useful when fishing for wary fish in clear water.
Benefits of Using Tapered Leaders:
- Improved casting accuracy and distance.
- More natural fly presentation.
- Reduced risk of spooking fish.
- Better turnover of the fly.
9.2. Shock Leaders For Powerful Fish
Shock leaders are short sections of heavy-duty line that are attached to the end of the leader to provide extra shock absorption when fighting large, powerful fish. These leaders are commonly used when targeting species like tarpon, tuna, or sharks.
Benefits of Using Shock Leaders:
- Increased shock absorption.
- Reduced risk of line breakage.
- Improved abrasion resistance.
- Better control of large fish.
9.3. Using Multiple Knots For Added Security
In some situations, it may be beneficial to use multiple knots to create a more secure leader connection. For example, you could tie a Loop To Loop connection to attach the leader to the fly line and then use a second knot, such as the Improved Clinch Knot, to attach the tippet to the leader.
Benefits of Using Multiple Knots:
- Increased redundancy and security.
- Reduced risk of total connection failure.
- Ability to combine the strengths of different knots.
- Improved peace of mind.
10. Embracing The Art Of Leader Connection For Fly Fishing Success
Mastering the art of leader connection is an ongoing process that requires practice, experimentation, and a willingness to learn from your experiences. By understanding the principles of knot tying, choosing the right knots for your fishing needs, and maintaining your connections properly, you can increase your chances of success on the water and enjoy the sport of fly fishing to the fullest.
10.1. Continued Learning And Practice
Fly fishing is a constantly evolving sport, and there is always something new to learn. Stay up-to-date on the latest techniques and technologies by reading books, magazines, and online resources, attending fly fishing clinics and workshops, and talking to experienced anglers. Practice your knot-tying skills regularly, both at home and on the water, to maintain your proficiency and build confidence.
10.2. Experimentation And Adaptation
Don’t be afraid to experiment with different knots, leader materials, and connection methods to find what works best for you. Pay attention to how your connections perform in different fishing situations, and adapt your approach as needed. Keep a journal or logbook to record your experiences and track your successes and failures.
10.3. Sharing Knowledge With Fellow Anglers
One of the best ways to improve your fly fishing skills is to share your knowledge with fellow anglers. Teach others how to tie knots, rig leaders, and maintain their connections. By sharing your expertise, you’ll not only help others become better anglers, but you’ll also reinforce your own understanding of the art of leader connection.
Are you eager to discover more about fly fishing techniques, explore various fly line options, and connect with a vibrant community of anglers? Visit flyermedia.net today to dive into a wealth of resources and information tailored to enhance your fly fishing experience. Whether you’re seeking expert advice, the latest gear reviews, or a place to share your own angling adventures, flyermedia.net is your ultimate destination.
FAQ: How to Tie a Leader onto Fly Line
1. What is the best knot to use for attaching a leader to a fly line?
The best knot depends on your priorities: the Albright Knot offers a slim profile and high strength, the Loop To Loop connection is convenient for quick changes, and the Nail Knot is a traditional, streamlined option.
2. How do I tie an Albright Knot?
Form a loop in the fly line, insert the leader, wrap the leader around the loop 8-10 times, thread it back through, moisten, and tighten slowly.
3. What is a Loop To Loop connection, and how do I make one?
It’s a convenient connection using a loop on the fly line and a loop knot (like Perfection Loop) on the leader; pass one loop through the other and then thread the leader through its own loop.
4. What are the pros and cons of using a Nail Knot?
Pros: streamlined. Cons: weaker than other knots, may damage fly line coating.
5. How important is it to lubricate a knot before tightening?
Very important; lubrication reduces friction and prevents the line from weakening, increasing knot strength by as much as 50%, according to studies.
6. What tools are helpful for tying leader connections?
Knot-tying tools, line clippers, leader straighteners, and UV resin are all valuable for improving knot strength and ease of tying.
7. How often should I replace my leader?
Replace your leader after every few fishing trips or whenever you notice signs of wear, damage, or reduced knot strength.
8. What causes knot slippage, and how can I prevent it?
Knot slippage is caused by using the wrong knot, tying it incorrectly, or not lubricating it; prevent it by choosing the right knot, tying it carefully, and lubricating it well.
9. Why is a strong leader connection important for fly fishing?
A strong leader connection is important because it ensures efficient energy transfer, provides shock absorption, and prevents break-offs when casting or fighting fish.
10. Can I use sleeves or crimp connectors for attaching a leader?
Yes, sleeves or crimp connectors offer a quick and secure way, especially for heavier lines or saltwater, but they can be bulky and are not ideal for frequent leader changes.