Fly fishing, while seemingly complex at first glance, becomes an accessible and rewarding sport with the right knowledge and gear. Setting up your fly rod correctly is the foundational step to enjoying your time on the water and successfully landing fish like trout and more.
To properly rig a fly fishing rod, you’ll need a balanced system including a rod, reel, and line of appropriate weights. Beyond these core components, you’ll also require backing, fly line, leader, tippet, and finally, your chosen fly.
Choosing the right materials for each component can feel overwhelming initially. In this guide, we will demystify the process, explaining how to select the appropriate gear for various fishing scenarios. Furthermore, we’ll provide a clear, step-by-step walkthrough of how to rig your fly rod, getting you ready to cast your first fly!
 Fly rod setup for fly fishing
Setting Up Your Fly Fishing Rod: A Beginner’s Guide
This section will break down each part of the fly fishing setup, guiding you through the selection process and detailing how to assemble and rig your fly fishing rod. Let’s explore the necessary components and how to choose wisely:
Selecting Your Fly Fishing Rod
The fly fishing rod is your primary tool, and its selection is crucial. When choosing a rod, consider both its length and weight, as these factors significantly impact your casting and fishing experience.
Fly Rod Length Considerations
Rod length is largely dictated by the size of the water bodies you intend to fish. For broader rivers and larger lakes, longer rods in the 10 to 12-foot range are generally preferred. These longer rods aid in casting distance and line control in open waters. Conversely, for smaller streams and tighter fishing environments, shorter rods between 7 and 9 feet offer better maneuverability and precision.
 Fly fishing rod in action on a river, showcasing rod length
Understanding Fly Rod Weight
The weight of your fly rod is equally important, influencing your casting control and overall comfort. Rod weight is indicated by a number (e.g., 3-weight, 5-weight), with lower numbers representing lighter rods. A good starting point for beginners is to choose a rod that feels balanced and comfortable in hand. The rod weight should also be appropriate for the type of fish you’re targeting; lighter rods are suitable for smaller fish, while heavier rods are needed for larger species.
| Rod Weight | Ideal Fish Species | Fishing Scenarios |
|---|---|---|
| 3-4 | Small Trout, Panfish | Small streams, delicate presentations |
| 5 | Average Trout, Grayling | Versatile, all-around trout fishing |
| 6-7 | Bass, Larger Trout, Salmon | Streamer fishing, larger flies, windy conditions |
| 8-9 | Pike, Large Bass, Salmon, Steelhead | Big fish, saltwater applications |
| 10-12 | Tarpon, Muskie, Heavy Saltwater Species | Largest game fish, demanding conditions |
With your fly fishing rod selected, let’s move on to the step-by-step process of setting it up!
Step 1: Assembling Your Fly Fishing Rod
Fly rod assembly is straightforward. Each rod section is designed to fit snugly into the next. Begin with the butt section (the thickest end you’ll hold). Align the dots or marks found near the joints of each section – these are usually meant to be 180 degrees apart for proper rod curvature. Gently insert the spigot of one section into the receiving end of the next larger section, twisting slightly as you push them together to ensure a secure fit. Repeat this process for all remaining sections until your rod is fully assembled. Avoid forcing the sections together; they should slide in smoothly.
 Assembling sections of a fly rod
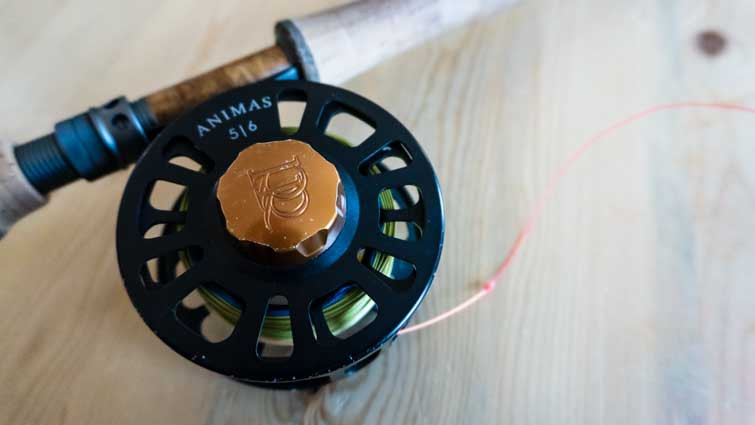
Step 2: Attaching Your Fly Reel
The fly reel is crucial for line management and fighting fish. The reel weight should be matched to your fly line weight for balanced performance. Heavier fly lines require heavier reels to maintain balance, while lighter lines pair best with lighter reels. A reel with a smooth and reliable drag system is essential for controlling fish, especially when targeting larger species.
| Reel Weight | Ideal Fish Species | Fishing Applications |
|---|---|---|
| 3-4 | Small Trout, Panfish | Light line fishing, small streams |
| 5 | Average Trout, Grayling | Versatile trout and general fly fishing |
| 6-7 | Bass, Larger Trout, Salmon | Streamer fishing, larger flies |
| 8-9 | Pike, Large Bass, Salmon, Steelhead | Heavier lines, larger game fish |
| 10-12 | Tarpon, Muskie, Saltwater Giants | Big game saltwater and freshwater |
To attach the reel, locate the reel seat on the butt section of your assembled rod – it’s usually a cork or composite section with metal fittings. Unscrew the locking nuts or rings on the reel seat. Slide the foot of your fly reel into the reel seat, ensuring it’s aligned with the rod guides. Once positioned, tighten the locking nuts to secure the reel firmly. Double-check that the reel is stable and doesn’t wobble before proceeding.
 Close up of a fly reel attached to a fly rod
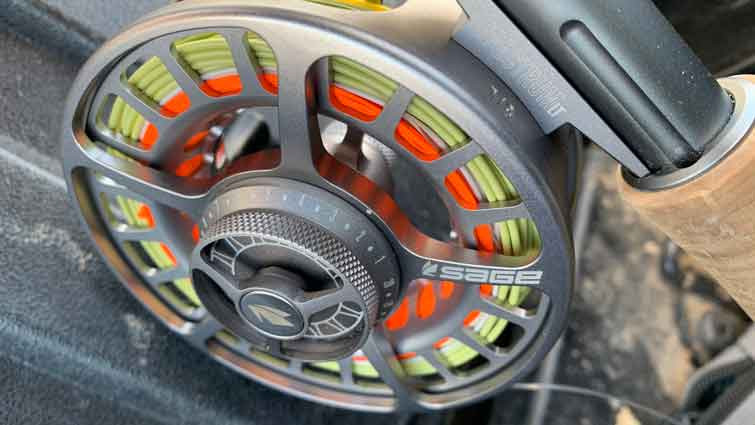
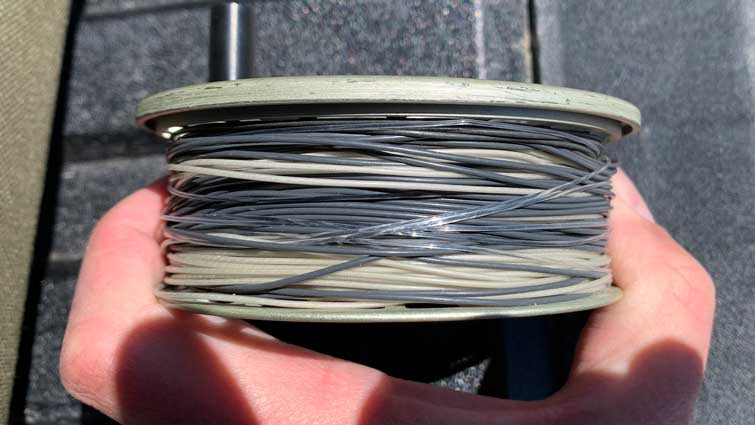
Step 3: Spooling with Line Backing
Line backing serves as extra line capacity on your reel, essential when a fish runs and takes out a lot of line. It also fills the reel spool, providing a base for your fly line. The breaking strength (weight) of your backing should be equal to or greater than your fly line weight for a balanced setup.
To attach the backing, start by feeding the backing through the rod guides from the tip-top guide down to the reel. Tie one end of the backing to the reel spool using an arbor knot. The arbor knot is a simple and reliable knot for this purpose.
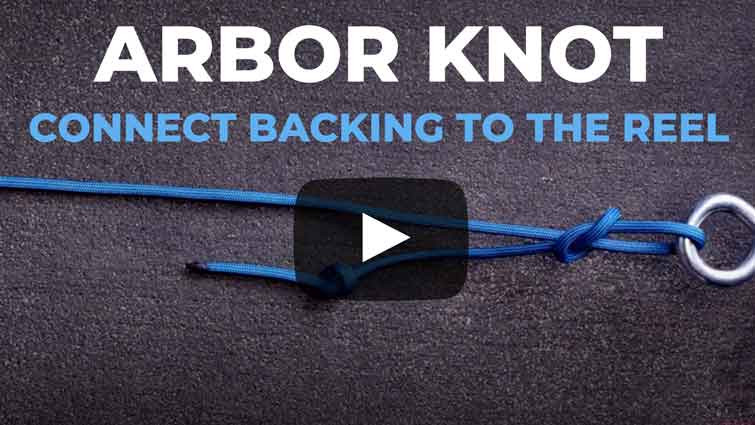 Arbor Knot Tying Guide – Click to Watch Video
Link to a video tutorial: Step-by-step instructions on tying the Arbor Knot to secure backing to the reel spool.
Before winding, ensure your reel is set for the correct retrieve (left or right-hand). Most reels can be adjusted for either hand. Wind the backing onto the reel spool, filling it to the manufacturer’s recommended capacity, typically between 100 and 200 yards. Check your reel manufacturer’s specifications for the ideal backing capacity for your reel size. This information is often found on the manufacturer’s website or reel packaging.
Step 4: Connecting Your Fly Line
The fly line is the weighted line that allows you to cast lightweight flies effectively. It’s crucial to match your fly line weight to your rod weight for optimal casting performance.
Attach the fly line to the backing using a knot. If your fly line has a pre-welded loop at the end, the surgeons loop knot is an excellent choice for a loop-to-loop connection. If your fly line lacks a loop, the Albright knot provides a secure line-to-line connection.
 Surgeons Loop Knot Tutorial – Video
Link to a video tutorial: Visual guide on tying the Surgeons Loop Knot for connecting looped fly lines.
Fly Line Types:
Understanding the different types of fly lines is important for adapting to various fishing conditions:
- Floating Fly Line: The most versatile type, floating lines are used in the majority of fly fishing situations. They are ideal for dry flies, nymphs fished under indicators, and general surface fishing.
- Sinking Fly Line: Designed to sink, these lines are used to get your fly down to deeper depths quickly. They are essential for streamer fishing in deep water or when fish are holding near the bottom.
- Sinking Tip Fly Line: These lines have a sinking front section and a floating running line. They offer a compromise, allowing you to fish slightly subsurface while maintaining better line control and visibility of the floating section.
 Types of fly lines, sinking fly line example
Matching Line Weight to Fish Size:
Line weight is another critical consideration. Heavier lines are designed to cast larger flies and handle windy conditions, while lighter lines are better for delicate presentations and smaller flies. Line weight should correspond to your rod and reel weight and the size of fish you are targeting.
| Line Weight | Ideal Fish Species | Fly & Fishing Style |
|---|---|---|
| 1-3 | Small Trout, Panfish | Small dry flies, delicate presentation |
| 4 | Panfish, Larger Trout | Light nymphing, dry-dropper rigs |
| 5 | Trout, Grayling | Versatile, all-purpose trout line |
| 6 | Large Trout, Bass | Streamers, larger nymphs, windy days |
| 7 | Bass, Salmon, Steelhead | Heavier streamers, salmon flies |
| 8+ | Large Salmon, Saltwater Species | Big game flies, saltwater fly fishing |
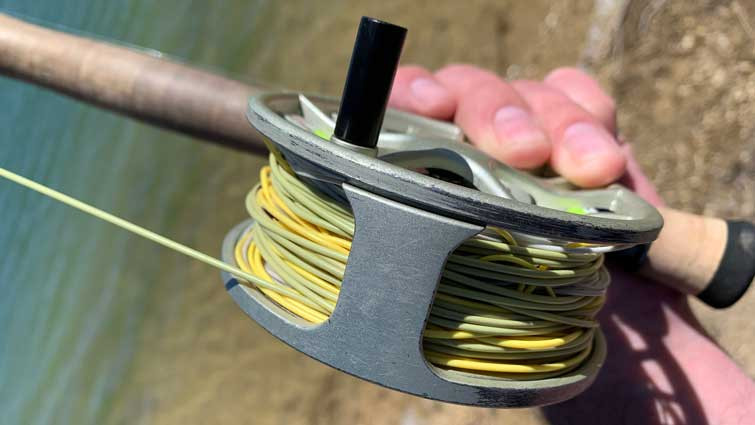 Fly line spooled on a fly reel, ready for leader attachment
Fly Line Direction on the Reel:
The fly line should come off the bottom of the reel spool. This ensures proper line management and prevents the line from getting trapped between the rod handle and your fingers during casting and retrieval. If the line comes off the top, it can create an awkward angle and potentially hinder your casting and hook sets. Having the line exit from the bottom allows for smoother stripping and better control, especially when a fish strikes.
(Replace ‘placeholder_diagram_url.png’ with a URL to a diagram illustrating correct fly line direction)
Diagram: Illustration showing the correct direction of fly line coming off the bottom of the reel.
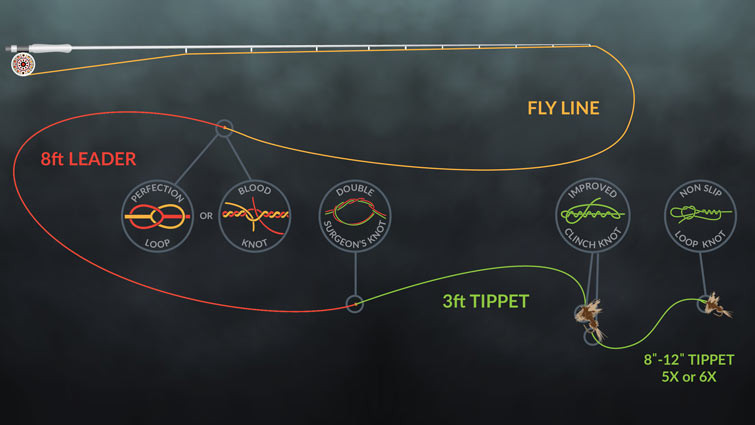
Step 5: Attaching a Leader
The leader is a tapered monofilament or fluorocarbon line that connects the thicker fly line to the finer tippet. It serves several crucial purposes: it provides a nearly invisible connection to the fly, helps turn over the fly during casting, and adds a shock-absorbing section to protect the fly line during fights with fish. Monofilament is a more affordable option, while fluorocarbon is less visible underwater and sinks faster.
To attach the leader to your fly line, you can use a loop-to-loop connection if both leader and fly line have pre-made loops. Alternatively, for a direct knot connection, the blood knot is a strong and streamlined option. For larger diameter fly lines and leader butts, a nail knot or snail knot can also be effective.
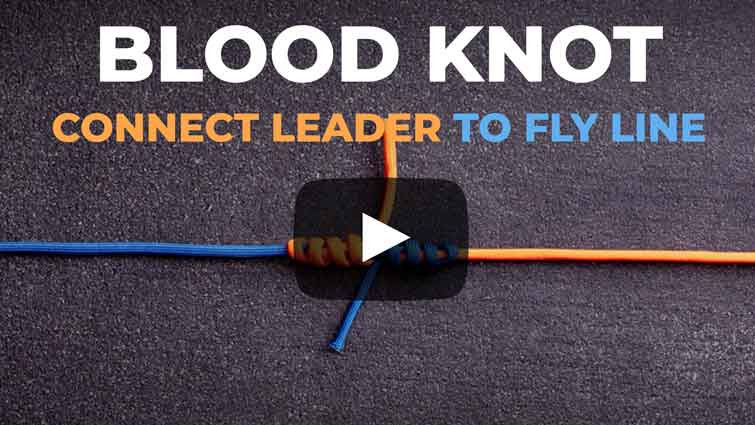 Blood Knot Tying Tutorial – Click to Watch
Link to a video tutorial: Visual instructions on tying the Blood Knot for leader-to-fly line connection.
Leaders come in various lengths, typically ranging from 6 to 12 feet. A 9-foot tapered leader is an excellent starting point for most trout fishing situations. Ensure your leader has a loop at the end for easy connection to the fly line or for attaching a tippet.
Leader and Tippet: Understanding the Difference
Often, anglers wonder about the necessity of both leader and tippet.
Generally, if you are using a tapered leader of sufficient length, a tippet is not strictly necessary initially. However, tippet becomes invaluable for extending the life of your leader and for making subtle adjustments to your presentation. Each time you change flies, you shorten your leader. Tippet allows you to add length back without replacing the entire leader.
 Leader and tippet setup with fly attached
Step 6: Attaching Tippet to Your Leader
The tippet is the final, often replaceable, section of line that connects directly to your fly. It’s typically made of monofilament or fluorocarbon and is chosen for its diameter and breaking strength, matching the size of the fly and the fish you’re targeting.
To attach the tippet to your leader, the double surgeons knot is a reliable choice. This knot is also useful for creating dropper rigs, allowing you to add multiple flies to your line.
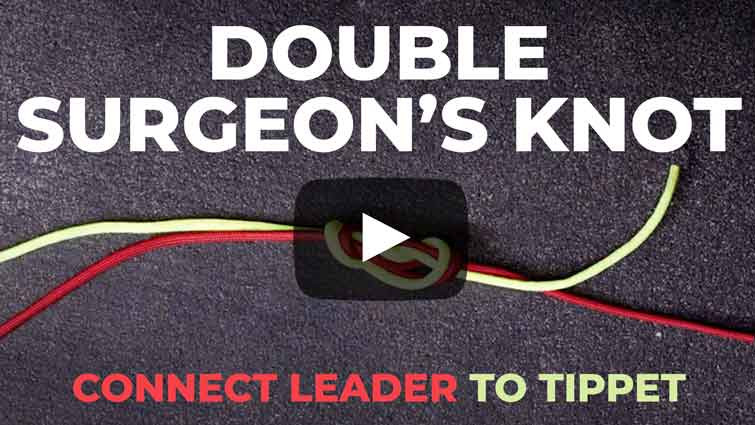 Double Surgeons Knot Video Guide – Watch Now
Link to a video tutorial: Visual guide on tying the Double Surgeons Knot for tippet connection.
Monofilament is a popular and cost-effective tippet material, offering good strength and flexibility. Fluorocarbon, while more expensive, is nearly invisible in water and offers superior abrasion resistance, making it a preferred choice in clear water or when fishing around structure.
Tippet Size Chart:
Tippet size is indicated by an “X” number, with higher numbers denoting thinner diameters and lower breaking strengths. Matching tippet size to the fly and target fish is crucial for natural presentation and successful hook sets.
| Tippet Size | Diameter (inches) | Approx. Breaking Strength (lbs) | Suitable Fish Size & Flies |
|---|---|---|---|
| 03X | 0.015 | 25 | Big Game, large streamers |
| 02X | 0.013 | 20 | Larger Salmon, big flies |
| 01X | 0.012 | 18.5 | Striped Bass, large streamers |
| 0X | 0.011 | 15.5 | Salmon, Steelhead, larger flies |
| 1X | 0.010 | 13.5 | Bonefish, large trout flies |
| 2X | 0.009 | 11.5 | Largemouth & Smallmouth Bass, large trout |
| 3X | 0.008 | 8.5 | Bass & Larger Trout, medium flies |
| 4X | 0.007 | 6 | Average Trout, standard flies |
| 5X | 0.006 | 4.75 | Trout & Panfish, smaller flies |
| 6X | 0.005 | 3.5 | Smaller Trout, very small flies |
| 7X | 0.004 | 2.5 | Smaller Trout & Panfish, tiny flies |
| 8X | 0.003 | 1.75 | Smallest Flies, delicate presentations |
Always choose a tippet size appropriate for your fly and the fish you are targeting. A tippet that is too thick can make your presentation unnatural, while one that is too thin may break under pressure from a larger fish.
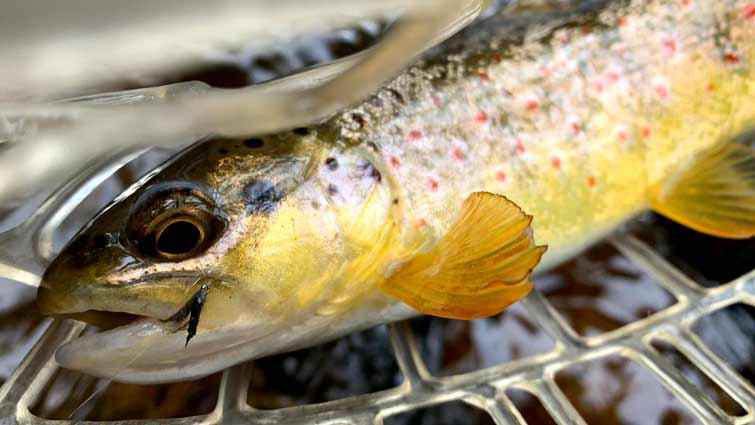 Small trout caught on a small fly and tippet
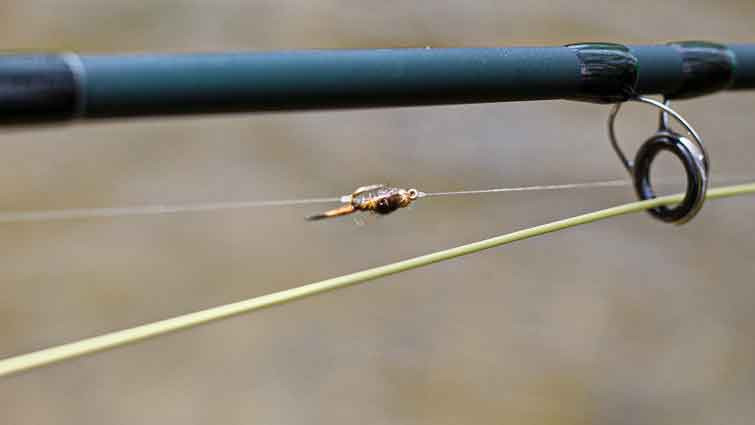
Step 7: Attaching Your Fly to the Tippet
The final step is attaching your chosen fly to the end of your tippet. Two popular and effective knots for this are the Improved Clinch Knot and the Non-Slip Loop Knot.
The Improved Clinch Knot is a strong and versatile knot, ideal for attaching flies for nymphing and dry fly fishing.
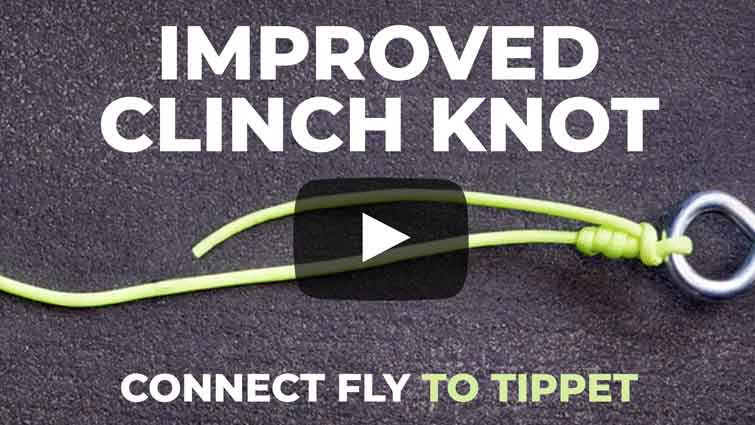 Improved Clinch Knot Tutorial Video – Click to Watch
Link to a video tutorial: Step-by-step instructions on tying the Improved Clinch Knot.
The Non-Slip Loop Knot is excellent for streamers and emergers, providing the fly with more freedom of movement in the water, which can be particularly effective for attracting fish.
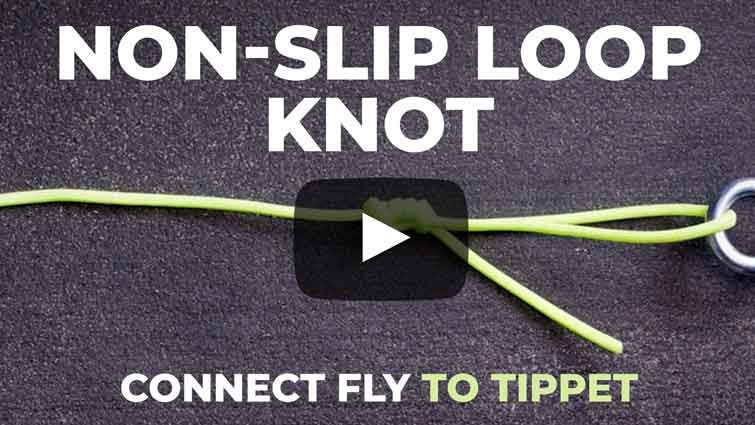 Non-Slip Loop Knot Video Guide – Watch Now
Link to a video tutorial: Visual guide on tying the Non-Slip Loop Knot for enhanced fly movement.
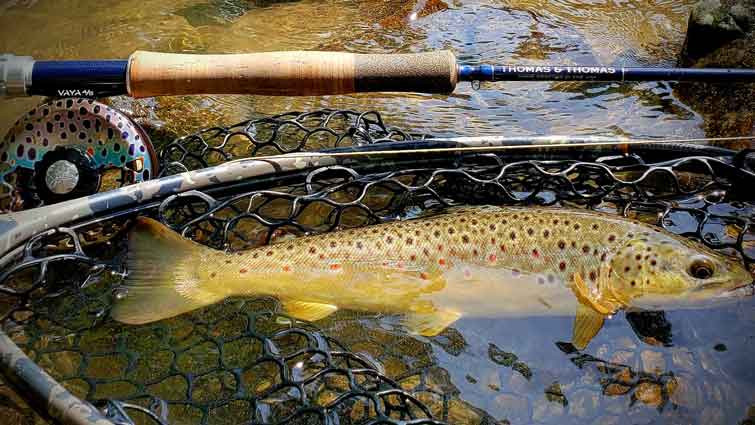
Reeling In on a Fly Rod: Key Techniques
Properly reeling in a fish on a fly rod is essential for a successful landing. The technique differs slightly from spin fishing.
When reeling, ensure your reel’s drag is set appropriately – not too tight, allowing line to be released if the fish runs, but enough to apply pressure. Keep your rod tip held high, which helps maintain pressure on the hook and tires out the fish. Reel in line steadily as you lower the rod tip towards the water, then lift the rod tip again while continuing to reel to retrieve more line. This “pump and reel” technique is effective for bringing the fish closer.
 Selection of fly fishing flies from Drifthook
Image: A collection of various fly fishing flies, essential for attracting different types of fish.
Setting up your first fly rod might seem daunting initially, but by following these steps and understanding the purpose of each component, you’ll quickly become proficient. Remember, selecting the right materials for your target species and fishing conditions is key to success.
While there are numerous pre-packaged fly fishing kits available for beginners, as you progress in fly fishing, you’ll develop a deeper understanding of rod and reel nuances and discover specialized setups that cater to your unique fishing style and preferences. Enjoy your fly fishing journey!