Man proudly displaying a paper airplane against a clear sky, symbolizing the joy of paper plane creation and flight.
Passing down essential skills is a cherished part of parenthood. From teaching your children how to ride a bike to mastering the art of skipping stones, there are countless moments of shared learning. Among these timeless skills is the craft of making a paper airplane. But let’s be honest, many of us rely on faded childhood memories, often resulting in flimsy creations that plummet to the ground. Instead of settling for a disappointing nosedive, why not equip yourself and your kids with the knowledge to build paper airplanes that truly soar?
This guide will walk you through three tried-and-tested paper airplane designs – beginner, intermediate, and expert levels – each grounded in the fascinating science of flight. These models are designed to progress in difficulty, ensuring there’s a perfect project for every age, even adults (go ahead, admit you’re curious to test these out during your next office break!). Let’s take flight and discover how to fold paper airplanes that are built for distance.
Beginner Level: The Bulldog Dart – Simple and Sturdy
The Bulldog Dart is your entry point into paper airplane mastery. It’s straightforward to fold, requires minimal steps, and delivers reliable flights. While it might not win any airshow competitions, it’s the ideal starting point for young aviators crafting their first paper jets.
1. Begin by folding your paper in half lengthwise, then unfold it. This initial crease serves as a crucial center guideline for the subsequent folds.
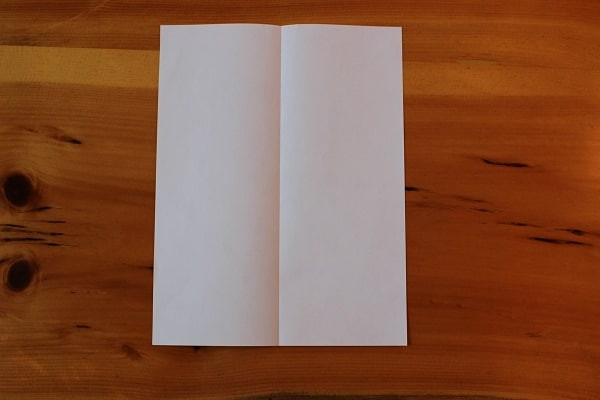 Paper is folded in half lengthwise on a wooden surface, establishing the central crease for the paper airplane construction.
2. Fold the top two corners down towards the center crease, aligning their points precisely. This classic fold is likely the foundation of your childhood paper airplane memories.
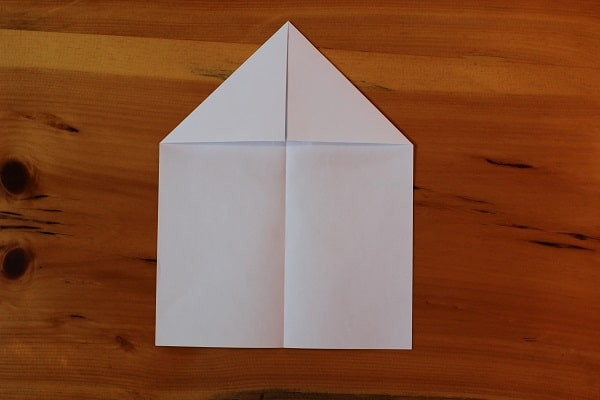 Top corners of the paper are folded inward, meeting at the center crease to form the pointed nose of the paper airplane.
3. Flip the paper airplane over. Now, fold the top corners in again, aiming for the center crease. Ensure the diagonal edge on one side of the plane aligns neatly with the center line, mirroring the opposite side.
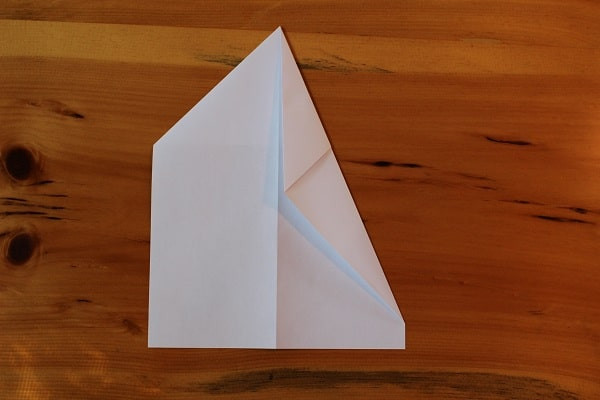 Paper airplane is flipped over, and the top corners are folded inward once more, refining the shape and aerodynamics.
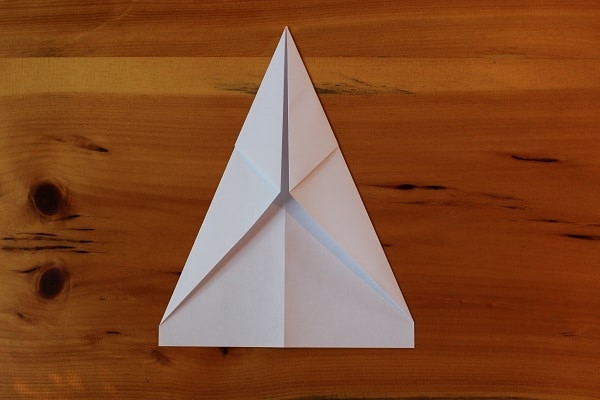 Paper airplane after completing the first three steps, showing the developing form and creases.Paper airplane showing the crisp folds after completing steps 1 through 3, ready for the next stage of construction.
4. Fold the top point downwards so that its tip aligns with the bottom edge where the previous folds converge. This fold creates a defined point at the front of the plane.
 Top point of the paper airplane is folded down, creating a sharp nose and adding structure to the front section.
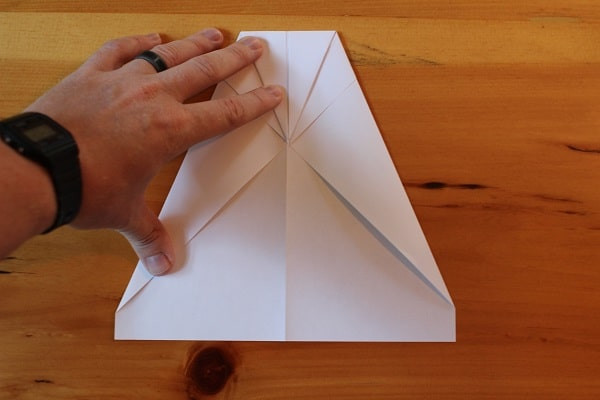
5. Fold the entire paper airplane in half along the original lengthwise crease, folding inwards on itself. This step forms the characteristic “snub nose” of the Bulldog Dart.
 Paper airplane is folded in half lengthwise, creating the body and the signature snub nose shape of the Bulldog Dart.
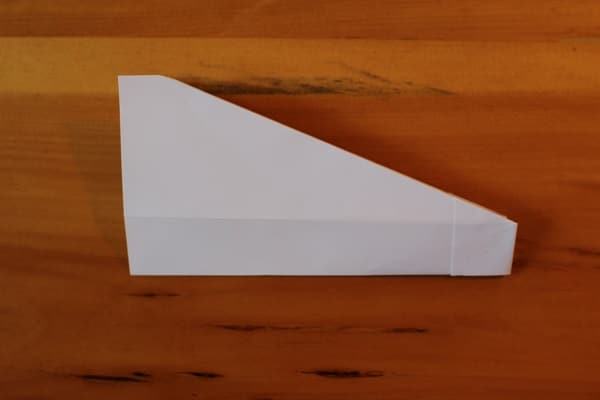
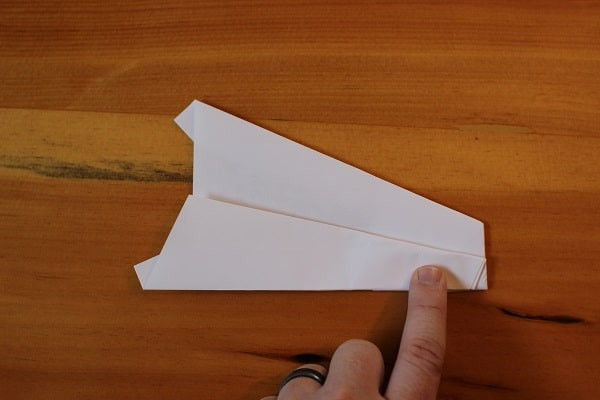
6. Fold the wings down, creating a straight, horizontal line from the top of the snub nose to the wingtip. Repeat this fold on the opposite side to form both wings.
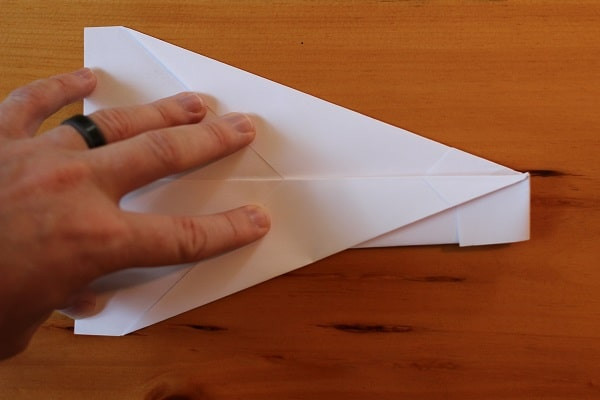 Wings of the paper airplane are folded down symmetrically, giving the Bulldog Dart its recognizable wing shape and readying it for flight.
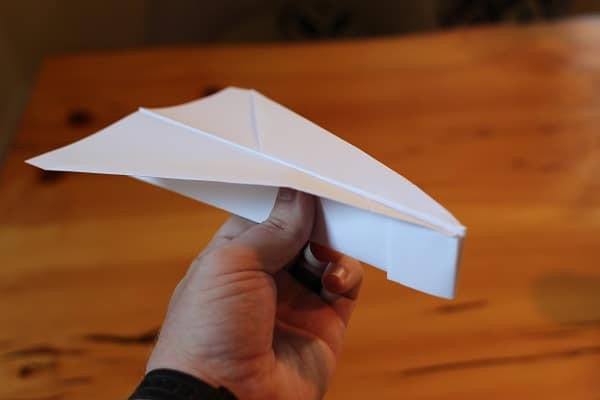 A person holds the finished Bulldog Dart paper airplane, ready to demonstrate its flight capabilities.The completed Bulldog Dart paper airplane. Remember, this model performs best with a gentle, underhand throw. Avoid the urge to launch it at high speed, as its heavier nose is designed for a softer launch to achieve optimal flight.
Intermediate Level: The Harrier – Enhanced Stability and Glide
Stepping up in complexity, the Harrier paper airplane introduces a few more folds and offers improved flight performance compared to the Bulldog Dart. It strikes a perfect balance between simplicity and sophistication, making it an excellent choice for recreational paper aviation enthusiasts.
1. Begin by folding the paper in half lengthwise and then unfolding, just as you did with the Bulldog Dart. This establishes the crucial center guideline.
Paper is folded in half lengthwise on a tabletop, setting the initial center crease for constructing the Harrier paper airplane.
2. Fold the top corners inwards so they meet precisely at the center crease. This is a familiar starting fold, common to many paper airplane designs.
Top corners of the paper are folded in to meet at the center crease, initiating the nose shaping for the Harrier paper airplane.
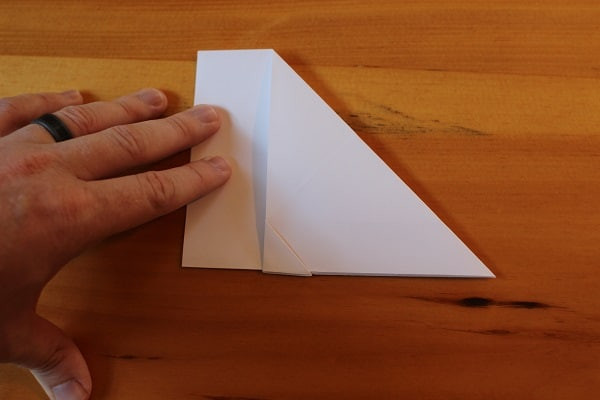
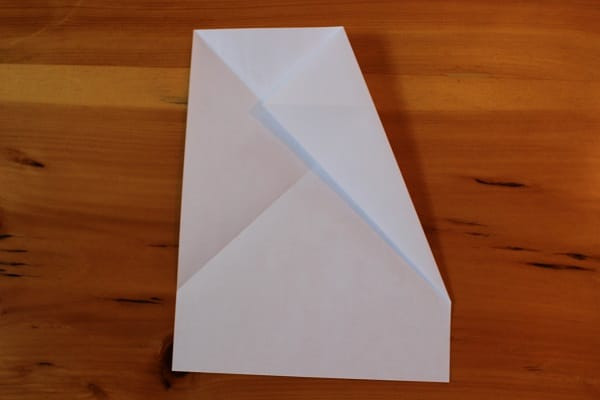
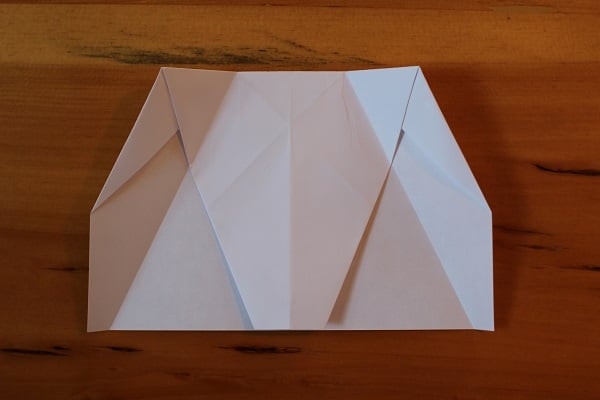
3. Fold the entire top section down, resembling the shape of an envelope. Crucially, leave a small gap of about half an inch at the bottom edge; avoid aligning the top point directly with the bottom edge.
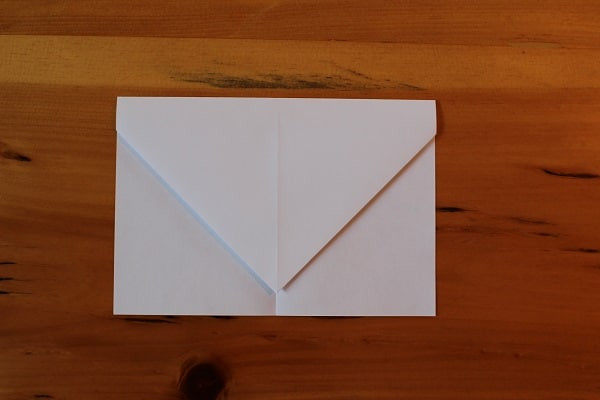 Top section of the paper is folded down to resemble an envelope, maintaining a slight gap at the bottom edge for the Harrier design.
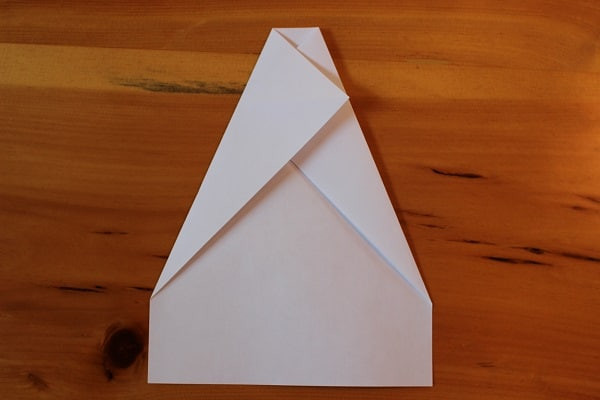
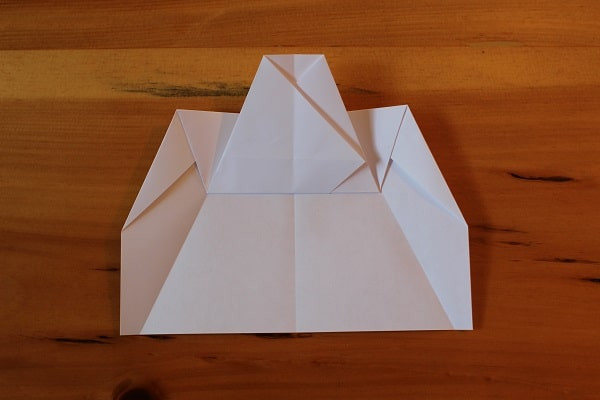
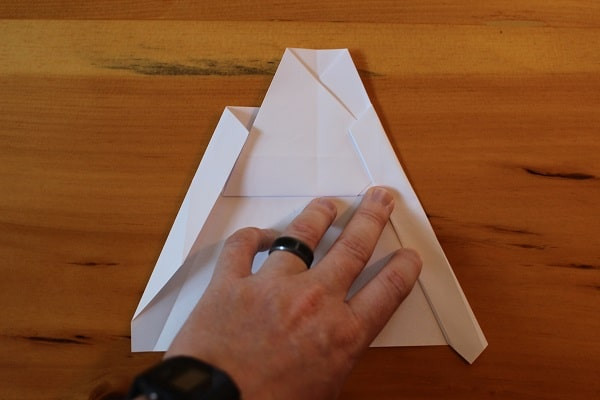
4. Fold the top corners inwards again, aligning them to meet at the middle crease. You’ll notice a small triangular flap extending out beneath these newly formed folds.
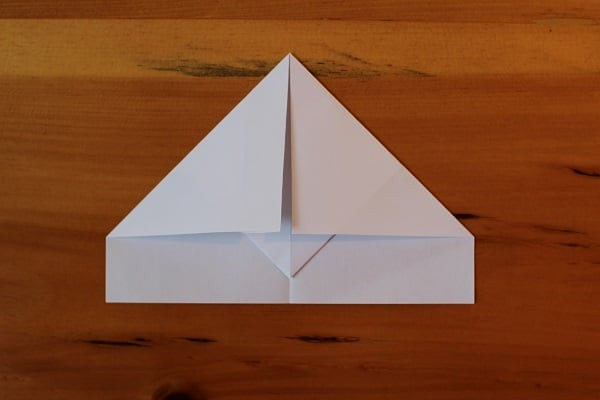 Top corners are folded inward again towards the center crease, creating layered folds and a small triangular flap for the Harrier model.
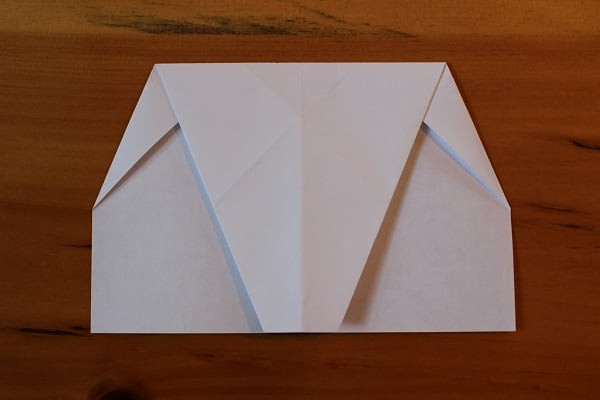
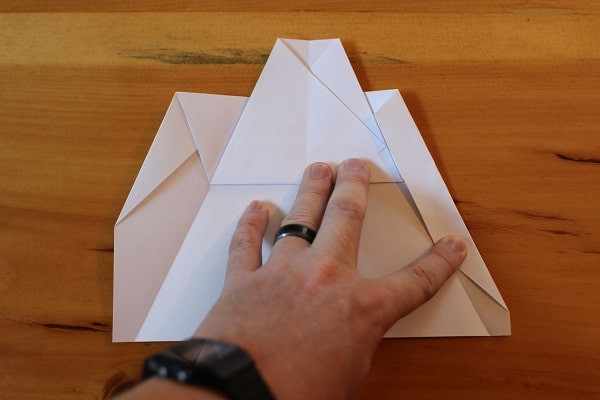
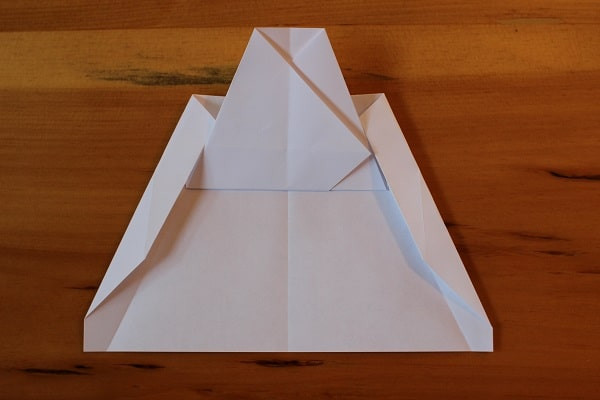
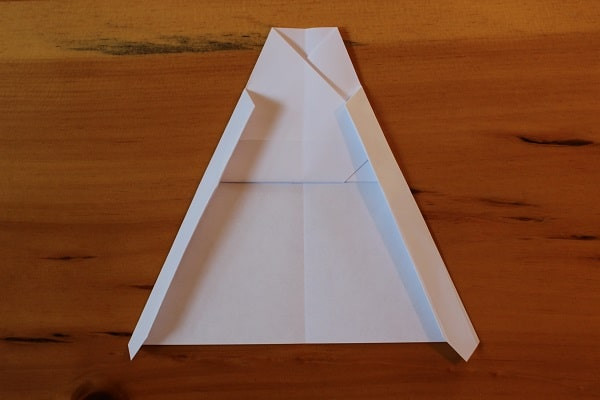
5. Fold that small triangular flap upwards to secure the previous folds in place. This flap acts as a locking mechanism, enhancing the plane’s structural integrity.
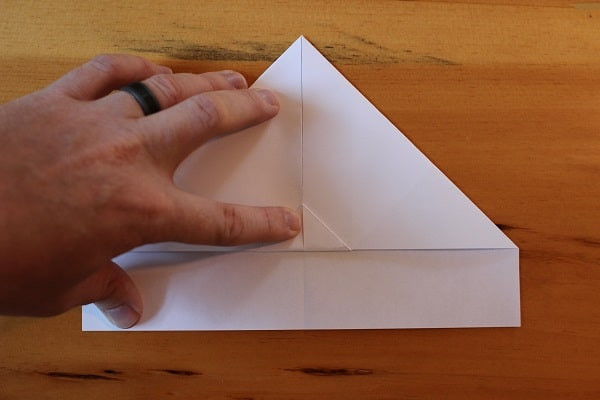 Small triangular flap at the bottom is folded upwards, securing the previous folds and adding structural support to the Harrier paper airplane.
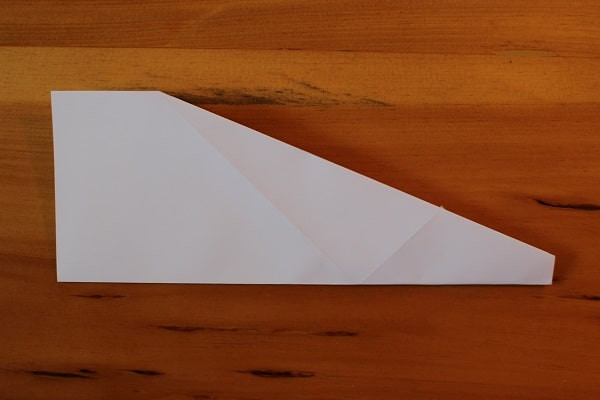
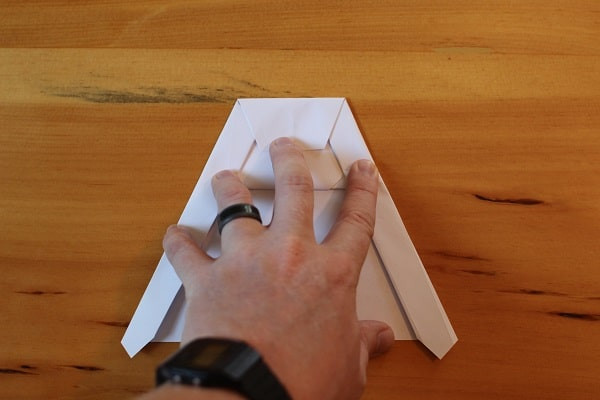
6. Fold the entire paper airplane in half, but this time, fold it outwards, not inwards. Ensure the previously folded triangular flap remains visible along the bottom edge.
 Paper airplane is folded in half outwards, keeping the triangular flap visible and forming the body of the Harrier model.
7. Fold the wing down so its top edge aligns with the bottom edge of the airplane’s body. Repeat this wing fold on the opposite side to create symmetrical wings.
 Wing of the paper airplane is folded down to meet the bottom edge, shaping the wing and preparing the Harrier for flight.
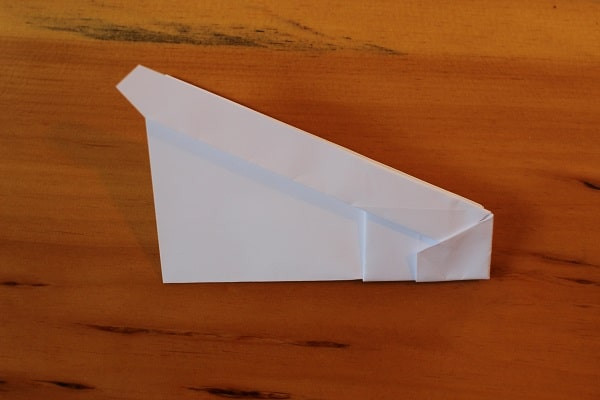
The finished Harrier paper airplane is pictured below. Its distinctive pointed wings and the stabilizing triangle underneath contribute to its excellent flight stability.
 A person holds the completed Harrier paper airplane, showcasing its pointed wings and stable design.
Expert Level: The Hammer – Distance and Precision Flight
While the world of paper airplane design extends to incredibly complex models, the Hammer strikes an optimal chord between intricacy and accessibility for the average paper airplane enthusiast. It involves significantly more folds than the previous two models, but the payoff is substantial: superior flight distance and impressive performance. Pay close attention to the following steps – the effort invested in precision folding will be richly rewarded with exceptional flights.
1. First, fold the top left corner all the way down to meet the right edge of the paper. Unfold it immediately after creating the crease, as this is just a guide.
 Top left corner of the paper is folded diagonally down to the right edge, creating a guiding crease for the Hammer design.
2. Repeat the same process with the top right corner, folding it down to meet the left edge and then unfolding. This will create a second diagonal crease.
 Top right corner is folded diagonally down to the left edge, and then unfolded, adding a second guiding crease to the paper.
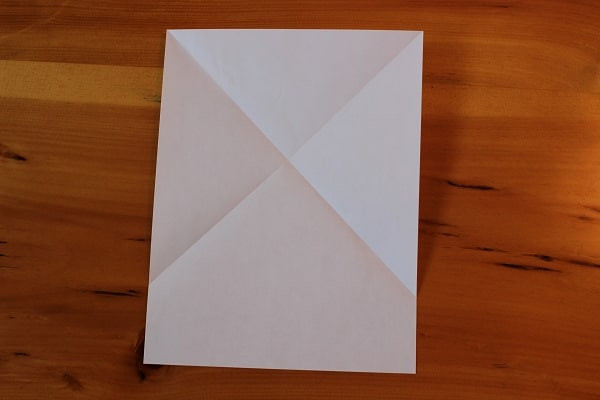 Unfolded paper showing two diagonal creases forming an 'X' pattern, essential guidelines for the Hammer's complex folds.The unfolded paper now displays two intersecting diagonal creases, forming an X shape, which are crucial for the next steps of the Hammer airplane.
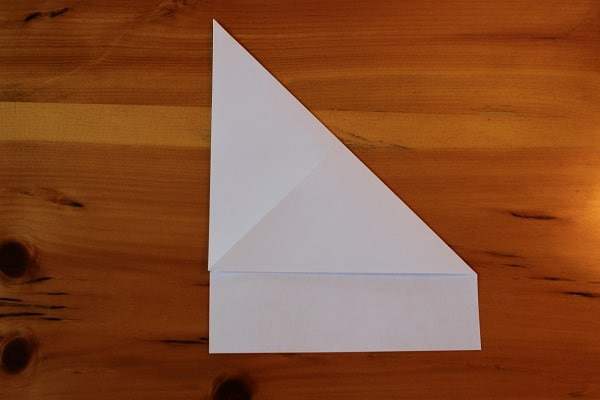
3. Fold the top right corner down so that its edge aligns with the diagonal crease running from the top left to the bottom right. Precision in aligning this edge is key.
 Top right corner of the paper is folded down to align with the diagonal crease, precisely shaping the wing section of the Hammer.
4. Mirror this fold on the left side. Fold the top left corner down so its point meets exactly at the diagonal right edge of the paper airplane. Symmetry is important here.
 Top left corner is folded down to meet the diagonal crease, mirroring the right side fold and ensuring symmetry for the Hammer.
5. Fold the paper airplane in half inwards on itself along the vertical center, and then unfold. This vertical crease will serve as another guide for subsequent folds.
 Paper airplane is folded in half vertically inward, creating a central vertical crease that will guide further shaping of the Hammer.
6. After unfolding from the previous step, fold the top section down so that its top edge aligns with the bottom edge of the paper. This fold creates a horizontal division across the plane.
 Top half of the paper airplane is folded down to meet the bottom edge, creating a horizontal fold line across the structure.
7. Fold the top corners down again so that their points meet at the middle vertical crease created in step 5. These folds refine the nose and wing structure.
 Top corners are folded down again to meet at the center vertical crease, further shaping the nose and wing sections of the Hammer.
8. Unfold these last corner folds. As with several steps in the Hammer design, these creases are primarily for guidance in the upcoming folds.
 Half-folded paper airplane is unfolded to reveal the creases from the previous corner folds, which will guide the next shaping steps.
9. Now, take the top edge that you previously folded down (Step 6) and fold it back upwards. Fold it precisely at the point where its edge intersects with the creases made in the previous step (Step 7).
 Top edge of the paper airplane is folded back upwards, utilizing the previously created creases to define the wing shape of the Hammer.
10. Fold the corners inwards yet again, aligning their edges to meet both the edge of the top flap and the crease from Step 7. This step forms the main wing surfaces.
 Corners are folded inwards again, aligning with the top flap edge and existing creases, shaping the primary wing structure of the Hammer.
 Paper airplane nearing completion with both corners folded in, showing the developing wing structure and complex folds.Both corners folded in, aligning with the top flap and previous creases, highlighting the nearly completed wing structure of the Hammer airplane.
11. Fold the wings inwards once more, this time simply folding along the crease that you have already established. After this fold, your paper airplane should have clean, straight lines from top to bottom.
 Wings are folded inward again along existing creases, refining the wing shape and creating clean lines on the Hammer airplane.
 Paper airplane with both sides of the wings folded in, exhibiting straight edges and a refined, aerodynamic profile.Both wings are folded inward again, resulting in straight edges from top to bottom, giving the Hammer a sleek and ready-to-fly appearance.
12. Fold the top section down from where it meets the top edges of the wing flaps created in the previous step. This fold shapes the final wing profile.
 Top section of the paper airplane is folded down from the wing flaps, finalizing the wing shape and adding aerodynamic refinement to the Hammer.
13. Fold the entire paper airplane in half outwards. Ensure all the paper flaps are on the exterior of the aircraft. Due to the multiple layers of paper, folding may become slightly challenging – take extra care to make crisp, clean folds.
 Paper airplane is folded in half outwards, ensuring all flaps are on the exterior and forming the final body shape of the Hammer.
14. Fold the wings down so that their top edges align with the bottom edge of the airplane’s body. This creates a small, final snub nose. Again, this fold might be a bit tougher due to paper thickness, so be precise and take your time.
 Wings are folded down to meet the bottom edge of the plane, creating the final snub nose and wing configuration of the Hammer.
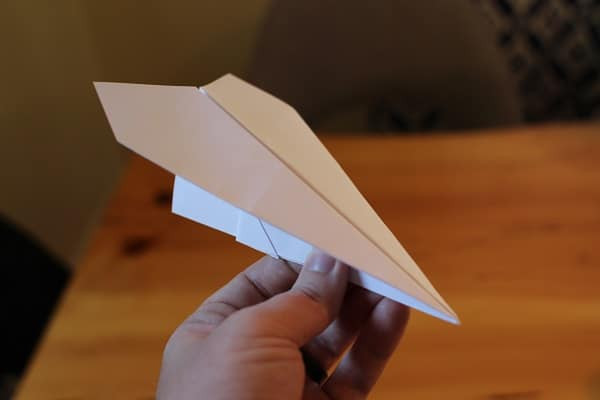
A person holds the completed Hammer paper airplane, ready to launch and demonstrate its long-distance flight capabilities.The finished Hammer paper airplane. This model is a true performer, known for its exceptional flight distance and impressive aerial dynamics.
These paper airplane designs offer a fantastic way to engage in a fun, hands-on activity, whether you’re bonding with kids or simply rediscovering the simple joys of play. Why not gather some paper and start folding your way to paper airplane mastery today?