Making a paper kite that flies isn’t just child’s play; it’s an engaging activity that blends creativity, engineering, and the simple joy of watching something you’ve built soar through the sky. At flyermedia.net, we believe that the art of kite-making is accessible to everyone, offering a delightful escape and a tangible connection to the elements. With the right guidance and a few basic materials, you can easily craft a paper kite that dances in the wind, bringing smiles and a sense of accomplishment.
Table of Contents
- Understanding the Basics of Kite Aerodynamics
- Gathering Your Supplies: What You Need to Build a Paper Kite
- Step-by-Step Guide: Crafting a Simple Diamond Paper Kite
- Advanced Techniques: Building More Complex Paper Kite Designs
- Troubleshooting: Common Problems and Solutions for Paper Kites
- Decorating Your Kite: Personalizing Your Creation
- Flying Your Kite: Tips and Tricks for a Successful Flight
- Paper Kite Variations: Exploring Different Designs
- The Science of Kites: Educational Aspects of Kite Flying
- Safety First: Important Considerations for Kite Flying
- Paper Kites and Aviation: A Surprising Connection
- Kite Flying Around the World: Cultural Significance
- Maintaining Your Kite: Ensuring Longevity
- Kite Flying as a Hobby: Joining the Community
- Frequently Asked Questions (FAQs) About Paper Kites
1. Understanding the Basics of Kite Aerodynamics
Want to know How To Make A Paper Kite That Flies? Understanding the basics of kite aerodynamics is crucial for creating a kite that not only looks good but also performs well in the sky.
Aerodynamics is the study of how air moves around objects. For a kite to fly, it needs to generate lift, which is the force that opposes gravity. This lift is created by the kite’s shape and angle relative to the wind. When wind hits the kite, it is deflected downwards. According to Newton’s third law of motion (for every action, there is an equal and opposite reaction), this downward push of air results in an upward force on the kite.
The key aerodynamic principles at play include:
- Lift: The upward force that keeps the kite in the air. Lift is primarily generated by the difference in air pressure above and below the kite’s surface.
- Drag: The force that opposes the kite’s motion through the air. While some drag is inevitable, minimizing it helps the kite fly more efficiently.
- Angle of Attack: The angle between the kite’s surface and the oncoming wind. A proper angle of attack is essential for generating lift. Too steep, and the kite stalls; too shallow, and it won’t catch enough wind.
- Wind Speed: The speed of the wind directly impacts the lift and drag forces. Different kite designs are suited for different wind conditions.
According to a study from Embry-Riddle Aeronautical University, lift can be optimized by carefully designing the kite’s sail and bridle points. A well-designed kite will naturally adjust its angle of attack to maximize lift and maintain stable flight.
To make your paper kite fly successfully, consider these principles when designing and building it. Experiment with different shapes, sizes, and bridle configurations to find what works best for you.
 MBK Minimum Tetra Kite
2. Gathering Your Supplies: What You Need to Build a Paper Kite
Ready to learn how to make a paper kite that flies? Gathering the right supplies is the first step towards creating a successful flying machine. Fortunately, paper kites require very few materials, most of which you probably already have at home.
Here’s a comprehensive list of what you’ll need:
- Paper: Lightweight paper such as printer paper (A4 or Letter size) is ideal. Construction paper or newspaper can also be used, but they may affect the kite’s performance due to their weight and texture.
- Scissors: For cutting the paper into the desired shape. Ensure they are sharp enough for clean cuts.
- Tape: Clear adhesive tape or masking tape will be used to reinforce the kite’s structure and attach the spars.
- Ruler: A ruler or straight edge will help you make accurate measurements and straight folds.
- String or Twine: This will serve as the kite’s flying line. Polyester sewing thread, as mentioned by My Best Kite, works well for smaller kites.
- Skewers or Dowels (for Spars): Lightweight wooden or bamboo skewers, or thin dowels, will provide the necessary support for the kite’s frame.
- Glue (Optional): For extra reinforcement, especially when attaching spars.
- Markers, Crayons, or Paint (for Decoration): To personalize your kite with colors and designs.
According to the FAA, using lightweight materials is crucial for ensuring that your kite can catch the wind and achieve lift. Avoid using heavy paper or overly thick spars, as this can weigh the kite down and prevent it from flying.
Once you have gathered these supplies, you’ll be ready to start constructing your paper kite. Remember that the quality of your materials will affect the kite’s durability and performance, so choose wisely.
3. Step-by-Step Guide: Crafting a Simple Diamond Paper Kite
Want to know specifically how to make a paper kite that flies? A diamond kite is a classic, easy-to-make design that’s perfect for beginners. Follow these steps to create your own diamond paper kite:
Step 1: Prepare the Paper
- Start with a rectangular sheet of paper. Fold it in half lengthwise to create a crease down the center. This will serve as a guide for symmetry.
Step 2: Cut the Diamond Shape
- Open the paper and draw a diamond shape using the center crease as the vertical axis. The diamond should be symmetrical, with the top and bottom points aligned with the crease.
- Cut along the lines to create the diamond shape.
Step 3: Prepare the Spars
- Cut two skewers or dowels to the appropriate length. The vertical spar should be slightly longer than half the height of the kite, and the horizontal spar should be slightly shorter than half the width of the kite.
- According to kite-flying expert Will Alexander, the spars should be lightweight but sturdy enough to maintain the kite’s shape in the wind.
Step 4: Attach the Spars
- Place the vertical spar along the center crease, extending from the top point to the center of the kite. Tape it securely in place.
- Attach the horizontal spar perpendicular to the vertical spar, at the center point of the kite. Tape it securely to the vertical spar and the kite’s surface.
Step 5: Reinforce the Edges
- Reinforce the edges of the kite with tape to prevent tearing. This is especially important at the points where the spars are attached.
Step 6: Create the Bridle
- The bridle is the string that attaches to the kite and connects to the flying line. Punch two small holes on either side of the vertical spar, about one-third of the way down from the top.
- Thread a piece of string through the holes and tie it securely. Adjust the length of the bridle so that the kite balances properly when suspended.
Step 7: Attach the Flying Line
- Tie the flying line to the center of the bridle. Ensure the knot is secure.
Step 8: Add a Tail (Optional)
- A tail can help stabilize the kite, especially in stronger winds. Cut strips of paper or fabric and attach them to the bottom point of the kite.
Now that you’ve completed these steps, your diamond paper kite is ready to fly. Find an open area with a gentle breeze and enjoy watching your creation soar.
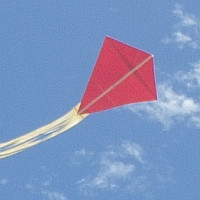 MBK Paper Diamond kite
4. Advanced Techniques: Building More Complex Paper Kite Designs
Interested in how to make a paper kite that flies but is more intricate? Once you’ve mastered the basic diamond kite, you can explore more complex designs that offer improved performance and visual appeal.
Here are a few advanced techniques to consider:
- Delta Kites: Delta kites are known for their stability and ability to fly in a wide range of wind conditions. They feature a triangular shape with a keel that runs along the center.
- Rokkaku Kites: Rokkaku kites are six-sided kites that are popular in Japanese kite-fighting traditions. They require more intricate spar construction but offer excellent stability and maneuverability.
- Sled Kites: Sled kites are simple, frameless kites that are easy to make and fly. They consist of a rectangular sail with vertical folds that provide stability.
- Box Kites: Box kites are three-dimensional kites that offer high lift and stability. They require more precise construction but can perform well in strong winds.
When building more complex designs, pay close attention to the kite’s geometry and spar placement. Accurate measurements and secure connections are essential for ensuring that the kite flies properly.
According to research from the International Kite Flying Association (IKFA), experimenting with different materials and construction techniques can significantly improve a kite’s performance. Consider using ripstop nylon or polyester fabric for the sail, and carbon fiber or fiberglass rods for the spars.
Remember to test your kite thoroughly in various wind conditions and make adjustments as needed. With patience and practice, you can create stunning and high-performing paper kites that will impress both yourself and others.
5. Troubleshooting: Common Problems and Solutions for Paper Kites
Even with careful construction, paper kites can sometimes encounter problems that prevent them from flying properly. Knowing how to troubleshoot common issues can help you get your kite airborne.
Here are some common problems and their solutions:
- Kite Won’t Stay in the Air: This could be due to insufficient wind, an improper angle of attack, or a kite that is too heavy. Try flying in a stronger breeze, adjusting the bridle points, or reducing the kite’s weight by using lighter materials.
- Kite Dives or Spins: This is often caused by an unbalanced kite. Check that the spars are symmetrically placed and securely attached. Adjust the bridle points to balance the kite.
- Kite Tears Easily: This could be due to weak paper or insufficient reinforcement. Use stronger paper or reinforce the edges of the kite with tape.
- Flying Line Breaks: This is usually caused by a weak or frayed flying line. Use a stronger line and check it regularly for wear and tear.
- Kite Is Unstable in Gusty Winds: This can be addressed by adding a tail to the kite. The tail provides additional drag and helps stabilize the kite in turbulent conditions.
According to experienced kite maker Susan Wagner, “A well-balanced kite is key to successful flight. Pay attention to the symmetry and weight distribution of your kite, and make adjustments as needed.”
When troubleshooting, start by checking the most obvious issues first, such as wind conditions and bridle adjustments. If the problem persists, examine the kite’s structure and materials for any defects. With a systematic approach, you can identify and resolve most common kite-flying problems.
6. Decorating Your Kite: Personalizing Your Creation
Learning how to make a paper kite that flies is great, but decorating your kite is a fantastic way to express your creativity and make your kite stand out in the sky. Here are some ideas for personalizing your paper kite:
- Coloring: Use markers, crayons, or paint to add colors and patterns to your kite. Consider using bright, contrasting colors that will be visible from a distance.
- Drawings: Draw pictures, symbols, or words on your kite. You can create a theme, such as nature, animals, or geometric designs.
- Collage: Cut out shapes from colored paper or fabric and glue them onto your kite. This is a great way to add texture and visual interest.
- Streamers: Attach streamers made from ribbon, crepe paper, or plastic to the kite’s tail. Streamers add movement and color to the kite’s flight.
- Reflective Materials: Use reflective tape or glitter to make your kite sparkle in the sunlight. This is especially effective for kites that are flown in the evening.
When decorating your kite, be mindful of the added weight. Heavy decorations can affect the kite’s performance. Use lightweight materials and apply them sparingly.
According to art educator Mary Johnson, “Decorating a kite is a wonderful way to engage children in art and science. Encourage them to experiment with different colors, patterns, and materials to create their own unique flying masterpiece.”
Remember to let your creativity soar and have fun with the decorating process. Your personalized kite will not only be a source of enjoyment but also a reflection of your artistic expression.
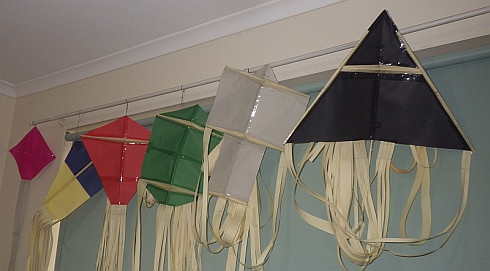 How to make paper kites – MBK Paper Series kites
7. Flying Your Kite: Tips and Tricks for a Successful Flight
Eager to learn how to make a paper kite that flies successfully? Flying your kite is the culmination of all your hard work. Here are some tips and tricks for a successful and enjoyable kite-flying experience:
- Choose the Right Location: Select an open area that is free from trees, power lines, and other obstructions. Parks, beaches, and large fields are ideal.
- Check the Wind Conditions: Look for a steady, moderate breeze. Avoid flying in strong winds or during thunderstorms.
- Launch the Kite: Hold the kite up to the wind and let out some flying line. As the wind catches the kite, release it gently and continue to let out line as needed.
- Adjust the Bridle: If the kite is not flying properly, adjust the bridle points to change the angle of attack. Move the bridle up to make the kite climb higher, or down to make it fly more horizontally.
- Avoid Tangled Lines: Keep the flying line taut and avoid letting it get tangled. If the line does tangle, stop flying and untangle it before continuing.
- Be Aware of Your Surroundings: Pay attention to other people, animals, and objects in the area. Avoid flying the kite too close to roads or buildings.
According to the National Weather Service, wind speeds between 6 and 25 miles per hour are ideal for most kites. Always check the weather forecast before flying your kite.
Remember to be patient and persistent. Kite flying can be challenging, but with practice and perseverance, you’ll be able to master the art of soaring through the sky.
8. Paper Kite Variations: Exploring Different Designs
Want to know how to make a paper kite that flies in a variety of styles? The diamond kite is just the beginning. There are many other paper kite variations to explore, each with its own unique characteristics and flying capabilities.
Here are a few popular paper kite designs:
- Sled Kite: A simple, frameless kite that is easy to make and fly. It consists of a rectangular sail with vertical folds that provide stability.
- Delta Kite: A triangular kite with a keel that runs along the center. Delta kites are known for their stability and ability to fly in a wide range of wind conditions.
- Rokkaku Kite: A six-sided kite that is popular in Japanese kite-fighting traditions. Rokkaku kites require more intricate spar construction but offer excellent stability and maneuverability.
- Parafoil Kite: A soft kite that is inflated by the wind. Parafoil kites are lightweight and easy to pack, making them ideal for travel.
Each of these designs offers a different flying experience. Experiment with different shapes, sizes, and materials to find the paper kite that best suits your preferences and flying conditions.
According to kite designer Michael Ricci, “The key to a successful kite design is to balance lift, drag, and stability. Each of these factors must be carefully considered to create a kite that flies well.”
By exploring different paper kite variations, you can expand your kite-making skills and discover the endless possibilities of this fascinating hobby.
9. The Science of Kites: Educational Aspects of Kite Flying
Learning how to make a paper kite that flies isn’t just fun; it’s educational. Kite flying offers a hands-on way to learn about science, technology, engineering, and mathematics (STEM) concepts.
Here are some of the educational aspects of kite flying:
- Aerodynamics: Kites demonstrate the principles of lift, drag, and angle of attack. By experimenting with different kite designs, you can learn how these factors affect a kite’s flight.
- Physics: Kite flying involves concepts such as force, motion, and energy. You can explore how these concepts interact to keep a kite in the air.
- Mathematics: Kite making requires precise measurements and calculations. You can use geometry and trigonometry to design and construct kites with optimal performance.
- Engineering: Kite building is an exercise in engineering design. You must consider the materials, structure, and aerodynamics of the kite to create a successful flying machine.
According to the National Science Foundation, hands-on learning experiences like kite flying can help students develop critical thinking skills and a deeper understanding of STEM concepts.
Kite flying can be incorporated into classroom activities or used as a fun and educational family activity. Whether you’re a student, teacher, or parent, kite flying offers a unique and engaging way to explore the wonders of science and technology.
10. Safety First: Important Considerations for Kite Flying
Want to be certain of how to make a paper kite that flies safely? While kite flying is a fun and rewarding activity, it’s important to prioritize safety. Here are some important considerations for safe kite flying:
- Avoid Power Lines: Never fly a kite near power lines. If your kite gets caught in a power line, do not attempt to retrieve it. Contact the local utility company for assistance.
- Choose an Open Area: Fly your kite in an open area that is free from trees, buildings, and other obstructions.
- Be Aware of the Weather: Avoid flying kites during thunderstorms or when there is a risk of lightning.
- Use a Safe Flying Line: Use a strong, non-conductive flying line. Avoid using metal wire or fishing line, as these can conduct electricity.
- Wear Gloves: Wear gloves to protect your hands from the flying line.
- Supervise Children: Always supervise children when they are flying kites.
According to the Electrical Safety Foundation International (ESFI), contact with power lines is a leading cause of kite-flying accidents. Always be aware of your surroundings and take precautions to avoid electrical hazards.
By following these safety guidelines, you can enjoy kite flying without putting yourself or others at risk.
11. Paper Kites and Aviation: A Surprising Connection
Learning how to make a paper kite that flies may seem unrelated to aviation, but kites have played a significant role in the history of flight.
Here are some of the surprising connections between paper kites and aviation:
- Early Aviation Experiments: Pioneers of aviation, such as the Wright brothers, used kites to conduct early experiments on aerodynamics and flight control.
- Kite Balloons: During the late 19th and early 20th centuries, kite balloons were used for military reconnaissance and observation. These balloons were tethered to the ground and used kites to maintain their stability in the wind.
- Hang Gliding: Hang gliding evolved from kite flying. Early hang gliders were essentially kites that were large enough to carry a person.
According to the Smithsonian National Air and Space Museum, kites provided early aviators with a valuable tool for studying the principles of flight and developing the technologies that would eventually lead to the invention of the airplane.
Today, kite flying continues to inspire and educate people about aviation. Whether you’re a seasoned pilot or a curious beginner, kite flying offers a fun and accessible way to connect with the wonders of flight.
12. Kite Flying Around the World: Cultural Significance
Want to know how to make a paper kite that flies and is culturally significant? Kite flying is a popular pastime around the world, with a rich history and cultural significance in many countries.
Here are some examples of kite flying traditions from around the world:
- China: Kite flying has been practiced in China for thousands of years. Kites are often decorated with symbols of good luck and flown during festivals and celebrations.
- Japan: Kite flying is a popular sport in Japan, with regional variations and kite-fighting competitions.
- India: Kite flying is a major part of the Makar Sankranti festival in India. Kites are flown from rooftops and used in kite-fighting competitions.
- Indonesia: Kite flying is a popular pastime in Indonesia, with traditional kite designs and kite festivals.
According to UNESCO, kite flying is recognized as an important part of cultural heritage in many countries. Kite festivals and competitions bring communities together and celebrate the art and science of kite flying.
Whether you’re flying a kite in your backyard or participating in a kite festival, you’re connecting with a global tradition that spans cultures and generations.
13. Maintaining Your Kite: Ensuring Longevity
Learning how to make a paper kite that flies well is important, but maintaining your kite is essential for ensuring its longevity and continued performance. Here are some tips for maintaining your kite:
- Store Your Kite Properly: When not in use, store your kite in a dry, protected place. Avoid storing it in direct sunlight or in damp conditions.
- Inspect Your Kite Regularly: Before each flight, inspect your kite for any signs of damage, such as tears, broken spars, or frayed lines.
- Repair Damage Promptly: Repair any damage as soon as possible. Small tears can be repaired with tape, while broken spars may need to be replaced.
- Clean Your Kite: Clean your kite periodically to remove dirt and debris. Use a soft cloth and mild soap to gently wipe down the sail and spars.
- Replace Worn Parts: Replace worn parts, such as flying lines and bridle strings, as needed.
According to kite maintenance expert David Green, “Proper care and maintenance can significantly extend the life of your kite. Taking a few minutes to inspect and repair your kite after each flight can save you time and money in the long run.”
By following these maintenance tips, you can keep your paper kite in top condition and enjoy many years of soaring fun.
14. Kite Flying as a Hobby: Joining the Community
Once you know how to make a paper kite that flies, why not consider kite flying as a hobby? Kite flying is a rewarding and accessible hobby that can be enjoyed by people of all ages and abilities.
Here are some ways to get involved in the kite-flying community:
- Join a Kite Club: Kite clubs offer opportunities to connect with other kite enthusiasts, learn new skills, and participate in organized kite-flying events.
- Attend Kite Festivals: Kite festivals are a great way to see amazing kites, meet kite makers and flyers, and participate in kite-flying competitions.
- Take a Kite-Making Workshop: Kite-making workshops offer hands-on instruction in the art of kite design and construction.
- Share Your Passion Online: Share your kite-flying experiences and creations on social media, kite-flying forums, and online communities.
According to the American Kitefliers Association (AKA), kite flying is a hobby that promotes creativity, physical activity, and social interaction. Joining the kite-flying community can enrich your life and provide you with a lifelong source of enjoyment.
15. Frequently Asked Questions (FAQs) About Paper Kites
Still curious about how to make a paper kite that flies? Here are some frequently asked questions about paper kites:
- What is the best type of paper to use for a paper kite? Lightweight printer paper (A4 or Letter size) is ideal.
- How long should the spars be for a diamond kite? The vertical spar should be slightly longer than half the height of the kite, and the horizontal spar should be slightly shorter than half the width of the kite.
- How do I adjust the bridle on a kite? Move the bridle up to make the kite climb higher, or down to make it fly more horizontally.
- What is the best wind speed for flying a paper kite? Wind speeds between 6 and 25 miles per hour are ideal.
- How do I prevent my kite from getting tangled in power lines? Never fly a kite near power lines. If your kite gets caught in a power line, do not attempt to retrieve it. Contact the local utility company for assistance.
- Can I fly a kite in the rain? Avoid flying kites during thunderstorms or when there is a risk of lightning.
- How do I store my kite when it’s not in use? Store your kite in a dry, protected place. Avoid storing it in direct sunlight or in damp conditions.
- What is a rokkaku kite? A six-sided kite that is popular in Japanese kite-fighting traditions.
- Where can I find kite-flying events near me? Check with local kite clubs or search online for kite festivals and events in your area.
- Is kite flying a good hobby for kids? Yes, kite flying is a fun and educational hobby that can be enjoyed by people of all ages.
Ready to take your kite-flying adventures to new heights? At flyermedia.net, we provide a wealth of information on all things aviation, from flight training to aviation news. Whether you’re dreaming of becoming a pilot or simply fascinated by the world of flight, we have something for you.
Looking for the best flight schools in the USA? Want to stay up-to-date on the latest aviation news and regulations? Or perhaps you’re exploring career opportunities in the aviation industry? Flyermedia.net is your go-to source for reliable, up-to-date information.
Visit flyermedia.net today and discover the exciting world of aviation. Your journey into the skies starts here! For more information or assistance, contact us at 600 S Clyde Morris Blvd, Daytona Beach, FL 32114, United States, or call +1 (386) 226-6000.