Making a flying paper butterfly is a fun and engaging activity! At flyermedia.net, we provide detailed guides and resources to help you create your own soaring paper butterflies, blending the principles of aerodynamics with simple crafting techniques. Discover how to craft a paper butterfly that not only looks beautiful but also mimics the flight of real butterflies, enhancing your understanding of aviation principles.
1. What is a Flying Paper Butterfly and Why Make One?
A flying paper butterfly is a paper toy designed to mimic the flight of a real butterfly using basic aerodynamic principles. Making one combines art, craft, and a touch of engineering, making it an engaging activity for all ages. Beyond being a fun project, it introduces concepts of lift, drag, and thrust in an accessible way.
1.1. Benefits of Creating a Flying Paper Butterfly
Creating a flying paper butterfly has several benefits:
- Educational Value: It teaches basic principles of aerodynamics and engineering.
- Creative Expression: Offers an outlet for artistic design and customization.
- Fine Motor Skills: Improves dexterity and hand-eye coordination.
- Fun and Engaging: Provides a satisfying and entertaining activity.
According to research from the National Science Foundation, hands-on activities significantly enhance learning outcomes in STEM fields, making projects like creating flying paper butterflies valuable educational tools.
2. Who Would Be Interested in Making a Flying Paper Butterfly?
The appeal of making a flying paper butterfly spans across various interests and age groups:
- Hobbyists and Crafters: Those who enjoy DIY projects and paper crafts.
- Educators and Students: Teachers looking for interactive science projects and students interested in learning about flight.
- Parents and Children: A fun family activity that combines creativity and learning.
- Aviation Enthusiasts: Individuals interested in the basics of aerodynamics and flight.
2.1. How Does Making a Flying Paper Butterfly Connect to Aviation Interests?
While seemingly simple, making a flying paper butterfly connects to aviation interests in several ways:
- Understanding Aerodynamics: It provides a basic understanding of how wings generate lift.
- Experimentation: Encourages experimentation with different designs and materials to improve flight.
- Introduction to Engineering: Introduces basic engineering principles such as balance and thrust.
- Inspiration: Sparks interest in more complex aviation topics.
3. What Materials Are Needed to Make a Flying Paper Butterfly?
Gathering the right materials is crucial for a successful flying paper butterfly project. Here’s a comprehensive list:
- Paper: Lightweight paper such as tissue paper, origami paper, or faux rice paper.
- Wire: 22-gauge florist wire for the frame.
- Rubber Bands: Small rubber bands to power the butterfly’s flight.
- Beads: Small glass beads to hold the wire in place.
- Tools: Round-nose pliers, chain-nose pliers, scissors, and tape.
- Template: Butterfly wing template (either printed or self-made).
3.1. Where Can You Source These Materials?
These materials are readily available from various sources:
- Craft Stores: Stores like Michaels or Hobby Lobby offer a wide range of paper, wire, and beads.
- Online Retailers: Amazon provides convenient access to all necessary materials.
- Local Hardware Stores: Florist wire and pliers can be found at local hardware stores.
- Dollar Stores: Budget-friendly options for paper and rubber bands.
 Supplies for the butterflies.
4. How Do You Construct the Wire Frame for the Butterfly?
The wire frame is the backbone of the flying paper butterfly, providing structure and support for the wings and rubber band mechanism.
4.1. Step-by-Step Guide to Creating the Wire Frame:
- Cut the Wire: Cut one piece of wire 4 inches long for the top wings and another piece 5-1/2 inches long for the bottom wings.
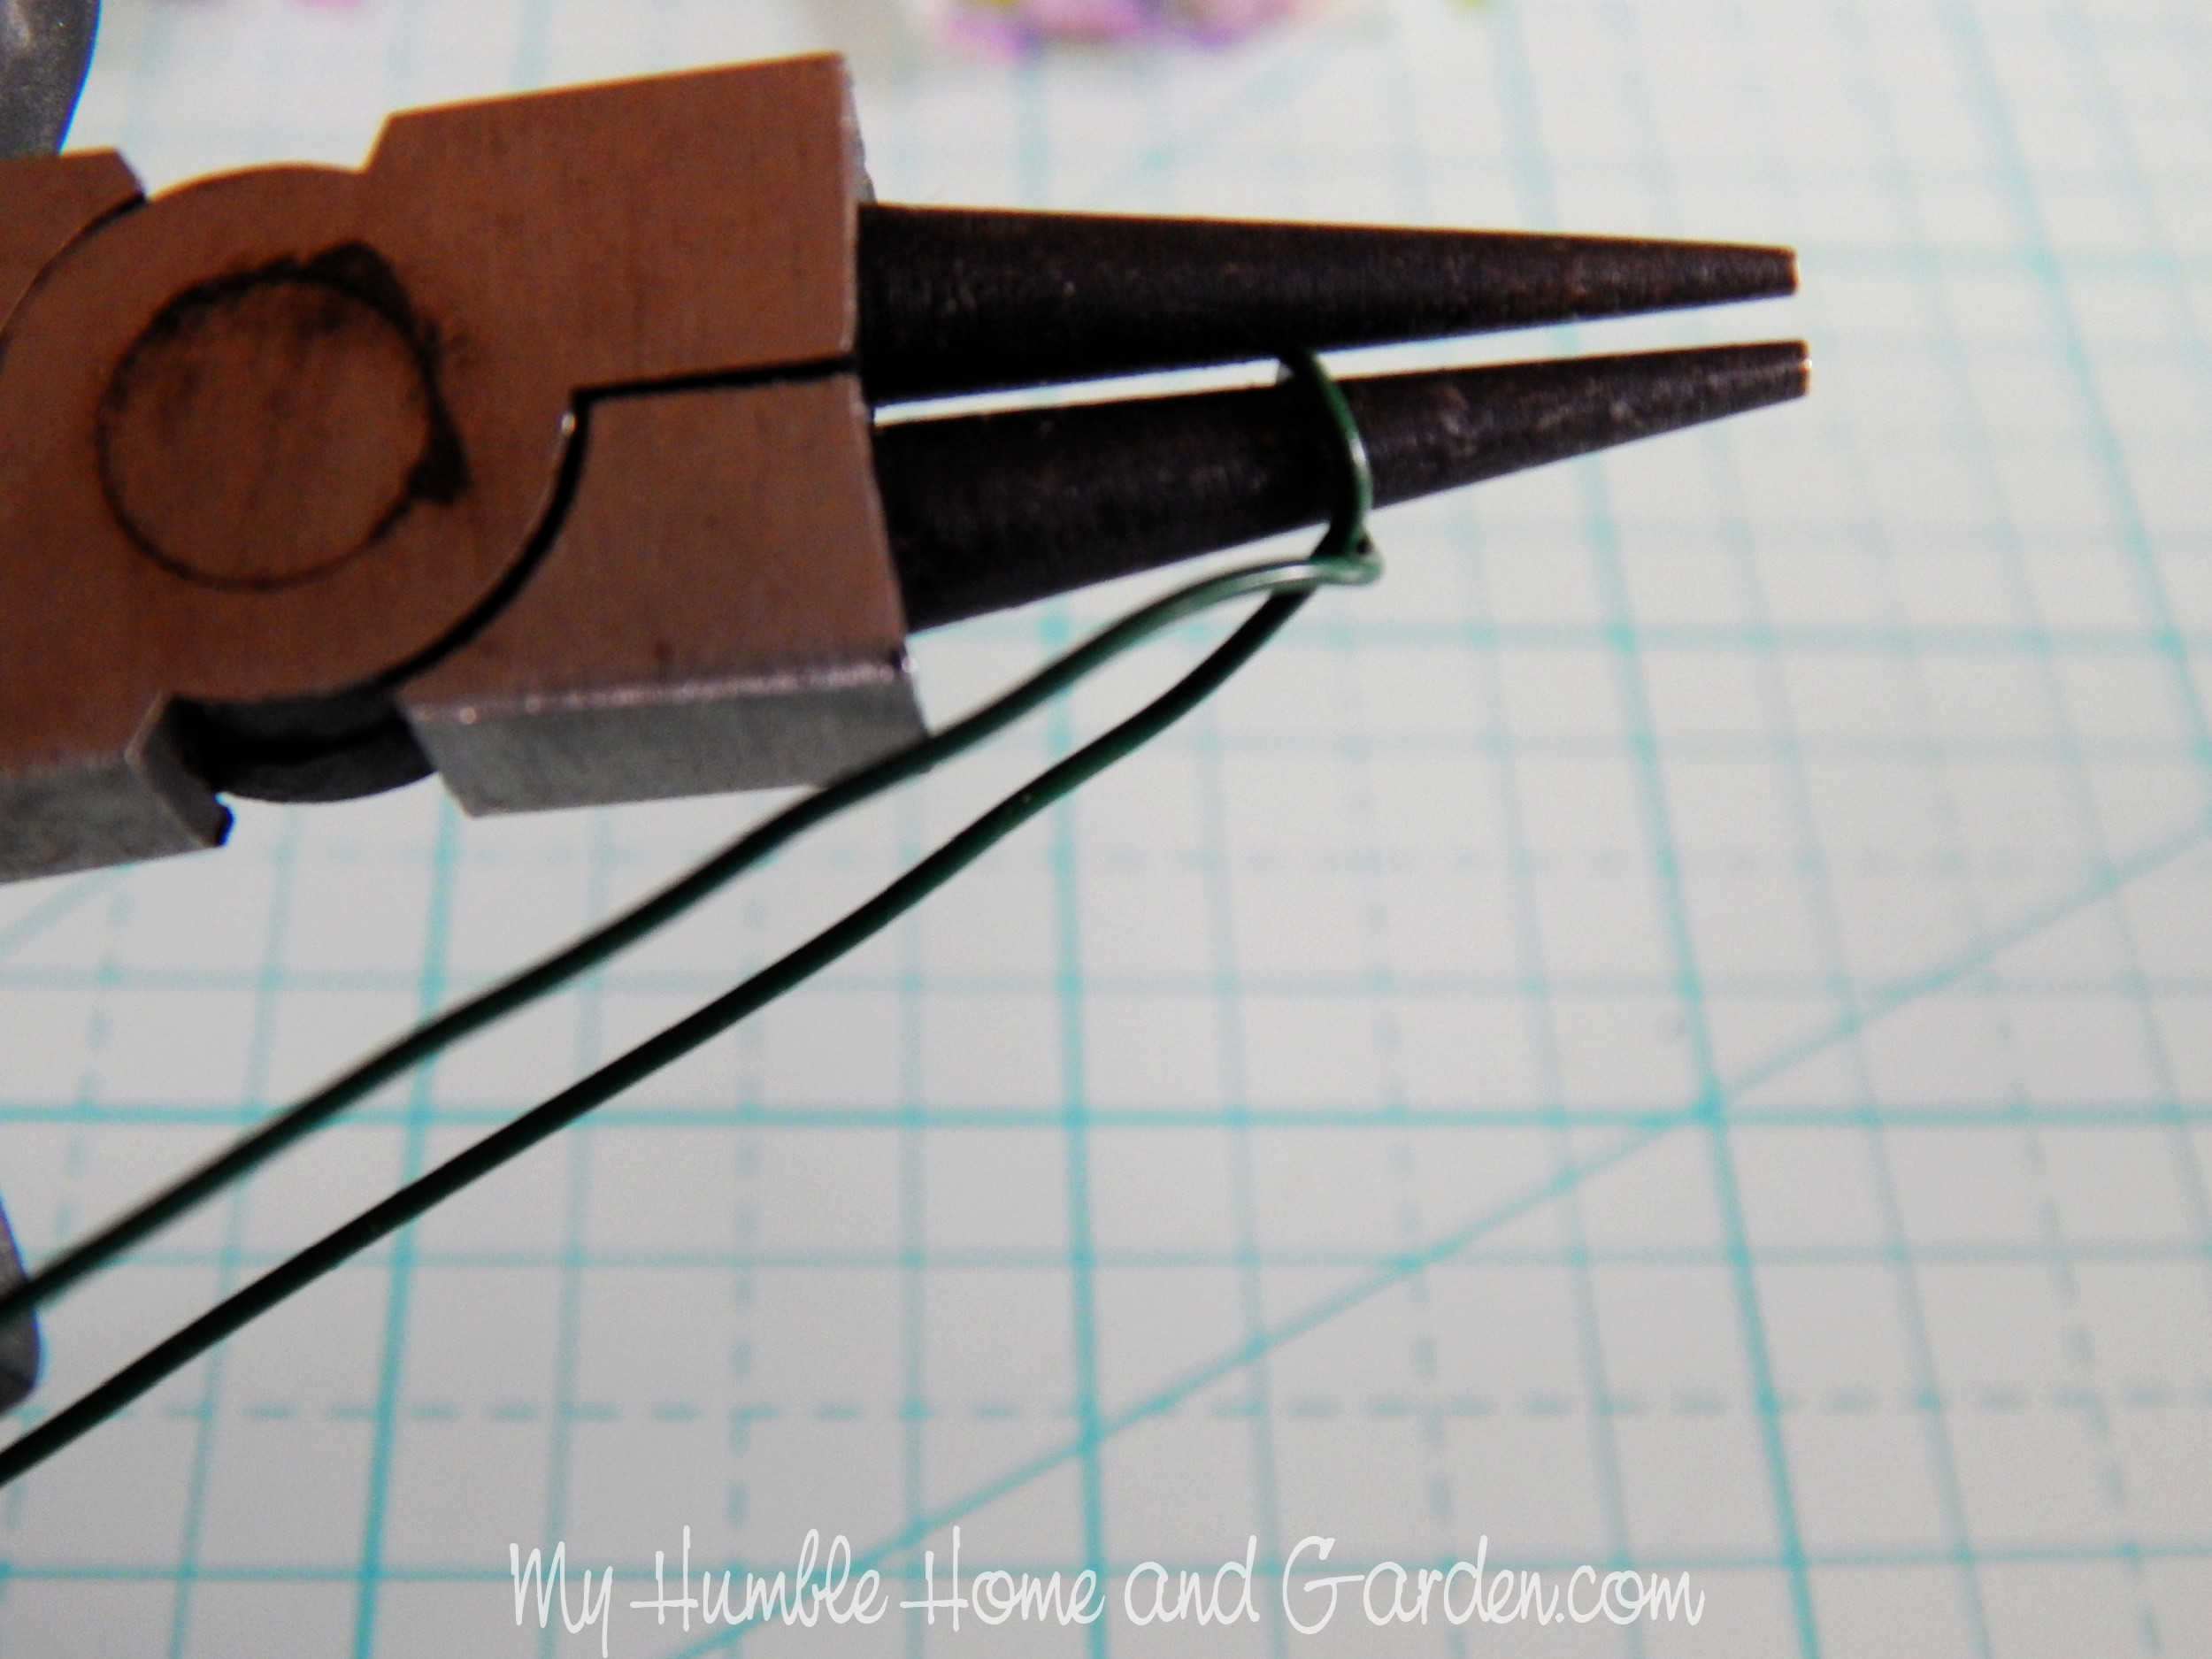
- Form a Loop (Bottom Wings): Find the center of the 5-1/2 inch wire and use round-nose pliers to form a loop.
- Bend the Tails Down: Keep the loop horizontal and bend the tails of the wire down so they are vertical.
- Create J-Hooks: Use round-nose pliers to bend the tip of each tail outward to form a loop and then inward to form two J-hooks facing each other.
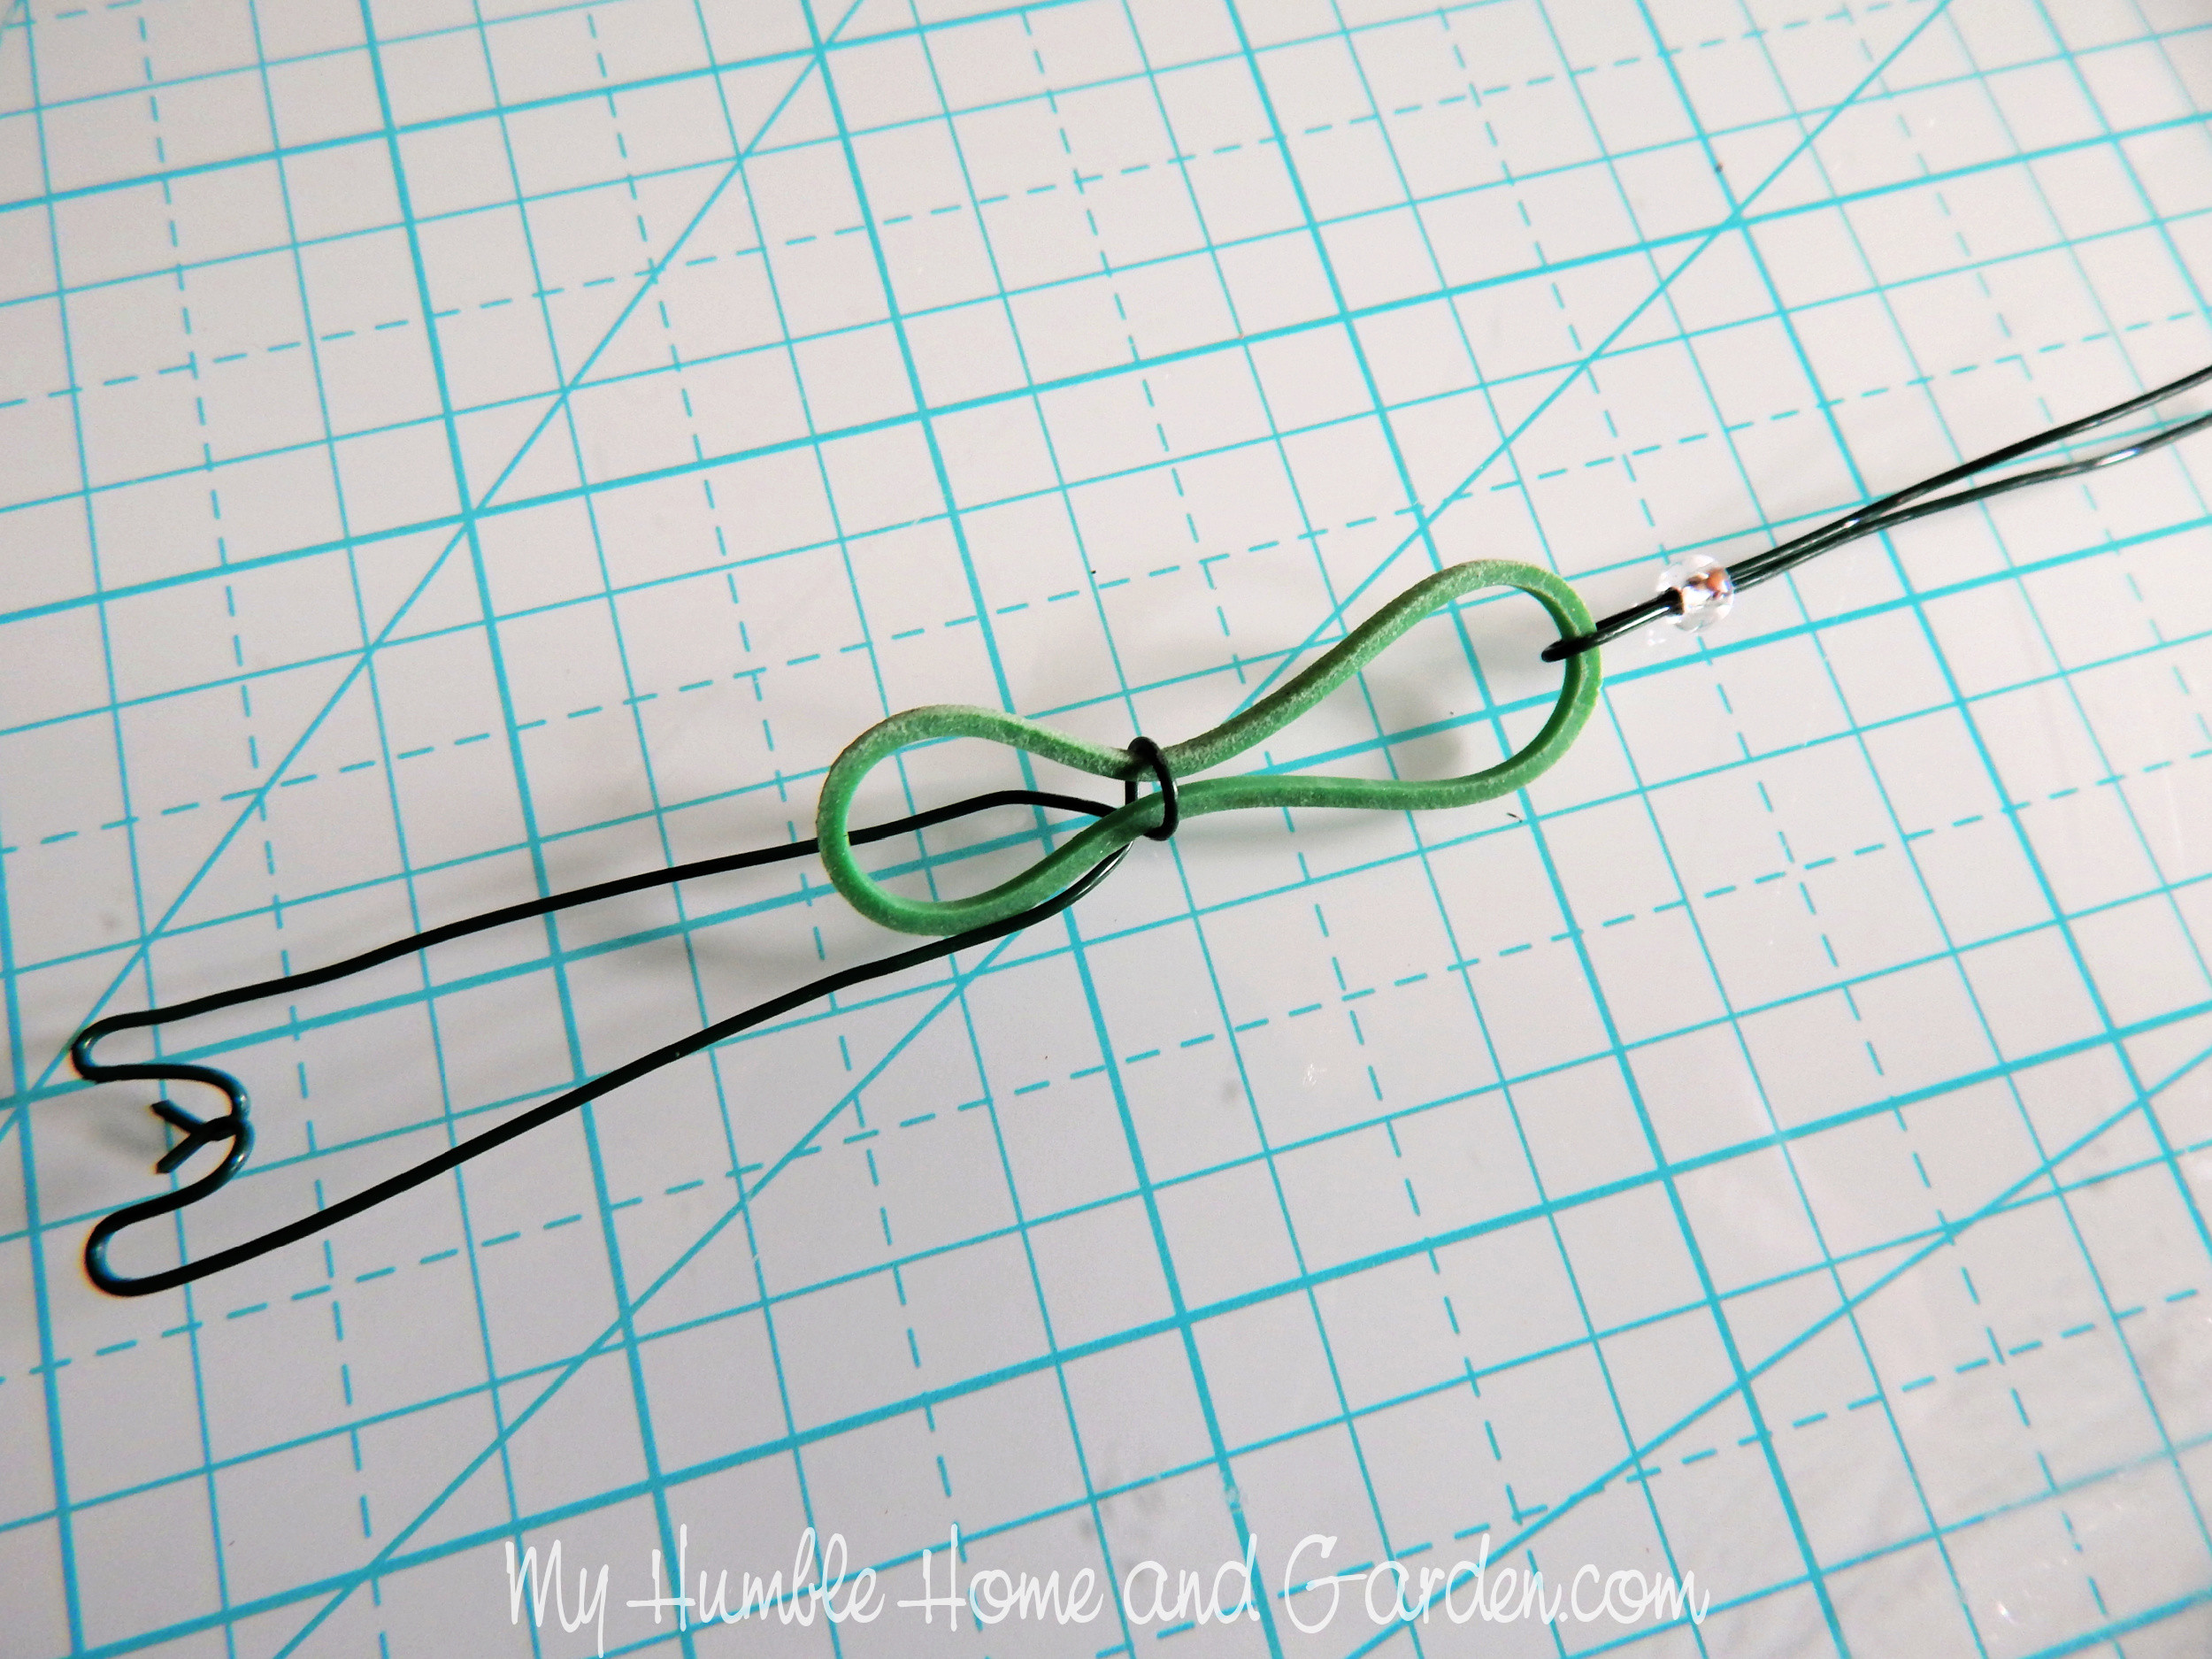
- Shape the Upper Wings: Find the center of the 4-inch wire and bend it in half to create a hairpin shape.
- Attach the Bead: Thread a bead onto the ends of the hairpin-shaped wire.
 How to Make a Wind-Up Paper Flying Butterfly
4.2. Tips for Working with Wire
- Use the Right Tools: Round-nose and chain-nose pliers are essential for shaping the wire.
- Be Careful: Avoid bending the wire too sharply, as it can weaken and break.
- Secure the Loops: Ensure the loops are tightly closed to prevent the rubber band from slipping off.
5. What is the Best Way to Attach the Rubber Band?
The rubber band provides the power for the butterfly’s flight. Proper attachment is crucial for optimal performance.
5.1. Step-by-Step Guide to Attaching the Rubber Band:
- Loop Through the Top Wire: Loop the rubber band onto the hairpin-shaped wire (top wings).
- Attach to Bottom Hooks: Pull the rubber band through the loop on the bottom wire and attach the rubber band to the loops at the end of the J-hooks.
- Secure the Connection: Ensure the rubber band is securely attached to both the top and bottom wires.
 How to Make a Wind-Up Paper Flying Butterfly
5.2. Troubleshooting Rubber Band Issues:
- Rubber Band Slipping: Ensure the loops on the wire frame are tight enough to hold the rubber band securely.
- Rubber Band Breaking: Use high-quality rubber bands and avoid over-winding.
- Insufficient Power: Try using a slightly thicker rubber band for more power.
6. How Do You Create and Attach the Paper Wings?
The paper wings give the butterfly its aesthetic appeal and contribute to its flight.
6.1. Creating the Wings:
- Use a Template: Use a pre-made template or create your own butterfly wing design.
- Cut the Wings: Cut out two top wings and two bottom wings from lightweight paper.
- Consider Paper Type: Faux rice paper or origami paper works best due to its lightweight and flexibility.
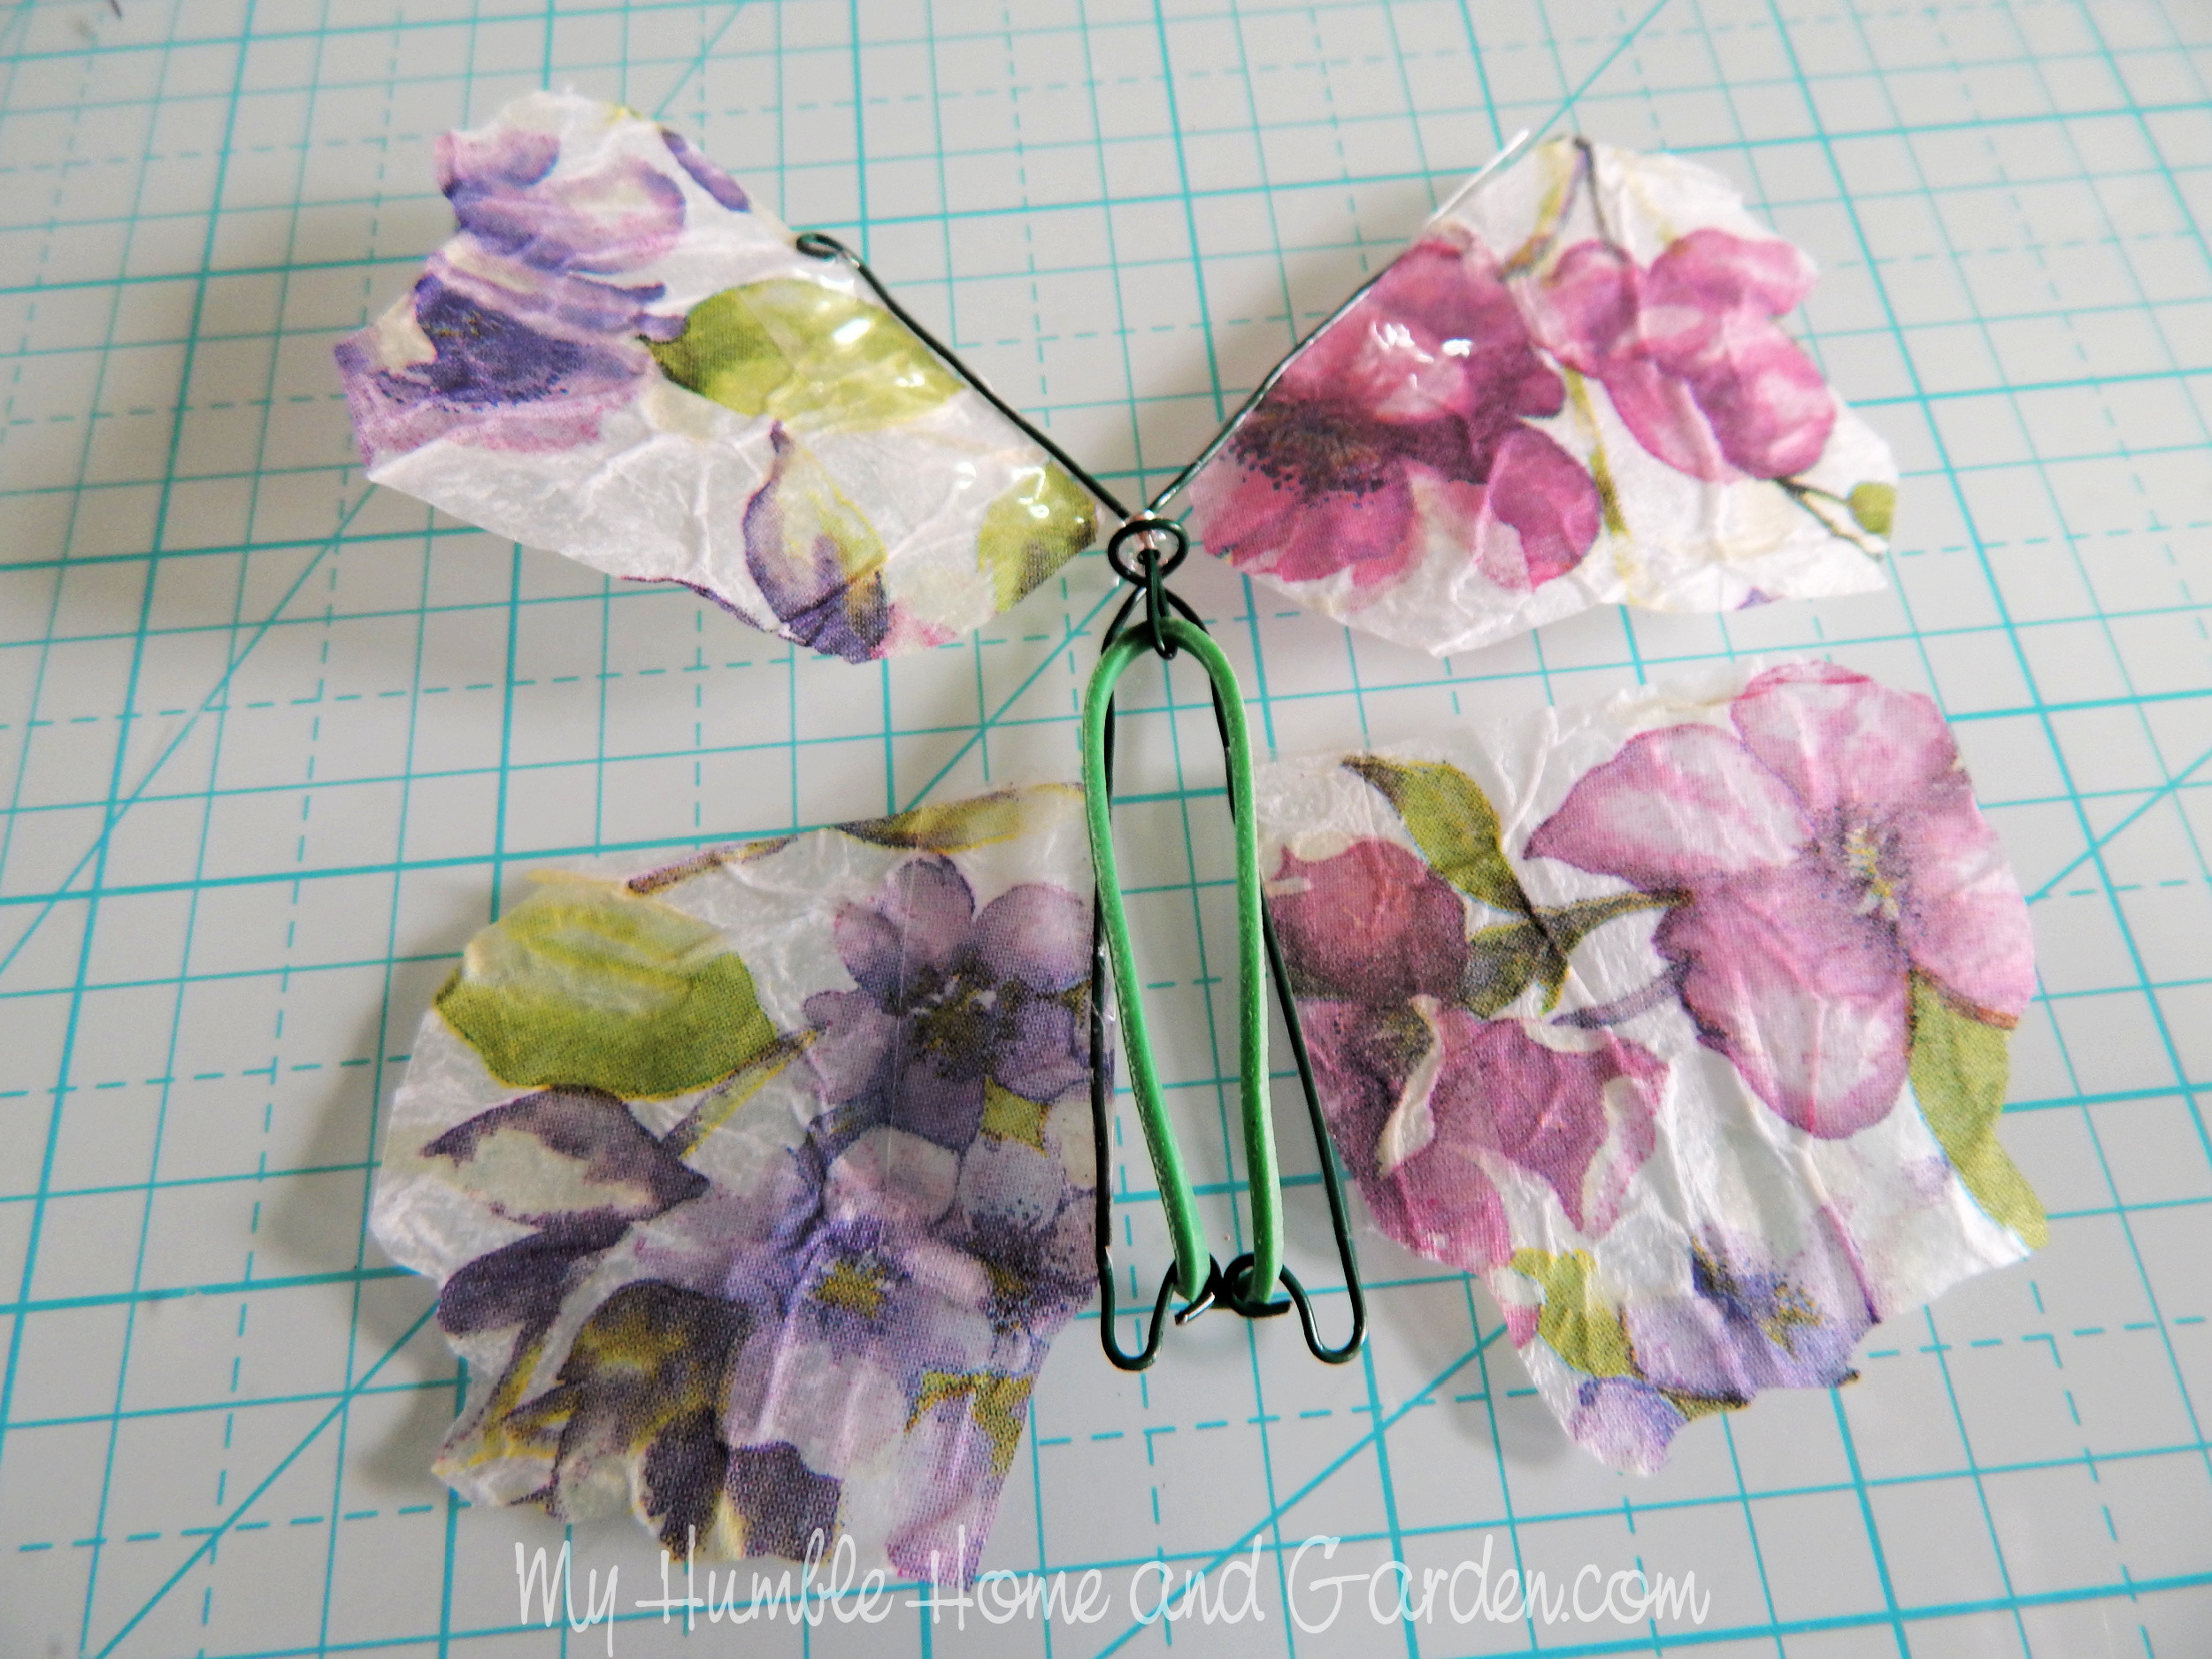
6.2. Attaching the Wings:
- Use Tape: Secure each wing to the wire frame using Scotch tape.
- Position the Wings: Tape the top wires to the top edge of the upper wings and the bottom wires to the inner edge of the bottom wings.
- Angle the Top Wires: Angle the top wires so that the top wings do not hit against the bottom wings.
 How to Make a Wind-Up Paper Flying Butterfly
6.3. Tips for Wing Design:
- Experiment with Shapes: Try different wing shapes to see how they affect flight.
- Add Decoration: Use markers, paint, or glitter to decorate the wings.
- Consider Weight: Use lightweight materials to ensure the butterfly can fly easily.
7. How Many Rotations Are Needed to Wind Up the Butterfly?
Winding up the rubber band stores the energy needed for the butterfly to fly. The number of rotations is crucial for achieving optimal flight.
7.1. Step-by-Step Guide to Winding the Butterfly:
- Hold the Body: Hold the butterfly body with one hand.
- Turn the Top Wings: Use your forefinger on your other hand to turn the top wings, winding up the rubber band.
- Count the Rotations: Aim for about 35-50 rotations to get it tight.
- Avoid Over-Winding: Be careful not to over-wind, as this can snap the rubber band or bend the wire.
7.2. Tips for Winding:
- Listen to the Rubber Band: If you hear the rubber band straining, stop winding.
- Test Flights: Experiment with different numbers of rotations to find the optimal amount for your butterfly.
- Gentle Winding: Wind the rubber band smoothly and evenly to avoid damaging it.
8. What Adjustments Can Be Made for Better Flight Performance?
Achieving the perfect flight requires fine-tuning and adjustments.
8.1. Common Issues and Solutions:
- Butterfly Doesn’t Fly:
- Issue: Insufficient winding.
- Solution: Wind the rubber band more times.
- Issue: Wings are too heavy.
- Solution: Use lighter paper or reduce the size of the wings.
- Issue: Rubber band is too weak.
- Solution: Replace with a stronger rubber band.
- Butterfly Flies Erratically:
- Issue: Wings are unevenly attached.
- Solution: Adjust the position of the wings to ensure they are balanced.
- Issue: Wire frame is bent.
- Solution: Straighten the wire frame to ensure it is symmetrical.
- Butterfly Doesn’t Fly Far:
- Issue: Insufficient power.
- Solution: Use a slightly thicker rubber band.
- Issue: Aerodynamic drag.
- Solution: Streamline the wing shape and reduce any unnecessary weight.
8.2. Aerodynamic Principles to Consider:
- Lift: The upward force that allows the butterfly to fly. Larger wings create more lift.
- Drag: The resistance of the air against the butterfly. Streamlined wings reduce drag.
- Thrust: The force that propels the butterfly forward. The rubber band provides the thrust.
- Weight: The force of gravity pulling the butterfly down. Lighter materials reduce weight.
According to Embry-Riddle Aeronautical University, optimizing these four factors is essential for achieving stable and efficient flight in any aircraft, including paper butterflies.
9. How Can You Customize Your Flying Paper Butterfly?
Customization adds a personal touch to your flying paper butterfly, making each one unique.
9.1. Creative Ideas for Customization:
- Wing Design: Experiment with different wing shapes, patterns, and colors.
- Paper Type: Use different types of paper to achieve various textures and visual effects.
- Decoration: Add glitter, paint, or markers to decorate the wings.
- Bead Selection: Choose beads of different colors and sizes to add visual interest.
- Rubber Band Color: Use colored rubber bands for a fun and vibrant look.
 How to Make a Wind-Up Paper Flying Butterfly
9.2. Examples of Unique Designs:
- Monarch Butterfly: Mimic the distinctive orange and black patterns of a Monarch butterfly.
- Blue Morpho: Create iridescent blue wings inspired by the Blue Morpho butterfly.
- Fantasy Butterfly: Design wings with unique shapes and colors, incorporating elements of fantasy and imagination.
10. Where Can You Find More Resources and Inspiration?
Expanding your knowledge and finding inspiration can enhance your flying paper butterfly projects.
10.1. Online Resources:
- flyermedia.net: Offers a wealth of information on aviation, including articles on aerodynamics and flight principles.
- Instructables: Provides detailed tutorials on making various types of paper butterflies.
- YouTube: Features numerous videos demonstrating how to construct and fly paper butterflies.
- Pinterest: Offers a vast collection of images and ideas for butterfly wing designs and decorations.
10.2. Books and Publications:
- “The Art of Paper Airplanes” by Arthur Okamura: Includes principles of flight and design applicable to paper butterflies.
- “Origami Design Secrets” by Robert J. Lang: Explores the mathematical principles behind origami, which can be applied to paper butterfly design.
10.3. Communities and Workshops:
- Local Craft Groups: Join local craft groups to share ideas and learn from others.
- Science Museums: Attend workshops and events at science museums to learn about aerodynamics and flight.
- Online Forums: Participate in online forums and communities dedicated to paper crafts and aviation.
FAQ: Making Your Paper Butterfly Soar
1. What type of paper works best for a flying paper butterfly?
Lightweight paper such as tissue paper, origami paper, or faux rice paper is ideal because it reduces the overall weight, allowing for better flight.
2. How do I prevent the rubber band from breaking when winding the butterfly?
Avoid over-winding the rubber band and use high-quality rubber bands. Wind it smoothly and evenly to prevent strain.
3. What can I do if my paper butterfly doesn’t fly?
Ensure the wings are lightweight and properly angled. Check that the rubber band is securely attached and wind it sufficiently. Also, make sure the wire frame is not bent or damaged.
4. How many times should I wind the rubber band for optimal flight?
Aim for about 35-50 rotations, but experiment to find the optimal amount for your specific butterfly design.
5. Can I use different types of wire for the frame?
Yes, but 22-gauge florist wire is recommended because it is lightweight yet sturdy enough to hold its shape.
6. How do I decorate the wings without affecting the butterfly’s flight?
Use lightweight decorations such as markers or very thin paint. Avoid heavy glitter or other embellishments that add too much weight.
7. What tools are essential for making a flying paper butterfly?
Round-nose pliers for shaping the wire, chain-nose pliers for holding small pieces, scissors for cutting the wings, and tape for attaching the wings to the frame.
8. Where can I find a template for butterfly wings?
You can find free templates online, create your own design, or use a pre-made template from a craft store.
9. How do I adjust the wings for better flight performance?
Ensure the wings are evenly attached and balanced. Angle the top wires so the top wings don’t hit the bottom wings.
10. Is making a flying paper butterfly suitable for children?
Yes, it’s a great activity for children, but adult supervision is recommended, especially when using tools like pliers and scissors.
Crafting a flying paper butterfly is more than just a simple DIY project; it’s an engaging way to learn about aerodynamics and engineering principles. By following the steps and tips outlined in this guide, you can create a soaring paper butterfly that captivates and educates. For more inspiration and resources, visit flyermedia.net, where you can explore a wide range of aviation-related topics and discover new opportunities in the world of flight. Whether you’re a hobbyist, educator, or aviation enthusiast, flyermedia.net is your go-to source for all things aviation.
Ready to take your aviation knowledge to new heights? Explore flyermedia.net today and discover the latest news, training programs, and career opportunities in the aviation industry. Contact us at +1 (386) 226-6000 or visit our address at 600 S Clyde Morris Blvd, Daytona Beach, FL 32114, United States. Let flyermedia.net be your guide to the skies!