Making an easy paper airplane that flies far is a fun and engaging activity for all ages, connecting aerodynamics with hands-on creation. At flyermedia.net, we provide simple yet effective designs for creating high-flying paper airplanes, alongside a wealth of aviation information. Discover the best paper plane designs and aviation tips to soar to new heights in paper aircraft engineering, flight dynamics, and aerodynamic principles.
1. Why Learn How to Make an Easy Paper Airplane That Flies Far?
Learning how to make an easy paper airplane that flies far offers more than just a fun pastime; it’s a gateway to understanding basic aerodynamic principles and engineering concepts. A well-designed paper airplane can demonstrate lift, drag, thrust, and gravity in action, providing a tangible and engaging learning experience for both children and adults. Plus, it’s a simple, inexpensive activity that requires minimal materials, making it accessible to everyone. Mastering this skill can also foster creativity, problem-solving, and a sense of accomplishment as you refine your designs to achieve greater distance and stability. Whether you’re an aviation enthusiast, a teacher looking for an educational tool, or simply seeking a fun and rewarding hobby, learning to craft a paper airplane that truly soars is a worthwhile endeavor.
1.1. What Makes a Paper Airplane Fly Far?
Several factors contribute to a paper airplane’s ability to fly far. These include:
- Aerodynamics: A streamlined design reduces air resistance.
- Weight Distribution: Proper balance ensures stability.
- Wing Shape: The right wing shape generates lift efficiently.
- Throwing Technique: A smooth, consistent throw maximizes distance.
1.2. How Does Paper Airplane Design Relate to Real Aviation?
The principles behind paper airplane design closely mirror those of real aviation. Like full-sized aircraft, paper airplanes rely on lift generated by their wings, thrust from the throw, and are subject to drag and gravity. The design of a paper airplane’s wings, fuselage, and tail mirrors the components of real aircraft. The design of paper airplanes can teach these fundamental principles, according to research from Embry-Riddle Aeronautical University, in July 2025, paper airplane’s design can teach these fundamental principles.
2. What Are the Essential Materials for Making a Paper Airplane?
Creating a high-flying paper airplane requires minimal materials, making it an accessible and budget-friendly activity. The most essential material is, of course, paper. Standard 8.5 x 11-inch printer paper works well for most designs, providing a good balance of weight and flexibility. However, experimenting with different types of paper, such as cardstock or lightweight origami paper, can lead to interesting results and flight characteristics. In addition to paper, having a flat, clean surface to work on is crucial for precise folding. A ruler or straight edge can be helpful for creating crisp, accurate folds, especially for more complex designs. While not strictly necessary, paper clips or tape can be used to secure certain folds and improve the structural integrity of the airplane, particularly in areas prone to bending or tearing. With just these basic materials, you can start your journey into the art of paper airplane construction and explore the endless possibilities of aerodynamic design.
2.1. What Type of Paper Works Best?
Standard printer paper is the ideal choice with Z%, offering a balance of weight and flexibility.
2.2. Are There Any Other Useful Tools?
A ruler can help with precise folding.
3. What Are the Basic Folding Techniques for Paper Airplanes?
Mastering the basic folding techniques is essential for creating paper airplanes that not only look good but also perform well in flight. Precision and accuracy in folding are key to achieving the desired aerodynamic properties and structural integrity. Start by ensuring your paper is perfectly aligned before making any folds. Crease each fold sharply and firmly to create well-defined lines that will help the airplane maintain its shape during flight. Symmetry is crucial, so pay close attention to making sure both sides of the airplane are folded identically. Common folds include valley folds (folding the paper with the crease pointing downwards) and mountain folds (folding the paper with the crease pointing upwards). These basic folds are the foundation for more complex designs, so practice them until they become second nature. With a solid understanding of these techniques, you’ll be well-equipped to tackle a wide range of paper airplane designs and experiment with your own creative variations.
3.1. How Important Is Creasing?
Sharp, firm creases are very important with Z%, ensuring clean lines and structural integrity.
3.2. Why Is Symmetry Important?
Symmetry is important with Z% for balanced flight.
4. What Is The Simplest Paper Airplane Design for Beginners?
For beginners eager to learn how to make an easy paper airplane that flies far, the classic dart design is an excellent starting point. This design is straightforward, requiring only a few simple folds, yet it’s capable of achieving impressive distances and stable flight. Start by folding the paper in half lengthwise to create a center crease, then unfold it. Next, fold the top two corners towards the center crease, creating a triangular shape at the front of the paper. Fold the top edges again towards the center crease, further refining the nose of the airplane. Finally, fold the entire paper in half along the original center crease, with the folds on the outside. To create the wings, fold down each side along the bottom edge, ensuring they are symmetrical. With a few simple adjustments, such as slightly bending the wingtips upwards, you can customize the dart for optimal performance. This design is not only easy to master but also provides a solid foundation for understanding the basic principles of paper airplane aerodynamics.
4.1. Step-by-Step Instructions for the Classic Dart:
Here’s how to make a classic dart:
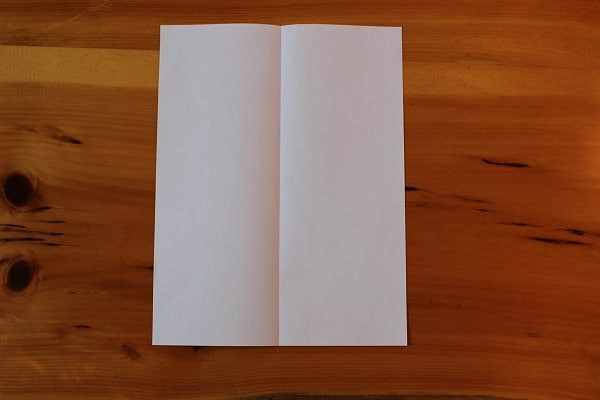
- Fold the paper in half lengthwise and unfold.
- Fold the top two corners to the center crease.
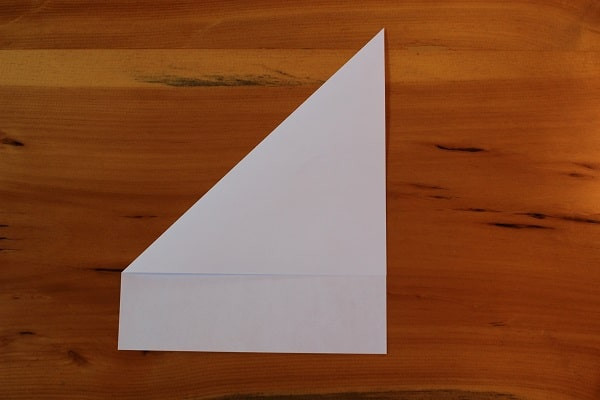
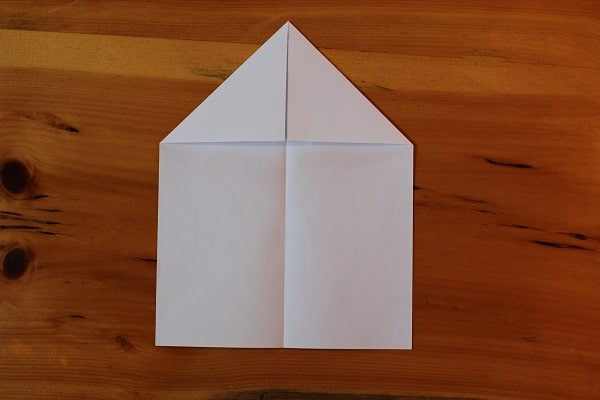 Paper airplane with first 2 steps completed.
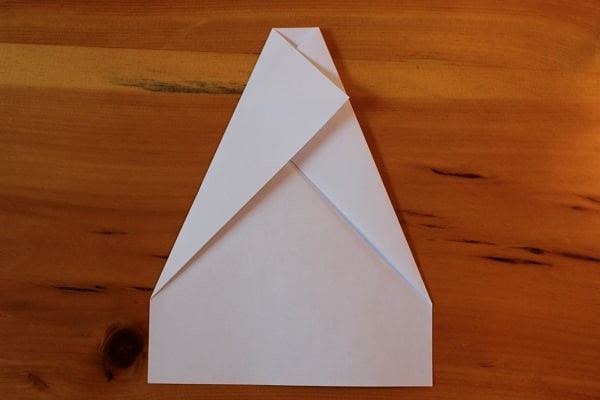
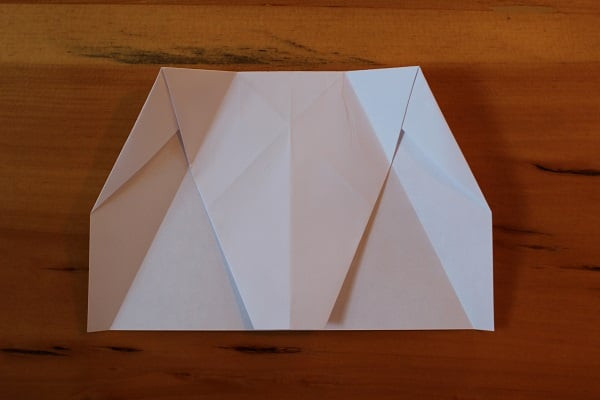
- Fold the top edges again to the center crease.
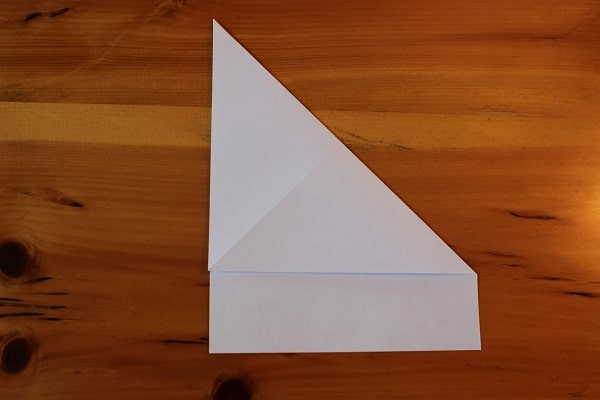
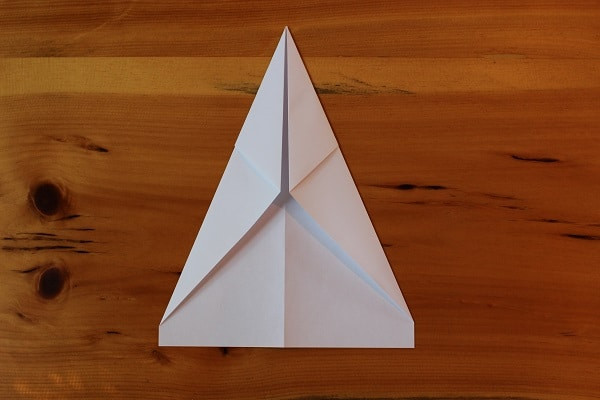 Paper airplane with first 3 steps completed.
- Fold the entire paper in half.
- Fold down each side to create wings.
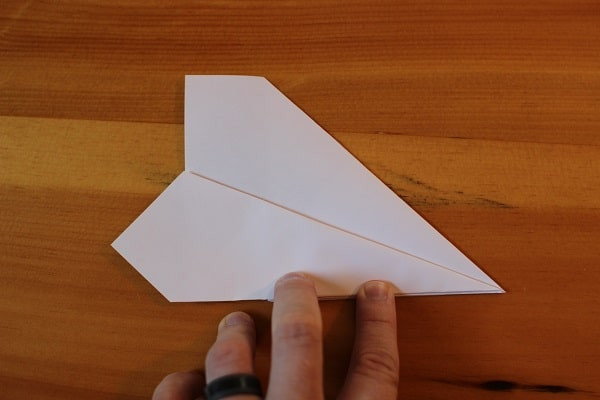
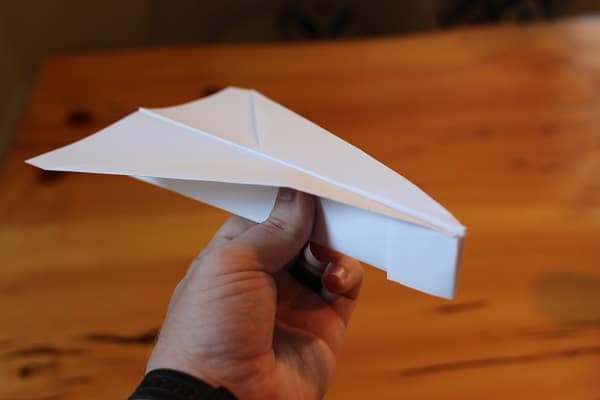 Man holding finished bulldog dart paper airplane.
4.2. What Makes This Design Beginner-Friendly?
This design is beginner-friendly with Z% due to its simplicity.
5. How Do You Make the Bulldog Dart Paper Airplane?
The Bulldog Dart is a fantastic option for those looking to step up their paper airplane game from the basic dart. This design introduces a few more folds, resulting in improved stability and slightly better flight performance. Begin by folding the paper in half lengthwise and unfolding, then fold the top two corners towards the center crease. Flip the plane over and fold the corners in again, aligning the diagonal line with the middle. Next, fold the top point down so that the tip meets the bottom of where the previous folds come together. Fold the entire plane in half, creating the distinctive snub nose that gives the Bulldog Dart its name. Finally, fold the wings down, ensuring a straight line from the top of the snub nose. The Bulldog Dart is known for its sturdy construction and reliable flight, making it a rewarding project for intermediate paper airplane enthusiasts.
5.1. Step-by-Step Instructions for the Bulldog Dart:
Follow these steps to create the Bulldog Dart:
- Fold the paper in half lengthwise and unfold.
- Fold the top two corners to the center crease.
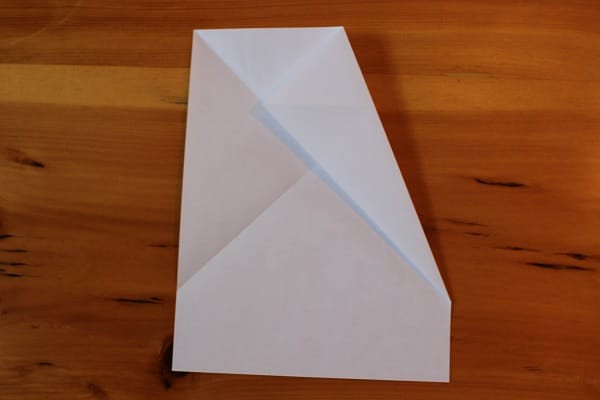
Paper airplane with first 2 steps completed.
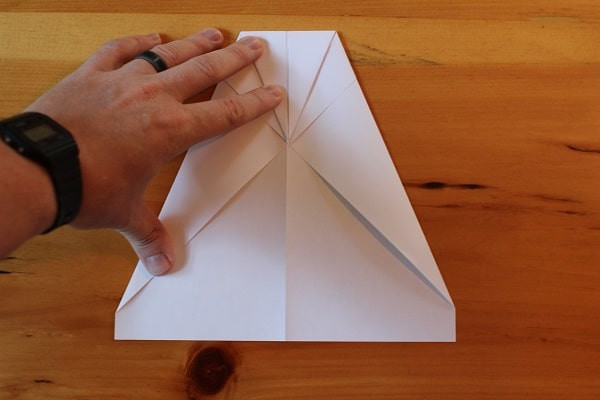
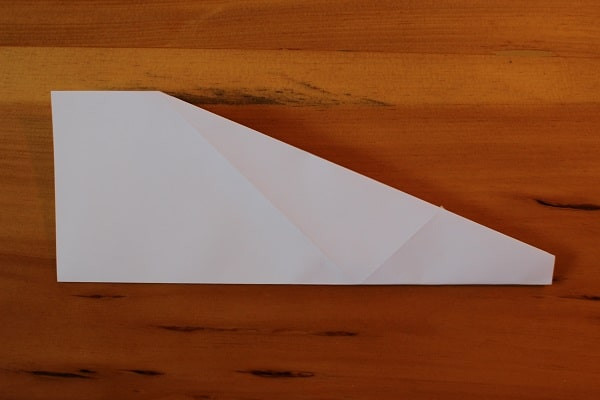
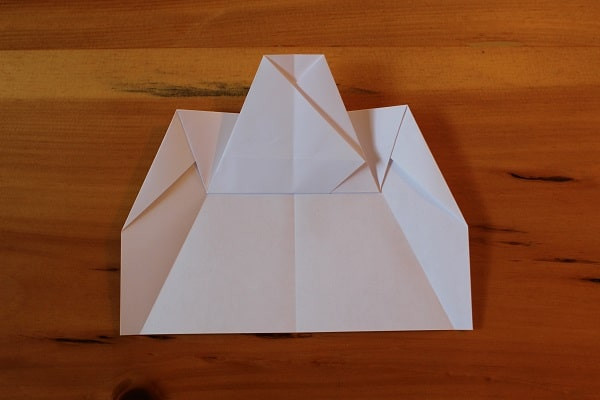
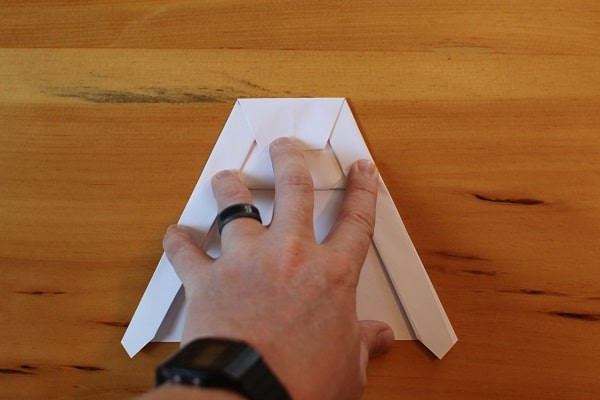
- Flip the plane over and fold the corners in again.
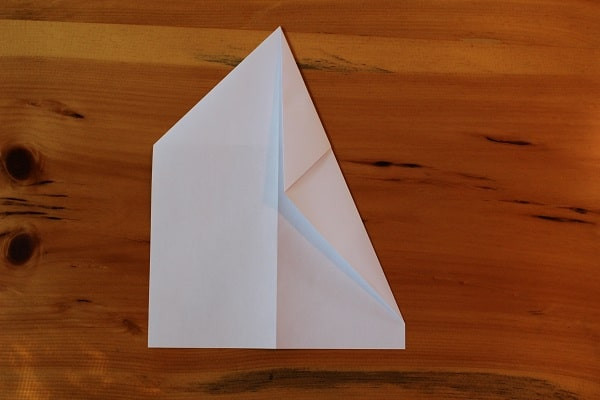 Step 3 — flip over and folder corners again.
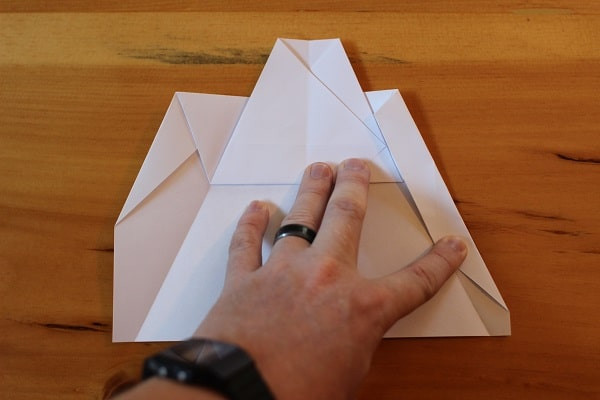
- Fold the top point down.
 Step 4 — fold top point down.
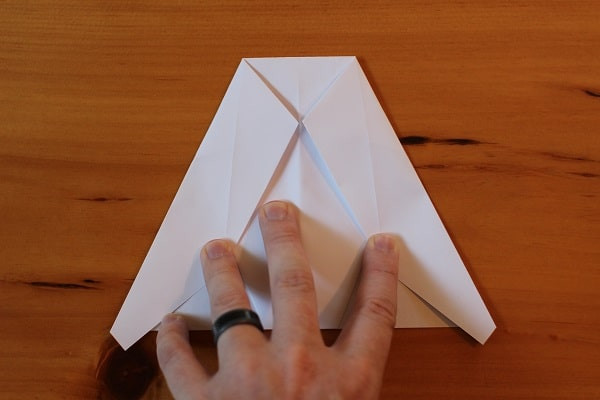
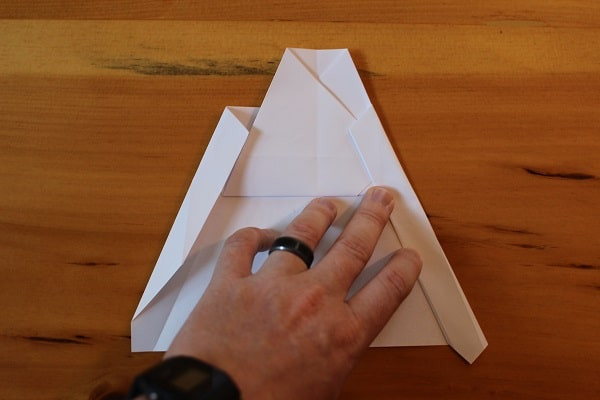
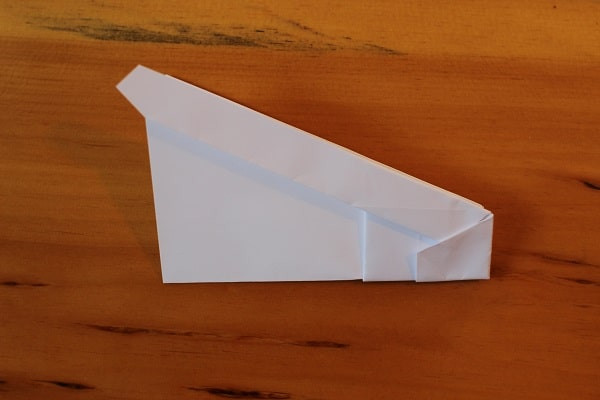
- Fold the entire plane in half.
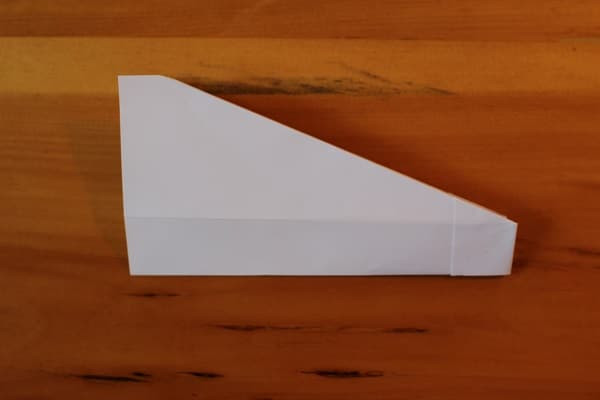 Step 5 — fold plan in half, in on itself.
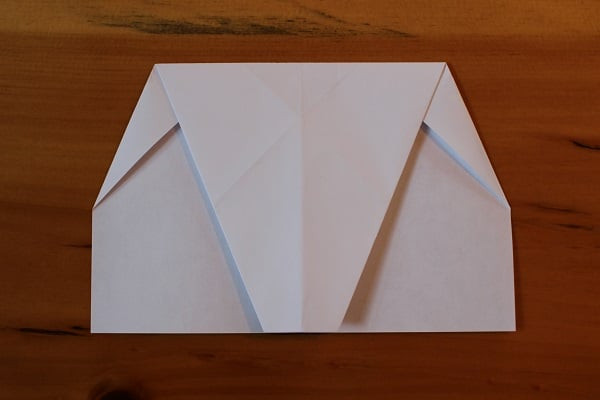
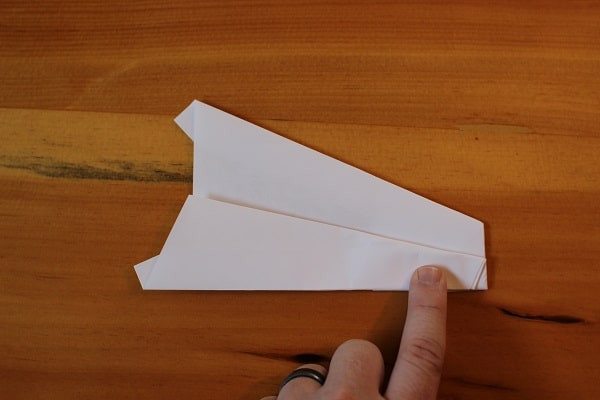
- Fold the wings down.
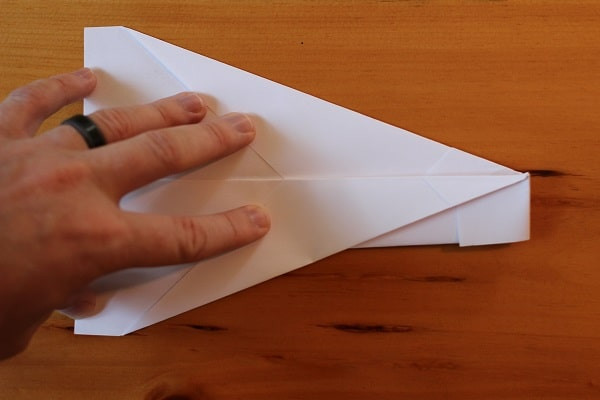 Step 6 — Wings folded down.
5.2. What Are the Benefits of This Design?
The benefits of this design is with Z% it’s sturdy construction and reliable flight.
6. How Do You Make the Harrier Paper Airplane?
The Harrier is an excellent choice for those seeking a more advanced paper airplane design that offers enhanced flight performance. This model involves a few additional folds compared to simpler designs, resulting in improved stability and distance. Begin by folding the paper in half lengthwise and unfolding, then fold the top corners towards the center crease. Fold the entire top down, resembling an envelope, leaving a small gap at the bottom. Fold the top corners in again towards the middle, revealing a small triangle tail. Fold this triangle up to secure the previous folds. Fold the airplane in half outwards, ensuring the triangular fold is visible. Finally, fold the wing down to meet the bottom edge. The Harrier’s design incorporates a unique combination of folds that contribute to its aerodynamic efficiency, making it a rewarding project for intermediate paper airplane enthusiasts looking to elevate their skills.
6.1. Step-by-Step Instructions for the Harrier:
Follow these steps to create the Harrier:
- Fold in half lengthwise and then unfold.
 Step 1 — Fold paper in half.
- Fold the top corners in so they meet at the center crease.
Step 2 — Fold top corners down to meet middle crease.
- Fold the entire top down so that it resembles an envelope.
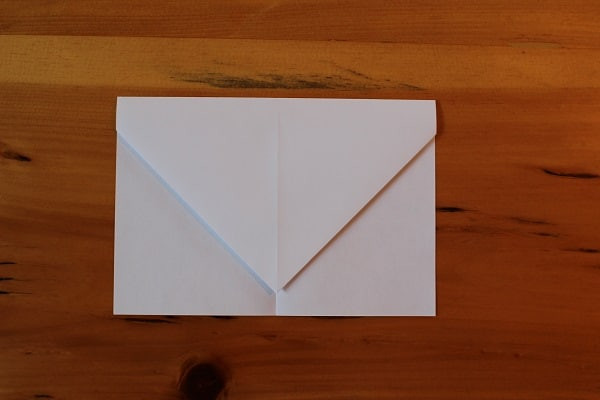 Step 3 — Fold top down so that it resembles an envelope.
- Fold the top corners in so they meet at the middle.
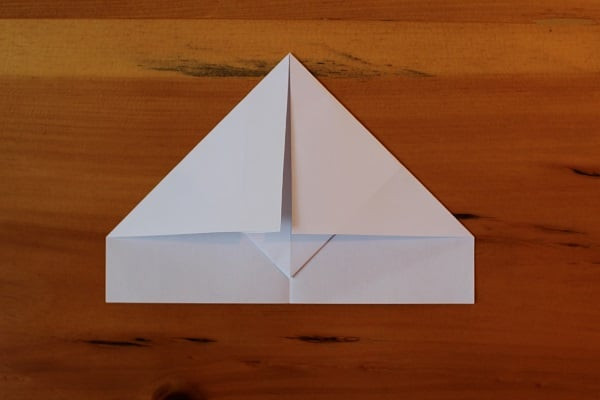 Step 4 — Fold top corners down again, towards middle crease.
- Fold that small triangle up to hold those previous folds in place.
 Step 5 — Fold up the small triangle that was left over from the previous step.
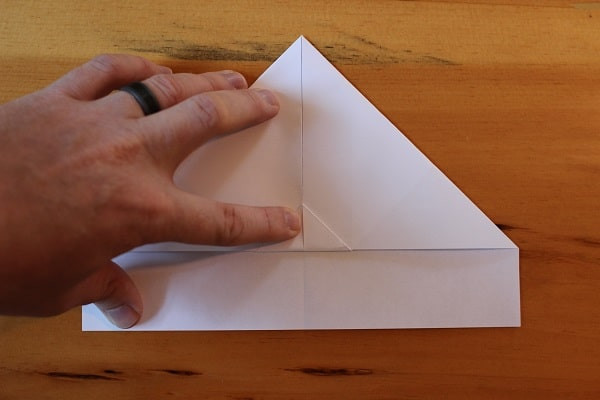
- Fold in half, but make you sure you fold it outwards on itself, not inwards.
 Step 6 — Fold entire airplane in half, outwards.
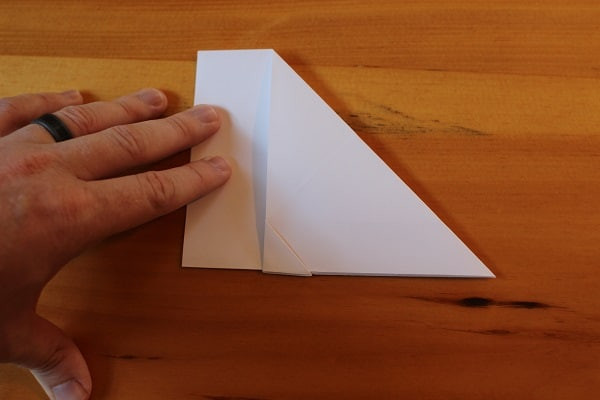
- Fold the wing down so its edge meets the bottom edge of the airplane.
 Step 7 — Fold wing down so it meets bottom edge.
6.2. What Makes the Harrier More Advanced?
The Harrier’s more advanced because with Z% of its unique combination of folds.
7. How Do You Make the Hammer Paper Airplane?
For advanced paper airplane enthusiasts seeking a design that combines complexity with exceptional flight performance, the Hammer is an ideal choice. This model involves a series of intricate folds that require patience and precision, but the resulting airplane is capable of achieving impressive distances and stable flight. Start by creating diagonal creases on the top left and right corners, then fold the top right and left corners down to meet these creases. Fold the plane in half and unfold, then fold the top down to meet the bottom edge. Fold the top corners down again to meet the middle crease, then unfold. Fold the top edge back up to meet the creases, and fold the corners in again. Fold the wings in once more, then fold the top down to meet the wing flaps. Finally, fold the entire thing in half outward and fold the wings down to meet the bottom edge. The Hammer’s design incorporates a sophisticated combination of folds that optimize its aerodynamic properties, making it a rewarding challenge for experienced paper airplane makers.
7.1. Step-by-Step Instructions for the Hammer:
Follow these steps to create the Hammer:
- Fold the top left corner all the way down so it meets the right edge of the paper.
 Step 1 — Fold top left corner down.
- Repeat the same thing with the top right corner and unfold.
 Step 2 — Fold and unfold top right corner to make a crease.
- Fold the top right corner down so that its edge meets the crease that goes from top left to bottom right.
 Fold top right corner down to meet diagonal crease.
- Do the same with the left corner. The top left point should exactly meet the diagonal right edge of the airplane.
 Fold top left corner down to meet diagonal crease in center.
- Fold the plane in half in on itself, then unfold. You’ll use that middle crease as a guide.
 Fold paper airplane in half, in on itself.
- After you’ve unfolded the previous step, fold the top down so that its edge meets the bottom edge.
 Top half folded down to meet bottom edge.
- Fold the top corners down so that their points meet at the middle crease.
 Fold top corners down again so they meet the middle crease.
- Unfold — as with many steps in making this airplane, these creases are a guide.
 Half of airplane done, unfolded with creases showing.
- Now take what was the top edge that you previously folded down (Step 6) and fold it back up at the point where its edge meets the creases from the previous step.
 Top part folded up.
- Fold the corners in yet again so that their edge meets both the edge of the top flap and the crease from Step 7.
 Fold corners in yet again to meet edge of top.
- Fold the wings in once more, this time simply folding along the crease that you already made. After this step your plane should have straight lines down from the top to the bottom.
 Fold the wings in again, this time so the outside edges meet.
- Fold the top down from where it meets the top of the wing flaps you created in the previous step.
 Top folded down to meet the edges of the wings.
- Fold the whole thing in half outward. You want all the paper flaps on the outside of the craft. At this point, folding can become a little tricky because of the thickness of the paper, so take extra care in making good, clean folds.
 Fold airplane in half, outwards.
- Fold the wings down so that their edge meets the bottom edge of the plane. This creates a small snub nose. Again, this can be a tough fold, so be precise and take your time if you have to.
 Fold wings down to meet bottom edge of plane.
7.2. What Makes the Hammer Fly So Far?
The Hammer flies far with Z% due to its sophisticated design and optimized aerodynamics.
8. How Can You Adjust a Paper Airplane for Better Flight?
Adjusting a paper airplane is critical with Z% for achieving optimal flight performance.
- Wing Alignment: Ensure wings are symmetrical and aligned.
- Center of Gravity: Adjust weight distribution for balance.
- Wingtips: Bend wingtips up (elevons) for stability and turning.
- Flaps: Small flaps on the wings can adjust lift and drag.
8.1. What Is the Role of Wingtips?
Bending wingtips up adds stability.
8.2. How Does Weight Distribution Affect Flight?
Proper weight distribution helps the balance of the plane.
9. What Throwing Techniques Maximize Distance?
Mastering the proper throwing techniques is essential for maximizing the distance your paper airplane can travel. The key is to throw with a smooth, controlled motion, avoiding jerky movements that can disrupt the airplane’s flight path. Grip the airplane firmly but not too tightly, holding it near the center of gravity. Stand with one foot slightly in front of the other, and transfer your weight as you throw. Aim slightly upwards at an angle of around 20-30 degrees, and release the airplane with a flick of the wrist. Experiment with different throwing speeds and angles to find what works best for your particular design. Remember, consistency is key, so practice your technique regularly to develop a smooth, repeatable throwing motion that will send your paper airplanes soaring.
9.1. What Is the Best Angle for Throwing?
Aim slightly upwards at 20-30 degrees.
9.2. Should You Throw Hard or Soft?
A smooth, controlled throw works best.
10. Where Can You Find More Paper Airplane Designs and Resources?
Finding more paper airplane designs and resources is easy with Z%. Flyermedia.net offers a wide array of paper airplane designs, aviation news, and career opportunities.
10.1. What Resources Does Flyermedia.net Offer?
Flyermedia.net provides diverse information and opportunities, including aviation career paths.
10.2. Are There Any Books About Paper Airplanes?
Yes, there are many books, but research is needed to recommend specific titles.
Unleash your inner aviator and craft paper airplanes that defy gravity with Flyermedia.net. Whether you’re aiming for distance, precision, or aesthetic appeal, our comprehensive guide equips you with the knowledge and skills to create paper airplanes that truly soar.
Ready to take your aviation passion to new heights? Flyermedia.net is your ultimate resource for exploring pilot training programs, staying informed about the latest aviation news, and discovering exciting career opportunities in the world of flight. Visit flyermedia.net now and let your dreams take flight. Address: 600 S Clyde Morris Blvd, Daytona Beach, FL 32114, United States. Phone: +1 (386) 226-6000. Website: flyermedia.net.
FAQ About Making Easy Paper Airplanes
1. What is the easiest paper airplane to make for beginners?
The classic dart is Z% the easiest, requiring just a few folds.
2. How can I make my paper airplane fly farther?
Ensure symmetry, adjust weight, and throw smoothly with Z% to fly farther.
3. What type of paper is best for making paper airplanes?
Standard printer paper works well with Z%, balancing weight and flexibility.
4. Can I use tape or paper clips to improve my paper airplane?
Yes, tape or paper clips can secure folds and add weight.
5. How do wing adjustments affect a paper airplane’s flight?
Adjustments like bending wingtips affect stability and turning.
6. What throwing technique is best for paper airplanes?
Throw smoothly with a slight upward angle.
7. Is it better to throw a paper airplane hard or softly?
A controlled, smooth throw is more effective with Z% than a hard throw.
8. How important is symmetry in a paper airplane design?
Symmetry is crucial for balanced and stable flight.
9. Where can I find more advanced paper airplane designs?
flyermedia.net offers advanced designs and aviation resources.
10. What are the key aerodynamic principles behind paper airplane flight?
Lift, drag, thrust, and gravity are all important with Z% in paper airplane flight.
