Flying with a bicycle can open up a world of cycling adventures, but it requires careful planning and preparation; that’s where flyermedia.net comes in. This guide provides you with everything you need to know about How To Fly With A Bicycle, from packing tips to airline policies, ensuring your bike arrives safely and affordably. Explore the skies with confidence and discover how to navigate air travel with your trusty two-wheeled companion, complete with advice, insights, and useful links related to air travel and bicycle transport.
1. Understanding the Essentials of Flying with a Bicycle
Planning to take your bicycle on a flight? Several key factors can influence your experience, so you’ll need to keep these things in mind:
- Bike Safety: Ensuring your bike arrives at your destination undamaged is paramount.
- Associated Costs: Airline fees for bikes can vary significantly.
- Ease of Handling: Disassembling and reassembling your bike can be challenging, especially in unfamiliar places.
Each travel option offers a different balance of these considerations; therefore, understanding the intricacies of each will help you make the best choice.
2. Key Advice Before You Fly with a Bicycle
Before you head to the airport with your bike, it is important to keep some things in mind.
- Necessary Technical Knowledge: Disassembling your bike requires tools and basic mechanical skills. Modern bikes, especially those with integrated cockpits, may need special cases and handling due to their complex designs.
- Airline Fees: Policies change frequently, and fees can vary a lot. Choosing a more expensive airline with lower baggage fees might save you money overall.
- Luggage Insurance: It is a good idea to insure your luggage because airlines may not cover damage during transit. Check if your homeowner’s, renter’s, or credit card policies offer baggage coverage.
- Prior Planning: Don’t wait until the last minute. Practice packing your bike and consider logistics like transportation to and from the airport and space for rebuilding your bike.
- Alternative Options: Consider bike shipping services or renting a bike at your destination if bringing your own bike isn’t essential.
3. Exploring Packing Options for Your Bicycle
What are the best ways to keep your bike safe while flying? Here are your best options:
3.1. Cardboard Bike Boxes
 Cardboard Bike Box
Cardboard boxes are a simple way to transport your bike on a flight.
- Pros: These are often free from bike shops and relatively easy to pack since they fit your bike nearly intact.
- Cons: They’re prone to damage, especially in wet conditions, and can be punctured easily. Airlines often don’t insure bikes packed in cardboard boxes. They also incur oversize baggage fees.
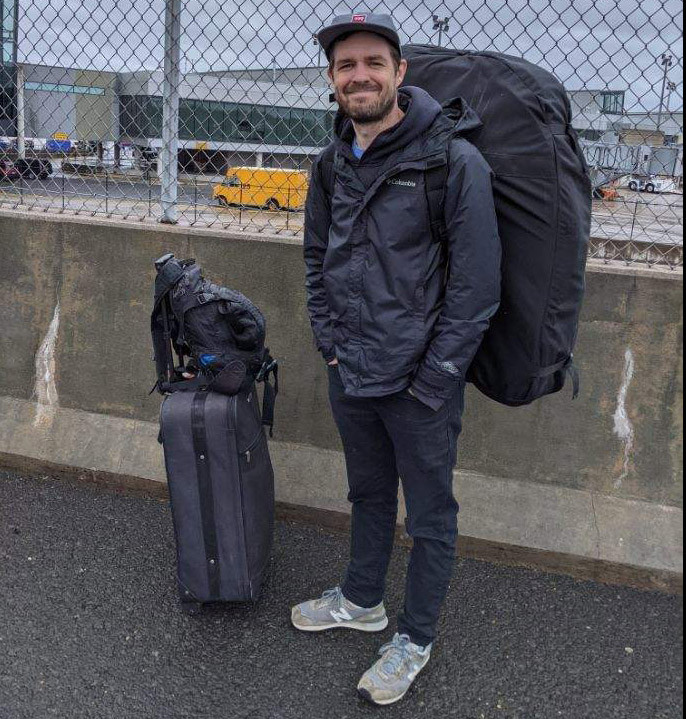
3.2. Bike Bags or Soft Cases
Soft-sided bike bags offer various designs and features.
- Pros: They have straps and wheels for easy transport and usually fit in rental cars without issues. Some smaller bags are designed to avoid oversize fees.
- Cons: Soft cases can be expensive (typically $400–$600 USD), and many airlines require a liability release for bikes packed in them. They may also require extra padding.
3.3. Hard-Sided Cases
Hard-sided cases offer the most protection for your bike.
- Pros: These offer robust protection against impact, and airlines are usually willing to insure bikes packed in hard cases.
- Cons: They can be less convenient to transport than soft bags, often incur oversize fees, and may attract rough handling from baggage personnel.
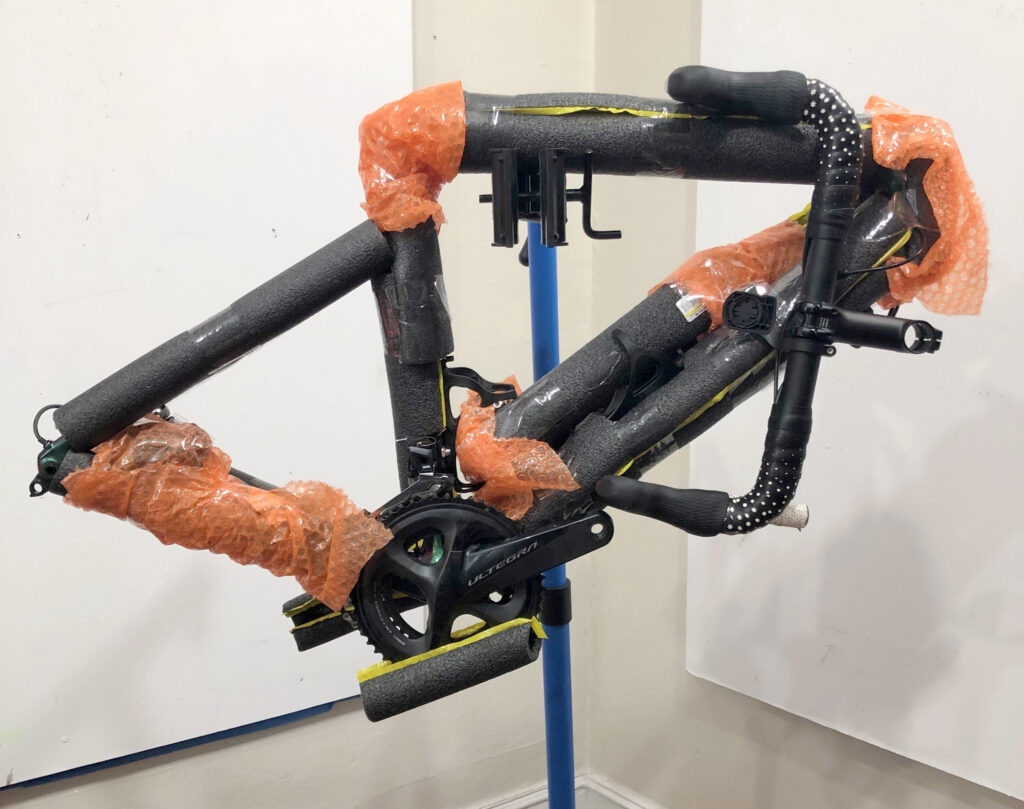
4. Step-by-Step Guide to Packing Your Bike
Want to make sure your bike arrives safe and sound? Here is what you need to do.
- Remove Components: Take off parts that are needed to fit the bike in your chosen container. Usually, this means taking off the handlebars, pedals, and front wheel. Depending on your luggage, it might also mean taking off your rear wheel, fork, and seat post. Put shipping spacers or thru axles into your dropouts and spacers into your disc brake calipers.
- Wrap in Padding: Use bubble wrap, pipe insulation, or pool noodles cut to size to wrap your bike and parts. Securely tape or zip-tie the padding in place.
- Attach Components to Frame: Attach handlebars, fork, and seat post to your frame and zip-tie in place. This makes it easier for TSA agents to repack after inspection and reduces the chance of anything getting lost.
- Remove Protruding Parts: Take off the rear derailleur and any other protruding part that could be hit if your bag or case is mistreated such as computer mounts, derailleur hangers, eTap batteries, etc. Wrap these parts in padding and attach to your frame. Wrap your chain in padding and attach it to your chainstay. Remove disc rotors from your wheels and wrap in bubble wrap or clothing.
- Photograph Everything: Photograph your gear before you put it into your bag, as it will be useful if you need to file a claim with the airline, and will help you repack your bag on the way home.
- Include Contact Information: Put your name and contact information on a sheet of paper and tape it to your bike and insert the bike into your bag or case. Insert wheels into the case, slightly deflating tires if needed to fit.
- Fill Extra Space: Use kit and shoes to fill extra space in your bag or case. Wrap your pump in padding and insert it. Wrap other parts you removed in padding, such as pedals, rotors, and saddlebag, and place them together in a small bag, which can also go into the extra space or pockets in your travel bag or case. Put every tool you used to take the bike apart into a small bag, wrap in padding, and place them in the luggage, too.
- Check for Protrusions: Close the bag or case and carefully feel around the outside. If you can feel any part of your bike sticking out, such as your chainring, reopen and reposition or attach extra padding to this area.
- Remove Old Stickers: Make sure all old barcodes and destination stickers are removed from the outside of your luggage. Mark the exterior prominently with your name and contact information.
5. Other Important Packing Tips
Here’s a few other pointers to consider when packing your bike.
- Protect Against Contact: Bikes are often damaged by contact with objects inside the case. Add padding anywhere two parts touch each other in the luggage. Wrap every loose part in padding and secure inside.
- Remove Rotors: Bent disc rotors are the most common damage during travel. Even if your case doesn’t require it, remove your rotors, wrap them in padding, and secure them somewhere safe.
- Zip-Tie Components: Zip-tie everything together inside the case, so if a security agent removes your bike during an inspection they won’t lose anything or have trouble putting it back in.
- Pack Tools: Many bike tools are prohibited from carry-on luggage, so wrap all the tools you’ll need together and secure them in your case. Don’t forget an air pump and always bring a torque wrench.
- Tire Pressure: Your tires won’t explode on an airplane. Some airlines require you to deflate your tires, but always leave enough air in tubeless setups to keep the tires seated.
- CO2 Cartridges: Most airlines prohibit CO2 containers in carry-on and checked luggage, so remove them from your flat kit and grab new ones at your destination’s local bike shop.
- Electronic Groupsets: Remove batteries from SRAM derailleurs so they don’t get lost if your case is opened. Shift levers can be inadvertently pushed inside of bags and cases, so remove the coin cell battery from SRAM shifters and unplug shifter cables under Shimano hoods.
- Power Meter: If your power meter has a removable battery, remove it during packing to prevent battery drain.
- Chargers: Remember to bring chargers for any electronic components, including head units, lights, and derailleurs.
6. Understanding the Costs Associated with Flying with Your Bike
 Specialized Bike
Take special care when preparing your bike for transport.
The cost of flying with your bike can vary widely, depending on the airline and your equipment. It can be calculated as follows:
Cost to Bring Bike = Bike Fee + Standard Checked Bag Fee + Oversize Fee (if Applicable) + Overweight Fee (if applicable)
Oversize fees usually apply if the combined length, width, and depth of your luggage exceed 62 inches, while overweight penalties typically start at 50 lbs. Discount carriers often charge more in additional fees, so research potential costs before buying your ticket.
7. Comparison of Airline Bike Policies
Want to know which airline offers the best deal for your bike? Here’s a comparison to help you decide:
| Airline | Bike Fee | 1st Checked Bag Fee | Oversize Fee* | Overweight Fee* |
|---|---|---|---|---|
| Air Canada | $50 CAD/ USD | N/A | N/A | N/A |
| Air France | €40-€125 | Usually included | N/A | N/A |
| Alaska Airlines | No Fee | $30 | N/A for bikes | N/A for bikes |
| American Airlines | No Fee | $30 | $150 – $200 | $100 |
| British Airways | No Fee | Usually included | Uncertain | €75/ $100USD |
| Delta | No Fee | $30 | $200 | $100 |
| Frontier | $75 | N/A | N/A | N/A |
| Hawaiian Airlines | $35 – $150 | $0–$35 | N/A | $60-$150 |
| jetBlue | $100 if large/heavy | $35 | N/A | N/A |
| Lufthansa | $80-$287 USD | Usually included | $150-$300 | $70-$150 |
| Quantas | No Fee | Usually Included | Varies | Varies |
| Ryanair | €/£60 | €25/£25 – €40/£40 | N/A | €11/£11 per kg |
| Southwest | NoFee | Usually Included | $75 | $75 |
| Spirit | $75 (max 40lb) | $35–$65 | N/A | N/A |
| United Airlines | No Fee | $35 | Varies | Varies |
| Virgin Atlantic | No Bike Fee | Included with most tickets | $300 | $100 |
| WestJet | $50 CAD | $30–$71 | N/A | N/A |
*Fees may vary based on specific circumstances.
8. Flying with a Mountain Bike: What to Consider
Is flying with a mountain bike different than flying with a road bike? Here are some things to keep in mind.
Bringing a mountain bike on an airline is similar to bringing a road or gravel bike, however, mountain bikes are generally bulkier, so they may not fit in all travel cases and can more easily incur overweight fees. When preparing your mountain bike for travel:
- It’s often easier to remove the handlebars from the stem, than it is to remove the stem from the steerer tube.
- If possible, flip your fork backward to shorten your wheelbase.
- Always remove your brake rotors.
- Only deflate your tires enough to fit your luggage.
- Let some air out of your suspension to reduce height, but make sure you bring your shock pump with you.
- Remove the dropper post from your frame.
- Service any hydraulic components in need of maintenance before you travel.
- Bring a large rag or towel along with you for your trip.
9. Frequently Asked Questions (FAQ) About Flying With a Bicycle
Still have questions? Here are some answers.
9.1. What is the best way to pack a bicycle for air travel?
The best way depends on your priorities. Cardboard boxes are cheap and easy, soft cases offer a balance of protection and portability, and hard cases provide the most protection but can be bulky and expensive.
9.2. How much does it typically cost to fly with a bicycle?
Costs vary based on the airline and fees. Check the airline’s specific bike, oversize, and overweight fees.
9.3. Which airlines are the most bike-friendly?
Airlines like Alaska Airlines and American Airlines offer no bike fees, but be sure to check for other potential charges like oversize or overweight fees.
9.4. Do I need to deflate my tires when flying with a bicycle?
Some airlines require it, but always leave enough air to keep the tires seated on tubeless setups.
9.5. Can I bring bike tools in my carry-on luggage?
Most bike tools are prohibited from carry-on luggage, so pack them securely in your checked bike case.
9.6. What should I do to protect my disc rotors during travel?
Remove your rotors, wrap them in padding, and secure them somewhere safe in your bike case to prevent bending.
9.7. Is it better to ship my bike or fly with it?
Shipping may be more economical depending on your destination and itinerary. Compare the costs and convenience of each option.
9.8. What should I do with electronic components like batteries when packing my bike?
Remove batteries from SRAM derailleurs and coin cell batteries from SRAM shifters to prevent loss or inadvertent activation.
9.9. How can I prevent damage to my bike during air travel?
Use plenty of padding, secure all components inside the case, and zip-tie everything together to prevent movement.
9.10. Should I purchase travel insurance for my bicycle?
Yes, it’s a good idea, especially for expensive bikes, to cover potential damage during transit. Check if your existing policies already provide coverage.
10. Conclusion: Your Cycling Adventure Awaits
Flying with a bike opens up new horizons for cycling enthusiasts, providing the opportunity to explore diverse landscapes and trails. By carefully considering packing options, understanding airline policies, and taking proactive steps to protect your equipment, you can ensure a smooth and enjoyable travel experience.
Ready to embark on your next cycling adventure? Visit flyermedia.net for more information on flight training, aviation news, and career opportunities in the aviation sector. Whether you’re seeking tips on packing your bike or looking for the best airlines for cyclists, flyermedia.net is your go-to resource for all things aviation. Don’t let the logistics of air travel hold you back – discover the world on two wheels with flyermedia.net, and turn your dream rides into reality!