Creating a compelling flyer doesn’t have to be daunting; in fact, with Canva, it’s a straightforward and enjoyable process. With flyermedia.net, you’ll discover how to leverage Canva’s intuitive interface and extensive template library to design eye-catching flyers for any event or purpose, whether related to aviation or any other field. This guide will cover everything from selecting the right template to optimizing your design for printing and distribution, ensuring your message takes flight.
1. What is Canva and Why Use It for Flyer Design?
Canva is a user-friendly online graphic design platform that empowers individuals and businesses to create stunning visuals without requiring advanced design skills. It’s a go-to tool for designing flyers because of its ease of use, vast library of templates, and affordability.
Why Canva is Ideal for Flyer Design:
- User-Friendly Interface: Canva’s drag-and-drop interface makes it easy for anyone to create professional-looking flyers, regardless of their design experience.
- Extensive Template Library: Offers a wide range of pre-designed templates suitable for various events, industries, and styles.
- Customization Options: Provides flexibility to customize every aspect of your flyer, from text and colors to images and layouts.
- Cost-Effective: Canva offers a free version with plenty of features and templates, making it an affordable option for small businesses and individuals.
- Accessibility: Being an online platform, Canva allows you to access and edit your designs from any device with an internet connection.
Canva empowers you to bring your creative vision to life and create flyers that effectively communicate your message and captivate your audience. According to Canva, over 75 million designs are created each month on their platform.
2. Who Benefits from Knowing How to Create a Flyer Using Canva?
Creating flyers using Canva is beneficial for a wide range of individuals and organizations, especially in aviation. Here are some key groups that can greatly benefit from these skills:
- Small Business Owners: Create promotional materials for events, sales, or new offerings.
- Event Organizers: Design eye-catching flyers for concerts, festivals, workshops, and conferences.
- Non-Profit Organizations: Promote fundraising events, awareness campaigns, and volunteer opportunities.
- Educators and Trainers: Create flyers for courses, workshops, and seminars.
- Aviation Enthusiasts: Design flyers for aviation events, airshows, or aviation-related businesses.
- Students: Create flyers for school events, clubs, and organizations.
- Freelancers and Consultants: Promote their services and expertise with professional-looking flyers.
- Marketing Professionals: Develop marketing campaigns and promotional materials for clients.
- Anyone with a Message: Share information, announcements, or invitations with visually appealing flyers.
- Aviation Businesses: Promote flight schools, charter services, aircraft maintenance, and aviation products.
According to the FAA, the aviation industry contributes over $1.6 trillion to the US economy each year. Effective flyer design can significantly boost promotional efforts within this sector.
3. How Do I Sign Up and Get Started with Canva?
Getting started with Canva is quick and easy. Here’s a step-by-step guide to sign up and begin creating your flyers:
- Visit the Canva Website: Go to www.canva.com in your web browser.
- Sign Up for an Account:
- Click on the “Sign up” button located in the upper right corner of the page.
- Choose your preferred sign-up method:
- Sign up with Google: Use your Google account to quickly create an account.
- Sign up with Facebook: Use your Facebook account to sign up.
- Sign up with Email: Enter your email address, create a password, and click “Get started, it’s free.”
- Verify Your Email (if applicable): If you signed up with email, check your inbox for a verification email from Canva. Click the link in the email to verify your account.
- Explore the Canva Interface:
- Once logged in, you’ll be directed to the Canva homepage.
- Familiarize yourself with the main sections:
- Search Bar: Use this to find specific templates, designs, or elements.
- Templates: Browse through various design templates categorized by type (e.g., flyers, posters, social media graphics).
- Features: Explore Canva’s features, such as photo editing, animation, and collaboration tools.
- Create a Design: Start a new design from scratch by choosing custom dimensions or selecting a pre-set size.
- Start Creating:
- To create a flyer, type “flyer” in the search bar and press Enter.
- Browse the available flyer templates or start with a blank canvas.
- Customize your flyer by adding text, images, graphics, and other elements.
Canva offers a free plan with access to thousands of templates and design elements. You can also upgrade to Canva Pro for additional features, such as premium templates, more storage, and advanced design tools.
4. What are the Key Elements of an Effective Flyer Design?
An effective flyer design captures attention, communicates key information, and motivates the audience to take action. Several key elements contribute to a successful flyer.
- Headline:
- Purpose: Grabs the reader’s attention and conveys the main message of the flyer.
- Tips: Use clear, concise, and compelling language. Make it large and easy to read.
- Visual Hierarchy:
- Purpose: Guides the reader’s eye through the flyer in a logical sequence.
- Tips: Use different font sizes, colors, and placement to emphasize important information.
- Images and Graphics:
- Purpose: Enhance the visual appeal of the flyer and illustrate key points.
- Tips: Use high-quality images that are relevant to the message. Ensure graphics are consistent with the overall design.
- Color Palette:
- Purpose: Creates a cohesive and visually appealing design.
- Tips: Choose colors that complement each other and reflect the tone of the message. Consider using brand colors for consistency.
- Typography:
- Purpose: Ensures readability and reinforces the flyer’s message.
- Tips: Use a limited number of fonts (2-3) that are easy to read. Ensure font sizes are appropriate for the target audience.
- Call to Action (CTA):
- Purpose: Tells the reader what to do next (e.g., visit a website, call a phone number, attend an event).
- Tips: Make the CTA clear, concise, and prominent. Use action-oriented language (e.g., “Sign Up Now,” “Learn More”).
- Whitespace:
- Purpose: Creates visual breathing room and prevents the flyer from feeling cluttered.
- Tips: Use whitespace strategically to separate elements and highlight important information.
- Contact Information:
- Purpose: Provides the reader with the necessary details to follow up.
- Tips: Include relevant contact information, such as phone number, email address, website, and social media handles.
- Brand Elements:
- Purpose: Reinforces brand recognition and consistency.
- Tips: Include your logo, brand colors, and brand fonts in the flyer design.
By incorporating these key elements, you can create flyers that effectively communicate your message and achieve your desired outcome.
5. How Can I Select the Right Canva Template for My Flyer?
Choosing the right Canva template is crucial for creating a flyer that aligns with your message and brand. Here’s how to select the perfect template:
- Define Your Purpose:
- Determine the goal of your flyer (e.g., promoting an event, advertising a product, making an announcement).
- Identify your target audience and tailor your message accordingly.
- Browse Canva’s Template Library:
- Type “flyer” into the search bar on the Canva homepage.
- Explore the various categories and styles of flyer templates.
- Use Keywords to Narrow Your Search:
- Use specific keywords related to your industry, event, or theme (e.g., “aviation,” “airshow,” “grand opening”).
- Consider Your Industry and Theme:
- Choose a template that reflects the tone and style of your industry or event.
- For example, an aviation flyer might feature images of airplanes, maps, or flight-related graphics.
- Evaluate the Layout and Structure:
- Look for a template with a layout that effectively showcases your content.
- Consider the placement of headlines, images, and text blocks.
- Assess the Color Palette and Typography:
- Choose a template with colors and fonts that align with your brand or message.
- Ensure the colors are visually appealing and the fonts are easy to read.
- Check for Customization Options:
- Ensure the template allows you to easily customize the text, images, and graphics.
- Look for templates with flexible layouts that can be adapted to your specific needs.
- Preview and Test:
- Preview the template to see how it looks with your content.
- Test different templates to find the one that best suits your needs.
- Start with a Similar Template:
- If you have a specific design in mind, start with a template that is similar and customize it to your liking.
- Consider Starting from Scratch:
- If you have a unique vision, consider starting with a blank canvas and building your flyer from the ground up.
By following these steps, you can select a Canva template that provides a solid foundation for your flyer design and helps you achieve your communication goals.
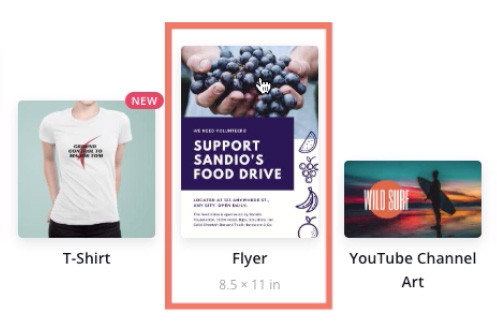 Canva's extensive template library
6. How Do I Customize Text in Canva for Maximum Impact?
Customizing text in Canva is essential for creating flyers that effectively communicate your message and capture attention. Here’s how to customize text for maximum impact:
- Select Your Text:
- Click on the text box you want to edit.
- This will activate the text editing toolbar at the top of the Canva interface.
- Choose the Right Font:
- Select a font that aligns with your brand or message.
- Canva offers a wide variety of fonts, from classic to modern.
- Consider the font’s readability and ensure it is easy to read at different sizes.
- Adjust Font Size:
- Increase or decrease the font size to emphasize important information.
- Use larger font sizes for headlines and key messages.
- Ensure the font size is appropriate for the target audience.
- Change Font Color:
- Select a font color that complements the overall design and makes the text stand out.
- Use contrasting colors to improve readability.
- Consider using brand colors for consistency.
- Apply Text Styles:
- Use bold, italic, or underline styles to emphasize specific words or phrases.
- Avoid overusing these styles, as they can make the text look cluttered.
- Adjust Text Alignment:
- Align the text to the left, right, center, or justify it to create a visually appealing layout.
- Consider the overall design and choose the alignment that best suits your needs.
- Add Text Effects:
- Use text effects like shadows, outlines, or curves to add depth and visual interest to your text.
- Experiment with different effects to see what works best for your design.
- Adjust Line Spacing:
- Increase or decrease the line spacing to improve readability.
- Ensure the line spacing is appropriate for the font size and style.
- Add Special Characters:
- Use special characters like bullets, arrows, or symbols to add visual interest and highlight important information.
- Ensure the special characters are relevant to the message and consistent with the overall design.
- Use Canva’s Text Templates:
- Explore Canva’s pre-designed text templates for inspiration and ideas.
- Customize the templates to suit your specific needs and style.
By following these tips, you can customize text in Canva to create flyers that effectively communicate your message and capture the attention of your audience.
7. How Do I Incorporate Images and Graphics Into My Canva Flyer?
Images and graphics can significantly enhance the visual appeal and effectiveness of your Canva flyer. Here’s how to incorporate them effectively:
- Choose High-Quality Images:
- Use high-resolution images that are clear, crisp, and visually appealing.
- Avoid using blurry or pixelated images, as they can detract from the overall design.
- Select Relevant Images:
- Choose images that are relevant to your message and target audience.
- For example, an aviation flyer might feature images of airplanes, pilots, or aviation-related graphics.
- Use Canva’s Image Library:
- Explore Canva’s extensive library of stock photos and graphics.
- Use the search bar to find specific images or browse through the various categories.
- Upload Your Own Images:
- Upload your own photos, logos, or graphics to personalize your flyer.
- Ensure your images are properly sized and formatted for optimal display.
- Crop and Resize Images:
- Use Canva’s cropping and resizing tools to adjust the size and dimensions of your images.
- Crop out unnecessary elements or focus on key areas of the image.
- Adjust Image Brightness and Contrast:
- Use Canva’s brightness and contrast controls to enhance the image’s visibility and impact.
- Adjust the settings to ensure the image complements the overall design.
- Apply Filters:
- Use Canva’s filters to add a unique look and feel to your images.
- Experiment with different filters to see what works best for your design.
- Add Graphics and Illustrations:
- Use Canva’s library of graphics and illustrations to add visual interest and highlight key points.
- Choose graphics that are consistent with the overall design and message.
- Position Images and Graphics Strategically:
- Place images and graphics in a way that guides the reader’s eye through the flyer.
- Use them to create visual hierarchy and emphasize important information.
- Use Whitespace:
- Allow for adequate whitespace around images and graphics to create visual breathing room.
- Avoid overcrowding the flyer with too many elements.
By following these tips, you can effectively incorporate images and graphics into your Canva flyer to create a visually appealing and engaging design.
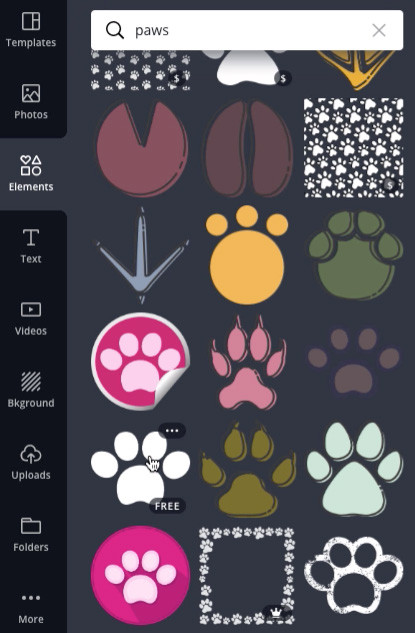 paw print graphic in Canva
8. How Can I Choose the Right Color Palette for My Flyer?
Selecting the right color palette is essential for creating flyers that are visually appealing and effectively communicate your message. Here’s how to choose the perfect color palette for your flyer:
- Understand Color Psychology:
- Learn about the emotional and psychological effects of different colors.
- For example, blue is often associated with trust and reliability, while red is associated with excitement and energy.
- Consider Your Brand:
- Choose colors that align with your brand’s identity and values.
- Use your brand colors consistently across all your marketing materials.
- Identify Your Target Audience:
- Consider the preferences and demographics of your target audience.
- Choose colors that resonate with them and are appropriate for their age, gender, and cultural background.
- Use Canva’s Color Palette Generator:
- Explore Canva’s color palette generator for inspiration and ideas.
- Upload an image or enter a color code to generate a matching color palette.
- Choose a Dominant Color:
- Select a dominant color that will serve as the foundation for your color palette.
- This color should be visually appealing and relevant to your message.
- Add Complementary Colors:
- Choose complementary colors that contrast with the dominant color and create visual interest.
- Use a color wheel to find complementary colors.
- Use Analogous Colors:
- Choose analogous colors that are adjacent to each other on the color wheel.
- This creates a harmonious and balanced color palette.
- Consider Contrast:
- Ensure there is adequate contrast between the text and background colors to improve readability.
- Avoid using colors that are too similar, as they can make the text difficult to read.
- Limit Your Color Palette:
- Use a limited number of colors (2-4) to avoid overwhelming the design.
- Stick to a consistent color palette across all your marketing materials.
- Test Your Color Palette:
- Test your color palette on different devices and in different lighting conditions to ensure it looks good.
- Get feedback from others to see if they find the color palette visually appealing and effective.
By following these tips, you can choose a color palette that enhances the visual appeal of your flyer and effectively communicates your message to your target audience.
9. How Can I Add a Call to Action That Drives Results?
A compelling call to action (CTA) is essential for driving results with your Canva flyer. Here’s how to create a CTA that motivates your audience to take action:
- Make it Clear and Concise:
- Use clear and concise language that tells the reader exactly what you want them to do.
- Avoid using jargon or technical terms that may confuse your audience.
- Use Action-Oriented Language:
- Use action verbs that encourage the reader to take action, such as “Sign Up,” “Learn More,” or “Get Started.”
- Create a sense of urgency by using phrases like “Limited Time Offer” or “Don’t Miss Out.”
- Make it Visually Prominent:
- Make the CTA stand out by using a different color, font, or size than the rest of the text.
- Place the CTA in a prominent location on the flyer where it is easily visible.
- Create a Sense of Urgency:
- Add a sense of urgency by including a deadline or limited-time offer.
- This will encourage the reader to take action immediately.
- Use Contrasting Colors:
- Use contrasting colors for the CTA button and text to make it stand out.
- Choose colors that are visually appealing and align with your brand.
- Keep it Short and Sweet:
- Keep the CTA short and sweet to avoid overwhelming the reader.
- Focus on the most important message and make it easy to understand.
- Consider the Placement:
- Place the CTA in a location that makes sense for the overall design and flow of the flyer.
- Consider placing it near the top or bottom of the flyer, or in a prominent location on the page.
- Test Different CTAs:
- Test different CTAs to see which ones perform best.
- Experiment with different wording, colors, and placement to optimize your results.
- Make it Easy to Take Action:
- Provide clear instructions on how to take action, such as visiting a website, calling a phone number, or scanning a QR code.
- Make it as easy as possible for the reader to follow through.
- Align with Your Goals:
- Ensure the CTA aligns with the overall goals of your flyer and marketing campaign.
- Choose a CTA that will help you achieve your desired outcome.
By following these tips, you can create a call to action that drives results and helps you achieve your marketing goals.
10. How Do I Optimize My Canva Flyer for Printing?
Optimizing your Canva flyer for printing ensures that your design looks its best when it’s brought to life. Here’s how to prepare your flyer for printing:
- Set the Correct Dimensions:
- Ensure your flyer is set to the correct dimensions for printing.
- Common flyer sizes include 8.5×11 inches (Letter), 5.5×8.5 inches (Half Letter), and 4×6 inches (Postcard).
- Use High-Resolution Images:
- Use high-resolution images (300 DPI) to ensure that your flyer looks crisp and clear when printed.
- Avoid using low-resolution images, as they can appear blurry or pixelated.
- Check Your Color Mode:
- Set your color mode to CMYK (Cyan, Magenta, Yellow, Black) for accurate color reproduction.
- RGB (Red, Green, Blue) is typically used for digital displays and may not translate well to print.
- Add Bleed:
- Add a bleed area of at least 0.125 inches (3mm) to the edges of your design.
- This ensures that the colors and images extend to the edge of the paper when the flyer is trimmed.
- Keep Important Elements Within the Safety Margin:
- Keep important text and graphics at least 0.25 inches (6mm) away from the edges of the flyer.
- This ensures that they are not cut off during the trimming process.
- Use Vector Graphics:
- Use vector graphics whenever possible, as they can be scaled without losing quality.
- Vector graphics are typically created in programs like Adobe Illustrator or Inkscape.
- Choose the Right File Format:
- Save your flyer as a PDF (Portable Document Format) for printing.
- PDFs are universally compatible and preserve the design’s formatting and fonts.
- Embed Fonts:
- Embed all fonts in the PDF to ensure that they are displayed correctly on the printer’s system.
- This prevents font substitution issues.
- Proofread Carefully:
- Proofread your flyer carefully for any typos or errors before sending it to print.
- It’s always a good idea to have someone else review your design as well.
- Test Print:
- Print a test copy of your flyer to check the colors, layout, and overall quality.
- Make any necessary adjustments before printing the entire batch.
By following these tips, you can optimize your Canva flyer for printing and ensure that your design looks its best.
11. What Are Some Alternative Flyer Design Platforms to Canva?
While Canva is a popular choice for flyer design, several alternative platforms offer similar features and capabilities. Here are some noteworthy alternatives:
- Adobe Creative Cloud Express (formerly Adobe Spark): Offers a user-friendly interface with a wide range of templates, images, and design elements.
- Visme: A versatile design platform that allows you to create flyers, presentations, infographics, and other visual content.
- Piktochart: An intuitive design tool that specializes in creating visually appealing infographics, presentations, and flyers.
- DesignCap: A simple and easy-to-use design platform that offers a variety of templates and design elements for creating flyers, posters, and other graphics.
- Crello (now VistaCreate): A user-friendly design tool with a wide range of templates, images, and design elements for creating social media graphics, flyers, and other visual content.
- PosterMyWall: A design platform that specializes in creating posters, flyers, and social media graphics.
- Fotor: A photo editing and design tool that offers a variety of templates and design elements for creating flyers, posters, and other graphics.
- Lucidpress: A brand templating platform that allows you to create and manage branded marketing materials, including flyers.
- Microsoft Publisher: A desktop publishing application that allows you to create flyers, brochures, and other marketing materials.
- Affinity Publisher: A professional desktop publishing application that offers advanced design features and capabilities.
Each of these platforms has its own strengths and weaknesses, so it’s worth exploring them to see which one best suits your needs and preferences.
12. How Can I Distribute My Canva Flyer Effectively?
Distributing your Canva flyer effectively is crucial for reaching your target audience and achieving your desired outcome. Here are some effective distribution strategies:
- Online Distribution:
- Social Media: Share your flyer on social media platforms like Facebook, Instagram, Twitter, and LinkedIn.
- Email Marketing: Send your flyer to your email list or include it in your email newsletter.
- Website: Upload your flyer to your website or blog.
- Online Advertising: Run online ads on social media or search engines to promote your flyer.
- Offline Distribution:
- Print and Hand Out: Print copies of your flyer and hand them out in high-traffic areas, such as events, conferences, or public spaces.
- Display in Local Businesses: Ask local businesses if you can display your flyer in their store or office.
- Community Centers: Distribute your flyer at community centers, libraries, and other public spaces.
- Direct Mail: Send your flyer through direct mail to reach a specific geographic area.
- Target Your Audience:
- Identify your target audience and focus your distribution efforts on reaching them.
- Consider their demographics, interests, and online behavior.
- Track Your Results:
- Track the results of your distribution efforts to see which strategies are most effective.
- Use analytics tools to measure website traffic, social media engagement, and email open rates.
- Use QR Codes:
- Add a QR code to your flyer that directs people to your website or social media page.
- This makes it easy for people to learn more about your business or event.
- Collaborate with Others:
- Partner with other businesses or organizations to distribute your flyer to their audiences.
- This can help you reach a wider audience and increase your exposure.
- Offer Incentives:
- Offer incentives, such as discounts or freebies, to encourage people to take action.
- This can help you generate more leads and sales.
- Be Consistent:
- Distribute your flyer consistently over time to reinforce your message.
- Avoid distributing it only once and then forgetting about it.
- Optimize for Mobile:
- Ensure your flyer is optimized for mobile devices.
- Many people will view your flyer on their smartphones or tablets.
- Monitor Feedback:
- Monitor feedback on social media and other online channels to see what people are saying about your flyer.
- Use this feedback to improve your future flyers.
By following these tips, you can effectively distribute your Canva flyer and reach your target audience.
13. FAQ: Creating Flyers with Canva
Here are some frequently asked questions about creating flyers with Canva:
- Is Canva free to use?
- Yes, Canva offers a free plan with access to thousands of templates and design elements. You can also upgrade to Canva Pro for additional features.
- Do I need design experience to use Canva?
- No, Canva is designed to be user-friendly and accessible to people with no design experience.
- Can I upload my own images to Canva?
- Yes, you can upload your own photos, logos, and graphics to personalize your flyers.
- What file formats can I download my Canva flyer in?
- You can download your Canva flyer in various file formats, including PDF, JPG, PNG, and GIF.
- Can I print my Canva flyer directly from the platform?
- Yes, Canva offers a printing service that allows you to print your flyers directly from the platform.
- Can I collaborate with others on a Canva flyer?
- Yes, Canva allows you to collaborate with others on your designs. You can share your flyer with others and grant them editing access.
- Are there any limitations to the free version of Canva?
- Yes, the free version of Canva has some limitations, such as limited access to premium templates, images, and design elements.
- Can I use Canva to create flyers for commercial purposes?
- Yes, you can use Canva to create flyers for commercial purposes, but you should be aware of the licensing terms for the images and design elements you use.
- Can I create animated flyers with Canva?
- Yes, Canva offers animation features that allow you to create animated flyers and GIFs.
- Does Canva offer customer support?
- Yes, Canva offers customer support through its help center and email support.
14. Conclusion: Elevate Your Promotions with Canva Flyers
Mastering the art of creating flyers with Canva opens up a world of promotional possibilities, allowing you to craft visually stunning and effective marketing materials with ease. Whether you’re promoting an aviation event, advertising a flight school, or simply sharing information, Canva empowers you to create flyers that capture attention and drive results. Remember the key elements of effective design, optimize your flyers for printing, and explore various distribution strategies to reach your target audience.
Ready to take your flyer design skills to new heights? Visit flyermedia.net today to discover more tips, resources, and inspiration for creating compelling flyers that elevate your promotions and achieve your marketing goals! Unlock your creative potential and start designing flyers that soar above the competition. Find the perfect flight school, get the latest aviation news, and discover exciting career opportunities! Let flyermedia.net be your guide to success in the skies.
15. Disclaimer
The information provided in this article is for general informational purposes only and does not constitute professional advice. While we strive to provide accurate and up-to-date information, we make no representations or warranties of any kind, express or implied, about the completeness, accuracy, reliability, suitability, or availability with respect to the article or the information, products, services, or related graphics contained in the article for any purpose. Any reliance you place on such information is therefore strictly at your own risk.
In no event will we be liable for any loss or damage including without limitation, indirect or consequential loss or damage, or any loss or damage whatsoever arising from loss of data or profits arising out of, or in connection with, the use of this article.
Through this article, you are able to link to other websites which are not under the control of flyermedia.net. We have no control over the nature, content, and availability of those sites. The inclusion of any links does not necessarily imply a recommendation or endorse the views expressed within them.
Every effort is made to keep the article up to date and running smoothly. However, flyermedia.net takes no responsibility for, and will not be liable for, the article being temporarily unavailable due to technical issues beyond our control.
