Passing down timeless skills is a joy for any parent or mentor. Beyond bike riding and stone skipping, crafting a paper airplane that truly soars is a memorable lesson. Forget those disappointing, nose-diving creations from childhood memories. It’s time to master the art of paper airplane making, creating models that achieve impressive distance and flight.
Below, you’ll discover three paper airplane designs, each tested and proven to fly remarkably well, grounded in some surprising aerodynamic principles. Organized by difficulty – beginner, intermediate, and expert – there’s a model for every skill level, from young children to adults rediscovering the fun. Don’t pretend you’re not tempted to test these out during your next office break!
Beginner Level: The Bulldog Dart
This Bulldog Dart is your entry point into paper airplane mastery. It’s straightforward, requires minimal folds, and achieves a decent flight. While it may not win design awards, it’s the perfect starting point for a child’s first paper airplane experience.
- Begin by folding the paper in half lengthwise, then unfold it. This initial crease acts as a center guideline for the subsequent folds.
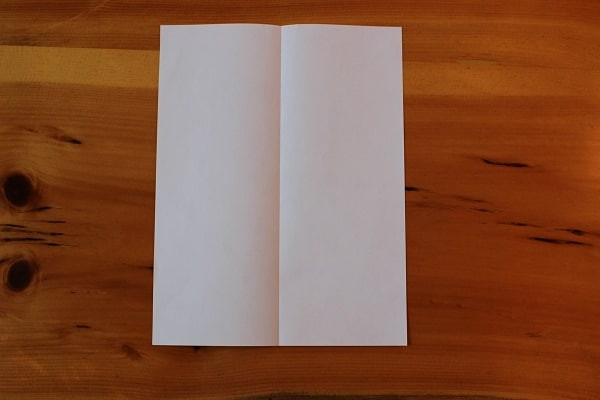 Paper folded in half lengthwise to create center crease.
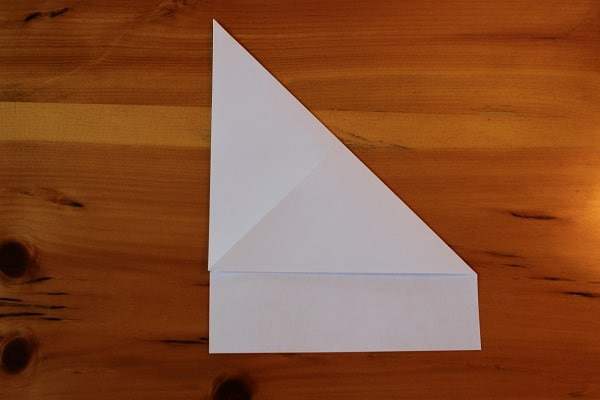
- Fold the top two corners down so they meet precisely at the center crease. This classic fold is likely the first step you learned when making paper airplanes as a child.
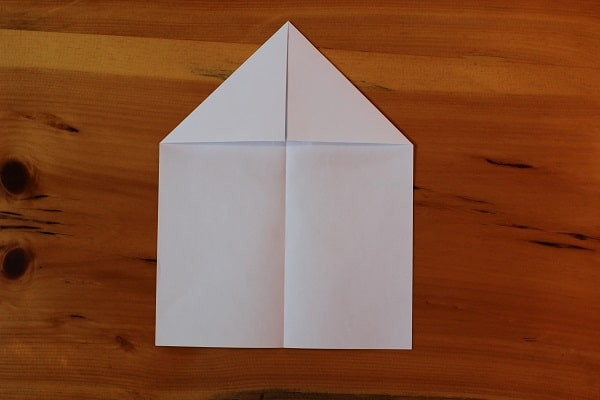 Folding top corners to meet at the center crease for paper airplane.
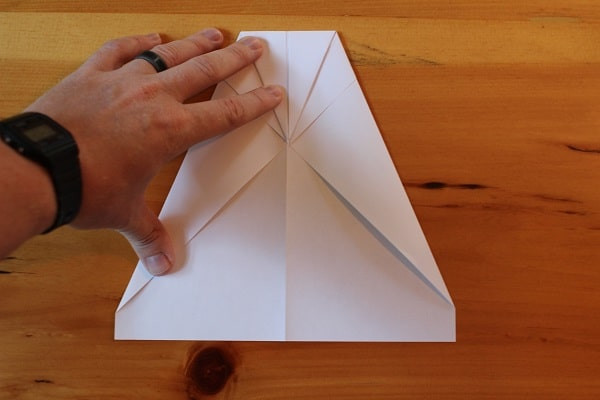
- Flip the paper airplane over, and fold the corners inwards again towards the center crease. Align the diagonal edge from the top of the plane (on the left side) with the central vertical crease (as shown on the right side of the image).
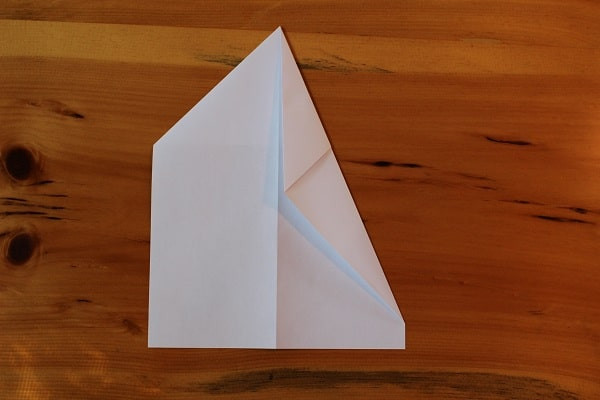 Flipping paper airplane and folding corners towards center crease again.
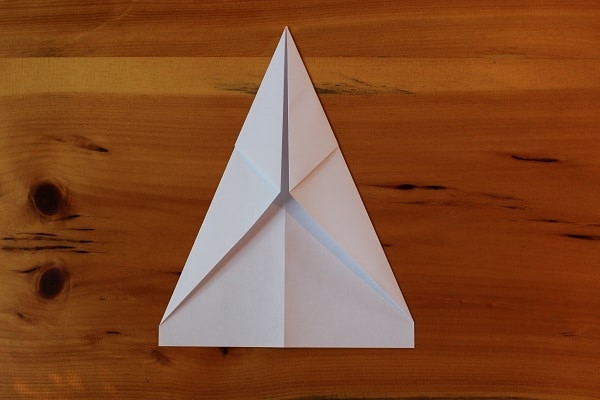 Paper airplane after completing the first three folding steps.Completed folds after steps 1 through 3 for Bulldog Dart paper airplane.
- Fold the top point downwards so the tip aligns with the bottom edge where the previous folds converge.
 Folding top point down on Bulldog Dart paper airplane.
- Fold the entire paper airplane in half, folding it inwards along the center crease. This creates the distinctive snub nose, which gives the Bulldog Dart its characteristic shape.
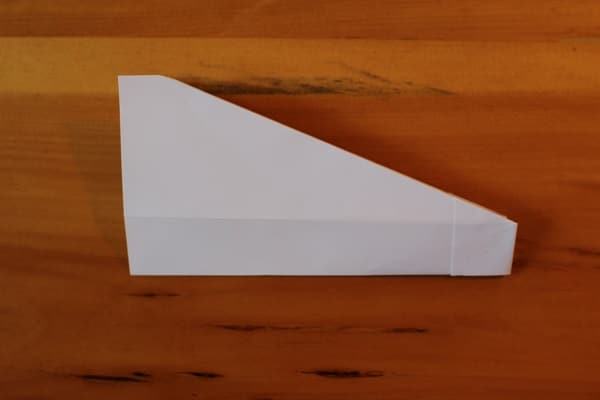 Folding Bulldog Dart paper airplane in half to create snub nose.
- Fold the wings down, creating a straight, horizontal line from the top of the snub nose across to the wingtip. Repeat this fold on the opposite side to form both wings.
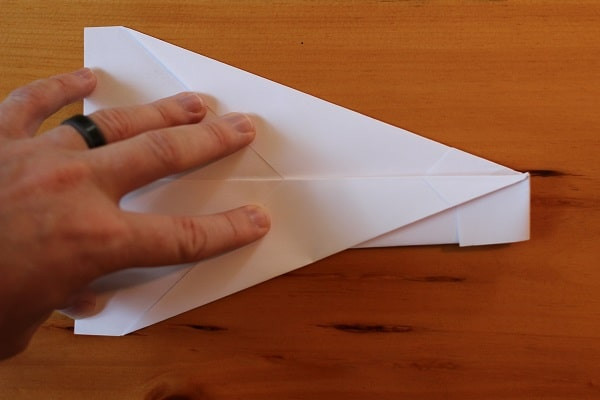 Folding wings down on Bulldog Dart paper airplane.
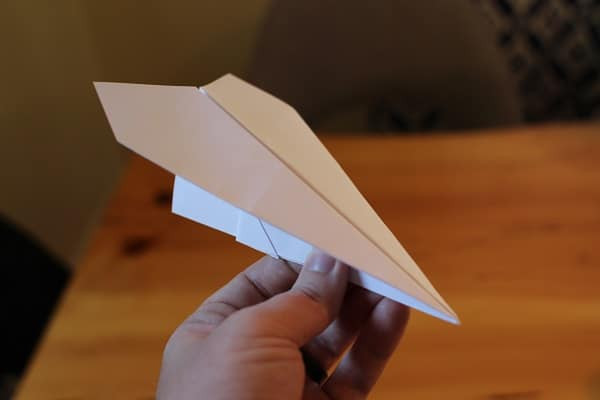
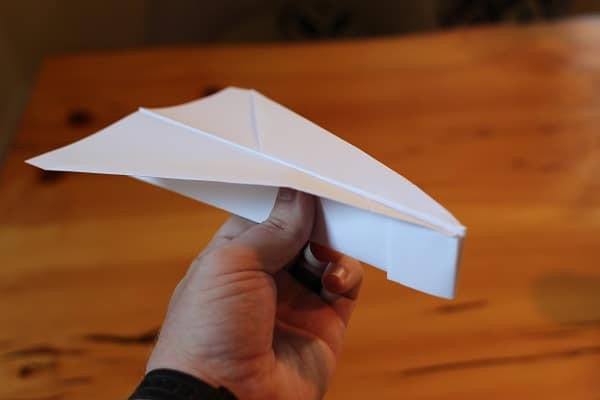 Finished Bulldog Dart paper airplane being held by hand.The completed Bulldog Dart paper airplane model, ready for flight. Remember to throw this model with a gentle, softer motion for optimal flight performance, as high-speed launches can cause it to nosedive.
Intermediate Level: The Harrier
Stepping up in complexity, The Harrier is an intermediate paper airplane design. It involves a few more folds and offers improved flight performance compared to the Bulldog Dart. This model strikes a perfect balance between simplicity and sophistication in recreational paper aircraft.
- Fold the paper in half lengthwise and then unfold. As with the Bulldog Dart, this center crease serves as an essential guide for the subsequent folding stages.
Paper being folded in half lengthwise to establish center crease.
- Fold the top corners inwards so they meet precisely at the center crease.
Folding top corners down to meet at the middle crease for Harrier paper airplane.
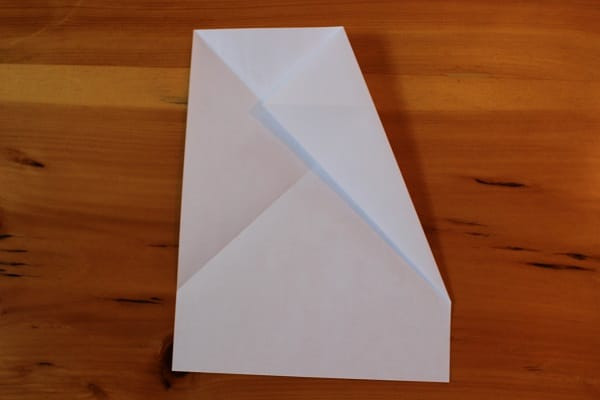
- Fold the entire top section downwards, shaping it to resemble an envelope. Ensure you leave a small gap of about half an inch at the bottom edge; avoid aligning the top point directly with the bottom edge.
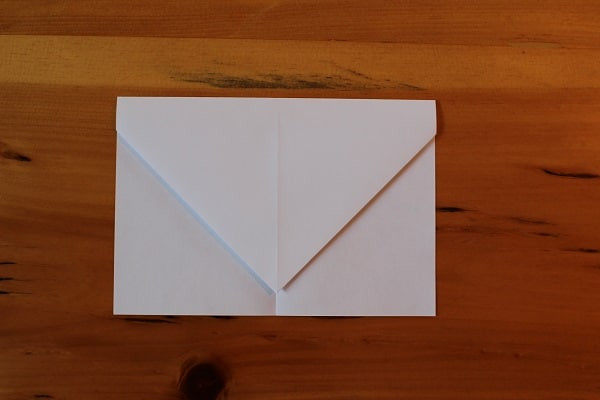 Folding top section down to create envelope shape for Harrier paper airplane.
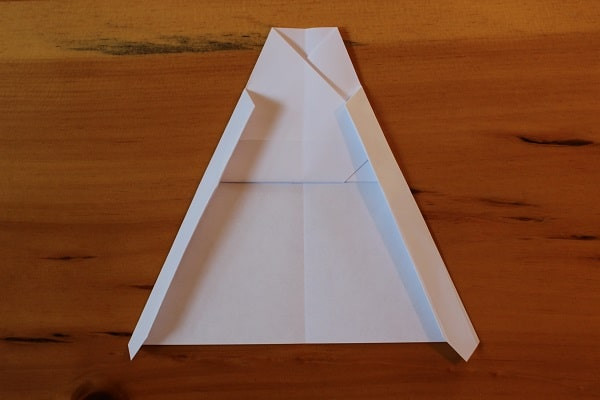
- Fold the top corners inwards again so they meet at the central crease. You should notice a small triangular flap extending beneath these newly formed folds.
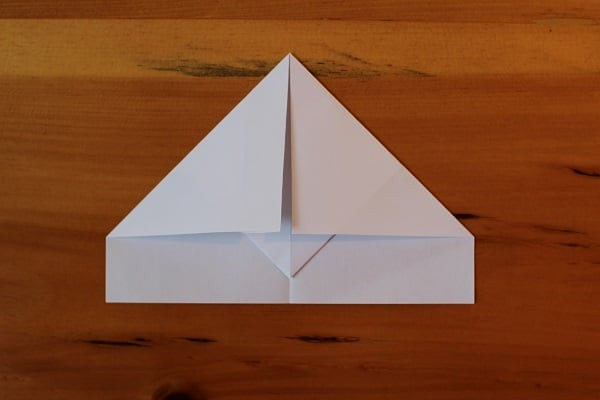 Folding top corners down towards middle crease again on Harrier paper airplane.
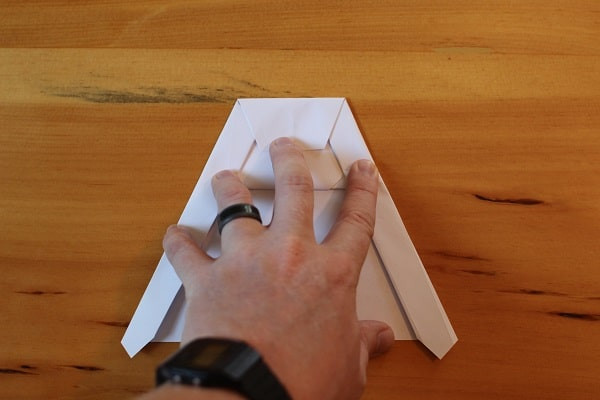
- Fold that small triangular flap upwards to secure the previous folds in position.
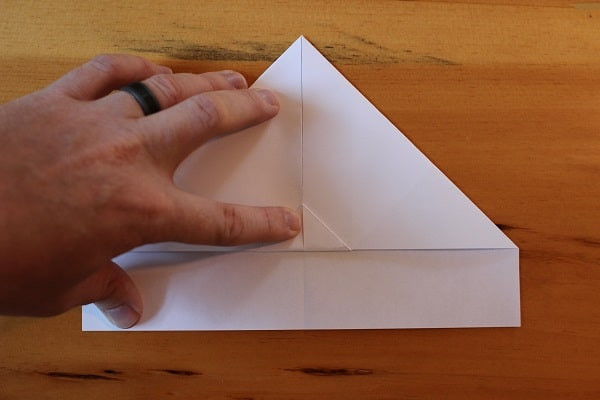 Folding up small triangle flap to secure previous folds on Harrier paper airplane.
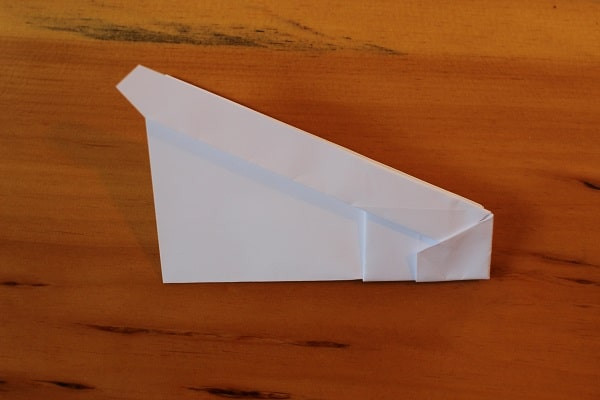
- Fold the entire paper airplane in half, but ensure you fold it outwards, not inwards. The triangular fold from the previous step should remain visible along the bottom edge of the plane.
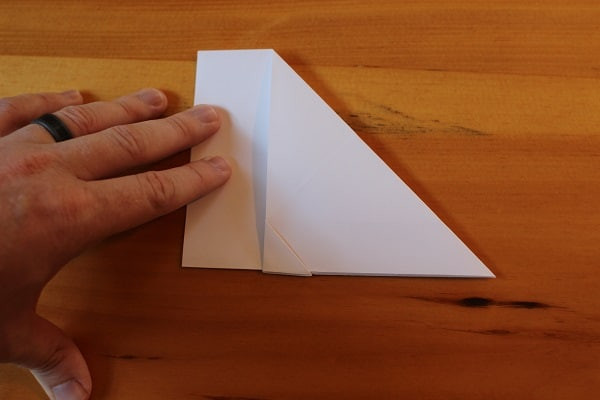 Folding Harrier paper airplane in half outwards along center crease.
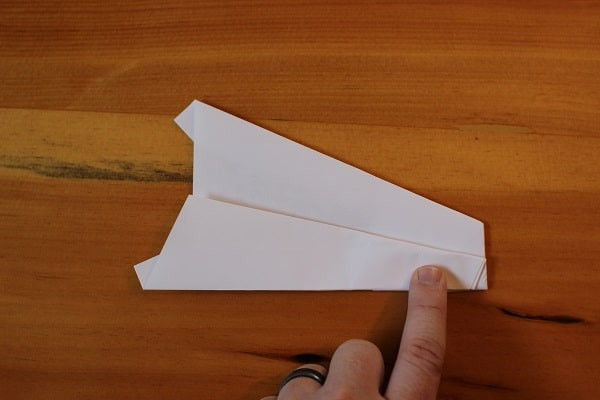
- Fold the wing downwards so its leading edge aligns with the bottom edge of the paper airplane. Repeat this wing fold on the opposite side to create both wings.
 Folding wing down to meet bottom edge on Harrier paper airplane.
The completed Harrier paper airplane is shown below. It features distinctive pointed wings and excellent stability, largely due to the stabilizing triangular element on its underside.
 Finished Harrier paper airplane being held by hand.
Expert Level: The Hammer
While there are undoubtedly more intricate paper airplane designs, The Hammer represents an ideal combination of complexity and accessibility, even for the average paper airplane enthusiast. It involves significantly more folds than the Bulldog Dart and Harrier, but it rewards your effort with superior flight distance and performance. Pay close attention to the following steps, as the resulting flight is well worth the detailed folding process.
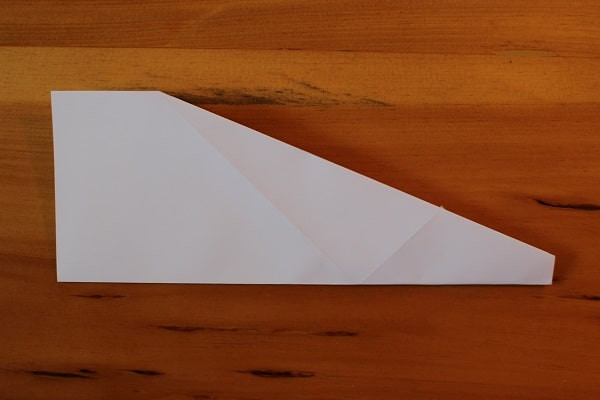
- Begin by folding the top left corner all the way down so it meets the right edge of the paper. Unfold immediately after creasing, as this fold establishes a crucial guiding line.
 Folding top left corner down to right edge to create crease for Hammer paper airplane.
- Repeat the same process with the top right corner, folding it down to meet the left edge, and then unfold.
 Folding and unfolding top right corner to create diagonal crease for Hammer paper airplane.
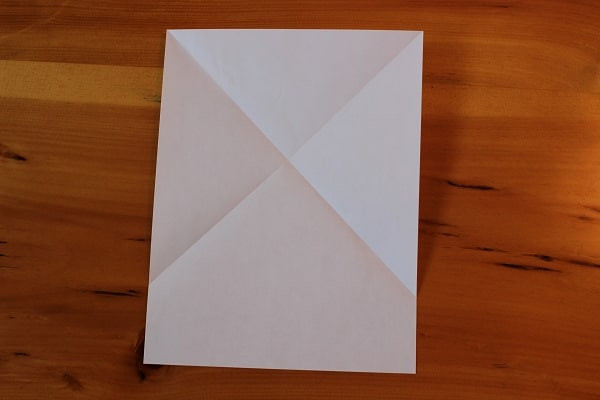 Unfolded paper showing X-shaped creases for Hammer paper airplane.The unfolded sheet of paper now shows two diagonal creases forming a distinct X shape, essential for the Hammer’s construction.
- Fold the top right corner downwards so its edge aligns with the diagonal crease that extends from the top left to the bottom right.
 Folding top right corner down to meet diagonal crease on Hammer paper airplane.
- Perform the same fold on the left corner. The top left point should precisely meet the diagonal right edge of the paper airplane structure currently forming.
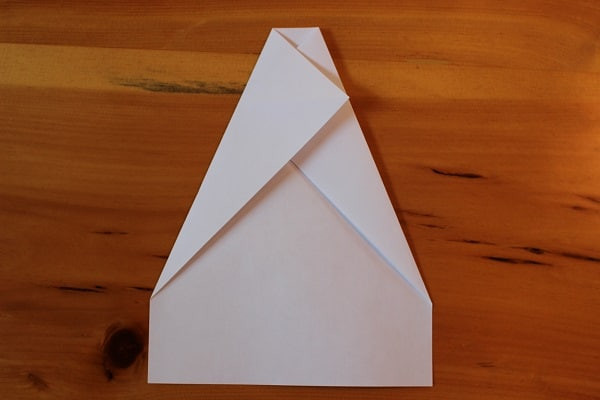 Folding top left corner down to meet diagonal crease in center for Hammer paper airplane.
- Fold the paper airplane in half inwards along the vertical center, then unfold. This middle crease will serve as another important guideline for subsequent folds.
 Folding Hammer paper airplane in half inwards along center crease.
- After unfolding from the previous step, fold the top edge downwards so that it aligns with the bottom edge of the paper.
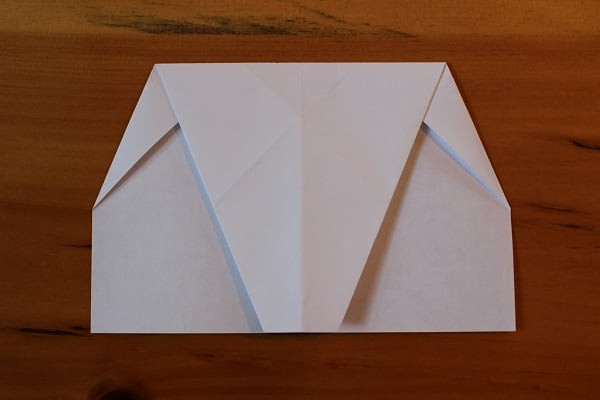 Folding top half down to meet bottom edge on Hammer paper airplane.
- Fold the top corners downwards again so that their points meet at the middle crease established in step 5.
 Folding top corners down again to meet middle crease on Hammer paper airplane.
- Unfold these last corner folds. Similar to earlier steps, these creases are primarily guides for the upcoming more complex folds.
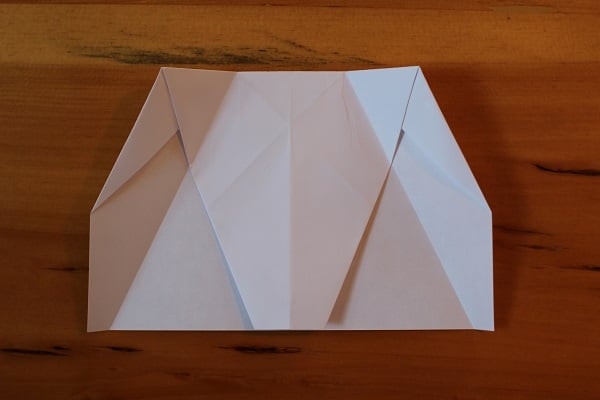 Half-folded Hammer paper airplane unfolded to show guiding creases.
- Now, take the top edge that you previously folded down in Step 6 and fold it back upwards. Fold it precisely at the point where its edge meets the creases created in the previous step (Step 7).
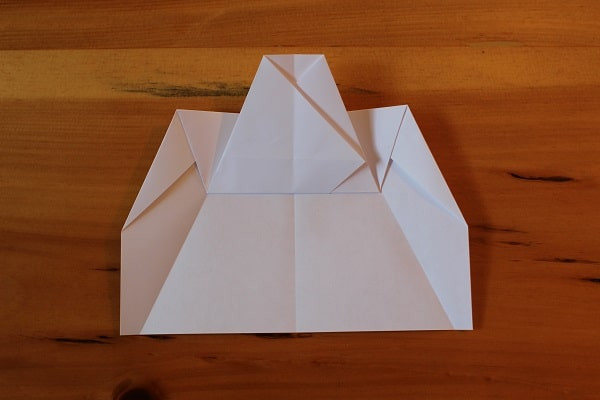 Folding top part upwards on Hammer paper airplane along guiding creases.
- Fold the corners inwards yet again, ensuring their edges align with both the edge of the top flap and the crease created in Step 7.
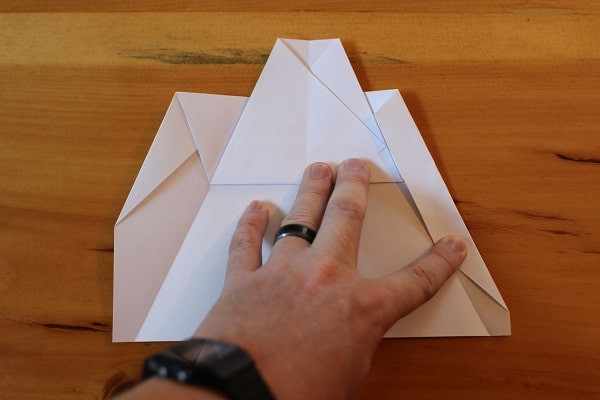 Folding corners in again to meet edge of top flap and creases on Hammer paper airplane.
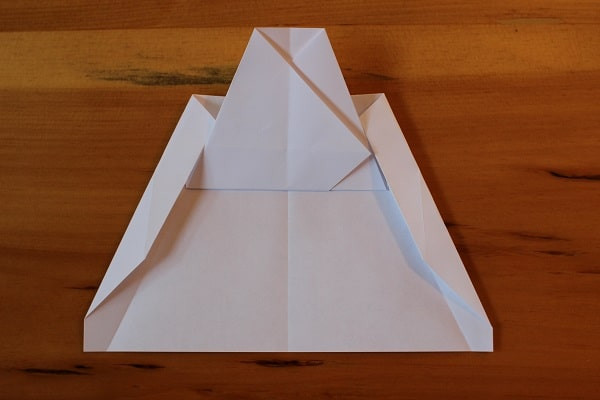 Both corners folded in on almost finished Hammer paper airplane.With both corners folded in, aligning with the top flap and previously made creases, the wings of the Hammer are beginning to take shape.
- Fold the wings inwards once more, this time simply folding along the crease that was already formed in the previous step. After this fold, your paper airplane should have straight, vertical lines from the top edge down to the bottom.
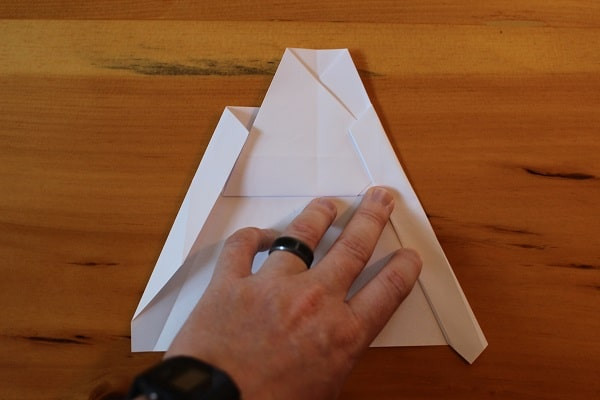 Folding wings in again along existing creases on Hammer paper airplane.
 Hammer paper airplane with both sides of wings folded inwards.With both wings folded in again, the Hammer now exhibits clean, straight vertical edges from top to bottom.
- Fold the top section downwards from where it meets the top edges of the wing flaps created in the previous step.
 Folding top section down to meet edges of wings on Hammer paper airplane.
- Fold the entire assembly in half outwards. Ensure all paper flaps are positioned on the exterior of the paper airplane. At this stage, due to the increased paper thickness from multiple folds, folding may require extra care to maintain clean, sharp creases.
 Folding Hammer paper airplane in half outwards for final assembly.
- Finally, fold the wings downwards so that their edges align with the bottom edge of the paper airplane. This last fold creates a small snub nose at the front. Again, precision and careful folding are key at this stage due to the paper’s thickness.
 Folding wings down to meet bottom edge to finish Hammer paper airplane.
 Finished Hammer paper airplane being held by hand, ready to fly.The completed Hammer paper airplane. This advanced design is known for its exceptional flight performance and distance.
For more engaging DIY projects for kids, explore our guides on building birdhouses or creating homemade kites.
To enhance the fun while crafting these paper airplanes with children, consider sharing some engaging riddles. It’s a fantastic way to combine learning and play.
Interested in exploring the importance of play and its benefits? Listen to our podcast interview with Charlie Hoehn, author of “Play It Away: A Workaholic’s Cure For Anxiety,” for valuable insights.