Making a paper airplane that flies far involves more than just folding paper; it’s an art and science combined, as we at flyermedia.net understand well. This comprehensive guide elevates the simple childhood activity into an engaging pursuit for aviation enthusiasts, hobbyists, and educators. Learn how to craft aerodynamic paper airplanes and unlock the secrets to achieving impressive flight distances, explore the principles of flight, improve motor skills, and spark an interest in aviation.
1. What Makes A Paper Airplane Fly Far?
A paper airplane’s flight distance hinges on several key factors: its design, aerodynamics, weight distribution, and the technique used to launch it. A well-designed paper airplane balances lift, drag, and thrust, enabling it to soar through the air with stability and efficiency. Let’s dive deeper into these elements:
- Design: Aerodynamic designs minimize air resistance and maximize lift. Complex designs like “The Hammer” involve precise folds that optimize airflow, as highlighted in studies on paper airplane aerodynamics.
- Weight Distribution: Proper weight distribution ensures stability during flight. Usually, a slightly nose-heavy design helps maintain a stable trajectory.
- Aerodynamics: The shape and angles of the wings affect how air flows around the plane, influencing its lift and drag.
- Throwing Technique: A smooth, consistent throw imparts the necessary thrust without disrupting the plane’s balance.
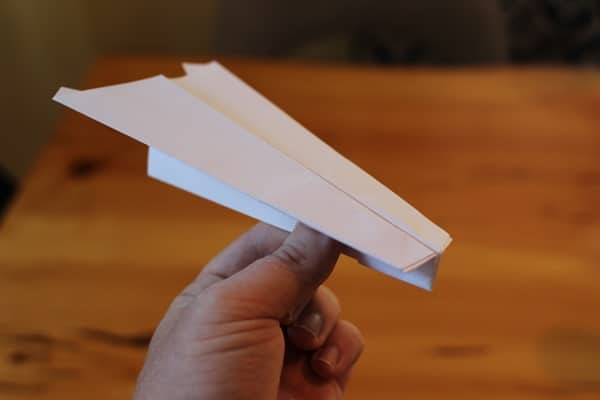 A hand launching a paper airplane outdoors, showcasing the throwing technique.
2. What Are The Essential Aerodynamic Principles For Paper Airplanes?
Understanding aerodynamics is crucial for designing paper airplanes that fly far. The four main forces acting on a paper airplane are lift, weight (gravity), thrust, and drag. According to NASA’s educational resources, lift must overcome weight for the plane to fly, and thrust must overcome drag for the plane to maintain forward motion. Here’s a breakdown:
- Lift: The upward force that opposes the weight of the airplane. It is generated by the airflow over the wings. Wings with a curved upper surface and a flatter lower surface create a pressure difference, resulting in lift.
- Weight (Gravity): The force pulling the airplane downward. Minimizing weight and distributing it evenly helps improve flight stability.
- Thrust: The force that propels the airplane forward. In paper airplanes, thrust is provided by the throw. A strong, smooth throw can significantly increase the airplane’s initial velocity and distance.
- Drag: The force that opposes the airplane’s motion through the air. Drag is caused by air resistance and is affected by the airplane’s shape and surface area. Reducing drag is crucial for achieving longer flights.
2.1 How Do Wing Designs Impact Aerodynamics?
Wing design significantly impacts lift and drag. Different wing shapes can affect a paper airplane’s flight characteristics. Here are some common wing designs:
- Straight Wings: Simple and easy to fold, providing good stability.
- Delta Wings: Offer a larger surface area, increasing lift and stability.
- Swept Wings: Reduce drag at higher speeds, making the airplane more aerodynamic.
- Gull Wings: Provide increased lift and stability, often used in advanced designs.
2.2 What Role Does Weight Distribution Play?
Weight distribution is critical for maintaining flight stability. A slightly nose-heavy design typically performs best. The forward center of gravity helps prevent the airplane from stalling or tumbling.
- Forward Center of Gravity: Ensures stability and prevents stalls.
- Even Weight Distribution: Helps maintain balance and control during flight.
- Adjustments: Small adjustments to weight distribution can significantly impact flight performance.
3. How To Choose The Right Paper For Your Airplane?
The type of paper you use can influence the flight characteristics of your paper airplane. Different paper types have varying weights, thicknesses, and textures, all of which affect the airplane’s aerodynamics and durability. Here’s how to choose the right paper:
- Weight: Standard 20 lb (75 gsm) printer paper is ideal. It’s light enough for good flight but sturdy enough to hold its shape.
- Thickness: Thicker paper is more durable but heavier, reducing flight distance. Thinner paper is lighter but may be too flimsy to maintain shape during flight.
- Texture: Smooth paper reduces air resistance, enhancing flight performance. Rough paper can increase drag and reduce distance.
- Size: Standard 8.5 x 11-inch paper works well for most designs, providing a good balance between wing size and overall weight.
4. What Tools Can Help You Make Better Paper Airplanes?
While paper airplanes are traditionally made with just paper and hands, certain tools can enhance precision and improve the final product:
- Ruler: Ensures straight, accurate folds, crucial for aerodynamic symmetry.
- Scissors: Help trim excess paper or refine wing shapes for better performance.
- Paper Clips: Can be used to adjust weight distribution, typically placed near the nose for stability.
- Tape: Reinforces folds and secures parts of the airplane, improving durability.
- Protractor: Measures angles for precise wing adjustments and aerodynamic optimization.
5. What Are Some Beginner-Friendly Paper Airplane Designs?
Starting with simple designs is a great way to learn the basics of paper airplane construction. Here are two beginner-friendly designs:
5.1 The Classic Dart
The Classic Dart is one of the most basic and well-known paper airplane designs. Its simplicity makes it perfect for beginners, and it’s a great starting point for understanding basic aerodynamic principles.
Instructions:
- Fold in Half: Fold the paper lengthwise and unfold.
- Fold Top Corners: Fold the top two corners down to meet the center crease.
- Fold Again: Fold the top corners in again to meet the center crease.
- Fold in Half: Fold the airplane in half along the original crease.
- Fold Wings: Fold the wings down so the edges align with the bottom edge of the airplane.
Tips for Flying:
- Throw with a medium force.
- Aim slightly upwards for a longer flight path.
- Adjust wing angles for stability.
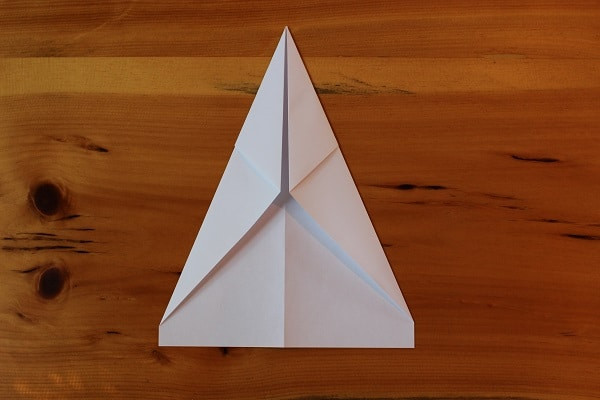 Paper airplane with first 3 steps completed.
5.2 The Bulldog Dart
The Bulldog Dart is a simple yet effective design, perfect for beginners. Its sturdy construction and easy-to-fold design make it a great choice for learning the basics.
Instructions:
- Fold in Half: Fold the paper lengthwise and unfold.
- Fold Top Corners: Fold the top two corners down to meet the center crease.
- Flip and Fold Again: Flip the plane over and fold the corners in again to the center crease.
- Fold Top Point Down: Fold the top point down so that the tip meets the bottom of where the previous folds come together.
- Fold in Half: Fold the entire plane in half, in on itself.
- Fold Wings: Fold the wings down, creating a straight line across from the top of the snub nose.
Tips for Flying:
- Throw at lower speeds.
- Avoid launching it too forcefully, as the heavy nose can cause it to nosedive.
- A softer throw will yield better results.
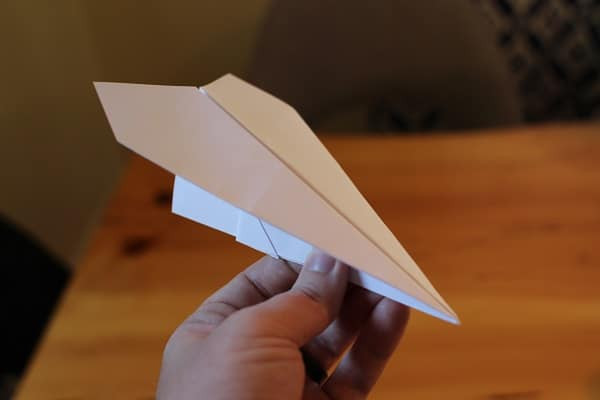
 Man holding finished bulldog dart paper airplane.
6. What Are Some Intermediate Paper Airplane Designs For Longer Flights?
Once you’ve mastered the basic designs, you can move on to intermediate models that offer improved flight performance. Here are two popular intermediate designs:
6.1 The Harrier
The Harrier is a slightly more advanced design that offers better flight performance than basic models. It involves a few more folds and adjustments to optimize aerodynamics.
Instructions:
- Fold in Half: Fold the paper lengthwise and unfold.
- Fold Top Corners: Fold the top corners in to meet at the center crease.
- Fold Top Down: Fold the entire top down, resembling an envelope, leaving a half-inch gap at the bottom.
- Fold Corners Again: Fold the top corners in to meet at the middle.
- Fold Triangle Up: Fold the small triangle up to hold the previous folds in place.
- Fold in Half Outwards: Fold the airplane in half, outwards on itself.
- Fold Wings: Fold the wing down so its edge meets the bottom edge of the airplane. Repeat on the other side.
Tips for Flying:
- Throw with a smooth, consistent motion.
- Adjust the wing angles for stability.
- The triangle on the bottom provides additional stability.
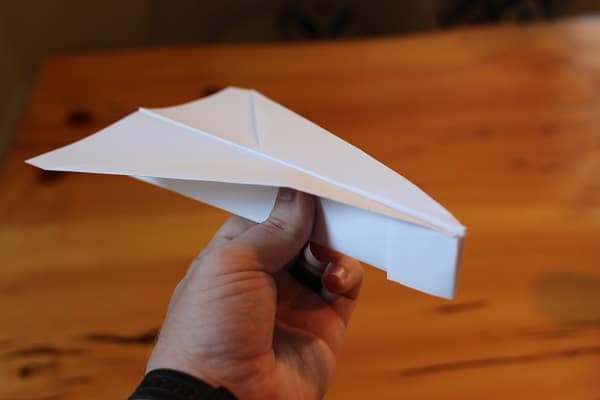
 Man holding finished harrier paper airplane.
6.2 The Sea Glider
The Sea Glider is designed for smooth, gliding flights. Its wide wings and balanced weight distribution allow it to stay in the air longer.
Instructions:
- Fold in Half: Fold the paper lengthwise and unfold.
- Fold Top Corners: Fold the top corners in to meet at the center crease.
- Fold Edges to Center: Fold the top edges in to meet at the center crease again.
- Fold in Half: Fold the airplane in half along the original crease.
- Fold Wings: Fold the wings down, leaving a small portion of the fuselage visible.
Tips for Flying:
- Throw gently with a slight upward angle.
- The wide wings provide lift and stability.
- Make small adjustments to the wingtips for better control.
7. What Are Some Advanced Paper Airplane Designs For Maximum Distance?
For those seeking maximum flight distance, advanced designs incorporate complex folds and aerodynamic principles. These designs require patience and precision but can yield impressive results.
7.1 The Hammer
The Hammer is an advanced design that balances complexity and accessibility. It involves multiple folds and adjustments to optimize aerodynamics, resulting in impressive flight distances.
Instructions:
- Fold Top Left Corner Down: Fold the top left corner down to meet the right edge and unfold.
- Repeat with Top Right Corner: Repeat with the top right corner and unfold.
- Fold Top Right Corner Down: Fold the top right corner down so its edge meets the crease from top left to bottom right.
- Do Same with Left Corner: Do the same with the left corner.
- Fold in Half and Unfold: Fold the plane in half in on itself, then unfold.
- Fold Top Down: Fold the top down so its edge meets the bottom edge.
- Fold Top Corners Down: Fold the top corners down so their points meet at the middle crease.
- Unfold: Unfold to reveal the creases.
- Fold Top Edge Up: Fold the top edge back up at the point where its edge meets the creases from the previous step.
- Fold Corners In Again: Fold the corners in again so their edges meet both the edge of the top flap and the crease from Step 7.
- Fold Wings In Once More: Fold the wings in once more along the existing crease.
- Fold Top Down: Fold the top down from where it meets the top of the wing flaps.
- Fold in Half Outward: Fold the whole thing in half outward.
- Fold Wings Down: Fold the wings down so that their edge meets the bottom edge of the plane.
Tips for Flying:
- Throw with a strong, consistent motion.
- Adjust the wing flaps for stability and distance.
- The Hammer’s design optimizes lift and reduces drag.
A hand launching a paper airplane outdoors, showcasing the throwing technique.
7.2 The Boomerang
The Boomerang is designed not only for distance but also to return to the thrower. This design requires precise folds and adjustments to achieve its unique flight pattern.
Instructions:
- Fold in Half: Fold the paper lengthwise and unfold.
- Fold Top Corners: Fold the top corners in to meet at the center crease.
- Fold Edges to Center: Fold the top edges in to meet at the center crease again.
- Fold in Half: Fold the airplane in half along the original crease.
- Cut Wing Slits: Cut small slits into the wings, creating flaps.
- Fold Flaps Up: Fold the flaps up at a slight angle.
Tips for Flying:
- Throw with a strong, upward motion.
- Adjust the wing flaps to control the boomerang effect.
- Experiment with different throwing angles for optimal return.
8. How Can You Adjust And Fine-Tune Your Paper Airplane?
Fine-tuning your paper airplane is essential for achieving optimal flight performance. Small adjustments can significantly impact its stability, distance, and overall flight characteristics.
8.1 Adjusting Wing Angles
Wing angles play a crucial role in lift and stability. Here’s how to adjust them:
- Increasing Wing Angle: Provides more lift, but can also increase drag.
- Decreasing Wing Angle: Reduces lift and drag, improving speed and distance.
- Symmetrical Adjustments: Ensure both wings have the same angle to maintain balance.
8.2 Correcting Stability Issues
Stability issues can cause your paper airplane to nosedive, stall, or veer off course. Here are some common problems and solutions:
- Nosediving: Add weight to the tail or increase the wing angle.
- Stalling: Add weight to the nose or decrease the wing angle.
- Veering Off Course: Adjust the wingtips or add a small rudder to the tail.
8.3 Using Flaps and Ailerons
Adding flaps and ailerons can provide greater control over your paper airplane’s flight.
- Flaps: Small, hinged surfaces on the trailing edge of the wings that can be raised or lowered to increase lift or drag.
- Ailerons: Hinged surfaces on the trailing edge of the wings that control roll.
- Rudder: A hinged surface on the tail that controls yaw.
9. What Are Some Advanced Techniques For Throwing Paper Airplanes?
The way you throw a paper airplane can significantly impact its flight distance and stability. Here are some advanced throwing techniques to consider:
- The Overhand Throw: Provides maximum power and distance.
- The Underhand Throw: Offers more control and accuracy.
- The Sidearm Throw: A balance between power and control.
- Consistent Force: Use a smooth, consistent motion to avoid disrupting the airplane’s balance.
- Launch Angle: Experiment with different launch angles to find the optimal trajectory.
- Wind Conditions: Account for wind conditions and adjust your throw accordingly.
9.1 How Does Launch Angle Affect Flight Distance?
The launch angle is critical for achieving maximum flight distance. Here’s how it affects your paper airplane:
- High Launch Angle: Can increase lift but also drag, potentially reducing distance.
- Low Launch Angle: Reduces lift but also drag, allowing for greater speed and distance.
- Optimal Launch Angle: Typically between 30 and 45 degrees, depending on the design and wind conditions.
9.2 How To Adjust Your Throw For Different Paper Airplane Designs?
Different paper airplane designs require different throwing techniques. Here are some tips for matching your throw to the airplane:
- Lightweight Designs: Require a gentle throw to avoid overpowering them.
- Heavier Designs: Can handle a more forceful throw for increased distance.
- Gliding Designs: Benefit from a smooth, consistent throw with a slight upward angle.
- Aerobatic Designs: Require precise throws and adjustments for controlled maneuvers.
10. Why Is Paper Airplane Flying More Than Just A Game?
Paper airplane flying is not just a fun pastime; it’s an educational activity that can teach valuable STEM (Science, Technology, Engineering, and Mathematics) principles.
- Physics: Understanding lift, drag, thrust, and gravity.
- Engineering: Designing and optimizing airplane models.
- Mathematics: Calculating angles, distances, and proportions.
- Technology: Applying aerodynamic principles to real-world applications.
- Creativity and Innovation: Experimenting with different designs and techniques.
- Problem-Solving Skills: Identifying and correcting flight issues.
10.1 How Can Paper Airplanes Be Used In Education?
Paper airplanes can be a valuable tool in the classroom for teaching STEM concepts. Here are some ways to incorporate them into educational activities:
- Aerodynamics Lessons: Demonstrate the principles of lift, drag, thrust, and gravity.
- Engineering Projects: Challenge students to design and build paper airplanes that meet specific performance criteria.
- Mathematics Exercises: Calculate wing areas, angles, and flight distances.
- Science Experiments: Investigate the effects of different paper types, wing designs, and throwing techniques.
- Team-Building Activities: Encourage collaboration and problem-solving through paper airplane competitions.
10.2 What Competitions And Records Exist For Paper Airplane Flying?
Paper airplane flying has its own set of competitions and records, showcasing the creativity and skill of enthusiasts around the world.
- Distance Records: The longest distance flown by a paper airplane.
- Duration Records: The longest time a paper airplane stays in the air.
- Aerobatics Competitions: Judging the performance of paper airplanes in controlled maneuvers.
- International Events: Organized competitions that attract participants from around the globe.
- Guinness World Records: Official records for paper airplane achievements.
FAQ About How To Make A Paper Airplane That Flies Far
1. What is the best type of paper for making paper airplanes?
The best type of paper is standard 20 lb (75 gsm) printer paper. It offers a good balance of weight and sturdiness, allowing for good flight performance.
2. How do I make my paper airplane fly farther?
To make your paper airplane fly farther, focus on aerodynamic design, proper weight distribution, and a smooth, consistent throw. Adjusting wing angles and using flaps can also help.
3. What is the most aerodynamic paper airplane design?
The Hammer is considered one of the most aerodynamic paper airplane designs, balancing complexity and performance for maximum flight distance.
4. How does weight distribution affect paper airplane flight?
Proper weight distribution is crucial for stability. A slightly nose-heavy design typically performs best, preventing stalls and maintaining a stable trajectory.
5. Can I use tape or paper clips to improve my paper airplane’s flight?
Yes, tape can reinforce folds and secure parts of the airplane, while paper clips can adjust weight distribution, typically placed near the nose for stability.
6. What is the best throwing technique for paper airplanes?
The best throwing technique depends on the design, but a smooth, consistent throw with a launch angle between 30 and 45 degrees often yields the best results.
7. How can I correct stability issues with my paper airplane?
To correct stability issues, adjust the wing angles, add weight to the tail or nose, or add a small rudder to the tail.
8. Are there competitions for paper airplane flying?
Yes, there are distance records, duration records, aerobatics competitions, international events, and Guinness World Records for paper airplane achievements.
9. How can paper airplanes be used in education?
Paper airplanes can be used to teach STEM principles such as aerodynamics, engineering, mathematics, and technology through hands-on activities and experiments.
10. What are flaps and ailerons, and how do they affect paper airplane flight?
Flaps are hinged surfaces on the trailing edge of the wings that increase lift or drag, while ailerons are hinged surfaces that control roll. Both can provide greater control over your paper airplane’s flight.
Ready to Soar? Explore Aviation with Flyermedia.net!
Now that you’ve mastered the art of paper airplane design and flight, why not take your passion for aviation to new heights? At flyermedia.net, we offer a wealth of information for aviation enthusiasts of all ages. Whether you’re dreaming of becoming a pilot, interested in the latest aviation news, or seeking career opportunities in the field, we have something for you.
- Discover Flight Schools: Find the best flight training programs in the USA.
- Stay Updated: Read the latest aviation news and trends.
- Explore Career Paths: Learn about various job opportunities in the aviation industry.
Visit flyermedia.net today and take the next step in your aviation journey. Your dreams of flight await! Feel free to visit us at 600 S Clyde Morris Blvd, Daytona Beach, FL 32114, United States, or call us at +1 (386) 226-6000.